On This Page
Adding Check Point R7x Management and MDS Devices
For Check Point deployments, TOS Classic monitors the management servers (SmartCenters, CMAs, and MDSs) for revision changes, and retrieves logs from Log servers and CLMs. For monitoring and usage analysis of all of your Check Point policies, add all managements and log servers to TOS Classic.
Configure monitoring of Check Point servers in this order:
- Provider-1 MDS
- SmartCenter servers and Provider-1 CMAs
- Log Servers and CLMs
To monitor the system configuration and performance of a gateway, enable Firewall OS Monitoring.
Prerequisites
To prepare a Check Point server (SmartCenter, CMA, MDS, Log Server, or CLM) for monitoring:
- Configure the Check Point server for OPSEC communication with TOS Classic.
-
Apply the changes to the server:
-
For a Provider-1 MDS:
- From the File menu, select Save.
- Right-click on the Global Policy and select Assign/Install Global Policy.
-
For a CMA: If the CMA has one or more associated CLMs, select the relevant CLMs.
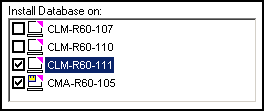
- For all others: From the Policy menu, select Install Database.
-
- Wait for confirmation that the database was saved.
Monitor a Check Point Device
To configure TOS Classic to monitor the policy revisions of a Check Point device:
-
In TOS Classic, go to
-
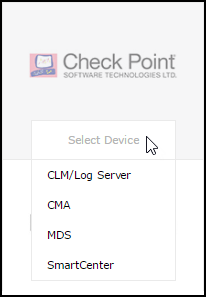
Select the appropriate device type e.g.:

-
Configure the device settings:
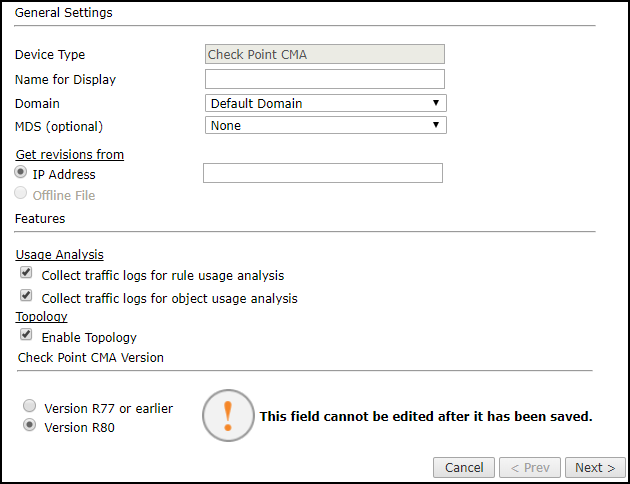
Depending on the Check Point server type, some or all of the following options will appear:
-
Name for Display
-
Domain: Available only if you have configured your system for managing multi-domains and All Domains is currently selected. Select the domain to which to add the device. The Domain can only be entered when adding a device; to change the Domain, you must migrate the device.
-
Device Specific Settings:
-
CMA only - MDS: the MDS that manages the CMA.
-
Log Server/CLM only - Associated Management: the SmartCenter sending logs to the Log Server, or the CMA sending the logs to the CLM.
-
MDS only - MDS version: Select the Check Point version installed on the MDS (R77 and below). After you save the device configuration, you cannot change this setting.
-
-
Get revisions from: One of the following:
- IP Address: Revisions are retrieved automatically
- Offline File: (If available) Revisions are manually uploaded to TOS Classic for Offline Analysis
-
ST server: In a distributed deployment, select which TOS Classic server monitors this device (Not shown in image)
For a Log Server/CLM, make sure the monitoring TOS Classic server is the same as for the Log Server/CLM's associated Check Point management server (SmartCenter/CMA).
-
Collect traffic logs for rule usage analysis is necessary for Rule Usage reports.
- Collect traffic logs for object usage analysis is necessary for reporting on unused objects and services in Rule Usage Reports.
Object usage analysis requires plenty of free disk space (depending on the number of gateways and the amount of traffic logs generated). If disk space is limited, you can configure TOS Classic to limit the number of days that data is kept.
We recommend that you enable TOS Classic administrative alerts, which notify you if there is low disk space on the server. When disk utilization exceeds 90% in the partition that has the database, TOS Classic sends an alert.
-
Enable Topology: Collects routing information for building the Interactive Map.
Topology options for Advanced management mode are configured when you import managed devices. -
Check Point Software Version (for CMAs only): Select the version of Check Point software installed on the device: (R77 and below)
-
-
Click Next.
-
Configure OPSEC communication in OPSEC Secure Internal Communication (SIC) (except for CLM/Log Server):
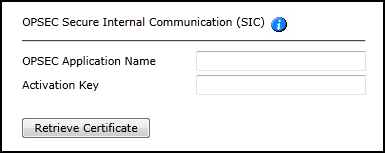
- Enter TOS Classic's OPSEC Application Name as you defined it for this Check Point server (case sensitive).
-
Enter the Activation Key as defined when the OPSEC object was created.
Before retrieving the certificate you must create an OPSEC Application in SmartDashboard
- The OPSEC Application must have the LEA and CPMI client entities selected
- You need to initialize Secure Internal Communications
- You need to select Permissions Profile in the CPMI tab and create a Read-Only All permission
- After creating the OPSEC Application you must run Install Database from the Policy menu (or just Save Policy for an MDS)
- Click Retrieve Certificate to setup encrypted communication between TOS Classic and the Check Point device.
The certificate appears, and the following message is displayed:

- Click Next.
-
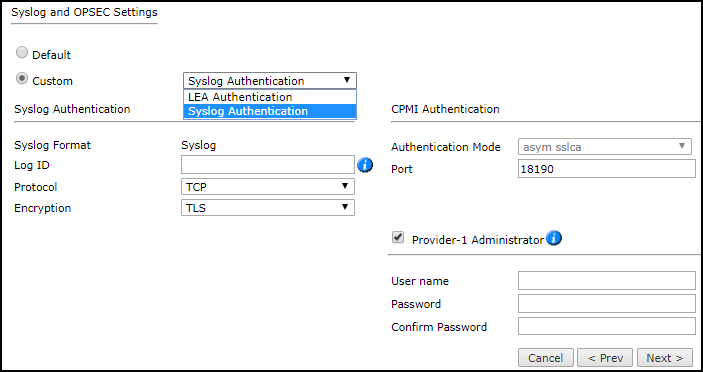
In Syslog and OPSEC Settings:
-
For MDS or CMA syslog or LEA logging: To configure the log type, select Custom and the relevant option: Syslog Authentication or LEA Authentication.
For additional information on Check Point R7x syslog configuration, see Configuring Check Point Syslogs.
-
For a Provider-1 MDS: To include monitoring of the Global Database, select Custom and Provider-1 Administrator. Enter Multi-Domain Super user credentials.
For Global Database monitoring, TOS Classic must also be set as a valid GUI client for the MDS. This enables monitoring of Provider-1 Customers, Administrators, GUI clients, and other global settings.
-
For a CMA version FP3:
- Select Custom.
- Select Backward compatibility for Provider-1 FP3.
- Enter credentials of a Provider-1 Administrator.
- Enter the DN of the MDS.
- For all others: If you are not certain, select Default.
-
- Click Next.
-
In the monitoring settings:
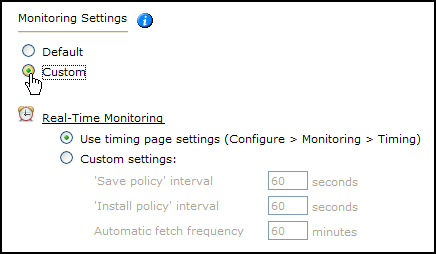
To use timing settings from the Timing configuration for this device, select Default.
To define specific timing settings for this device, select Custom, then select Custom settings, and configure:
-
'Save policy' interval: When a Save Policy event is followed within this time interval by an Install Policy event for the same policy, TOS Classic tries to combine the two events into a single revision. The default value is 60 seconds.
- 'Install policy' interval: When two or more Install Policy events for the same policy occur within this time interval, TOS Classic combines the events into a single Install Policy revision (Default: 60 seconds)
- Automatic fetch frequency: Frequency (in minutes) for automatic fetch
Click Next.
-
-
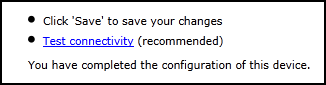
You can test the communication with the Check Point server by clicking Test Connectivity:
-
Click Save.
The Check Point device is shown in the Device Configuration list.
If you use non-standard LEA authentication, see this technical note.
- If you have a secondary Check Point management server, configure TOS Classic to communicate with the secondary server in the event of a failover.
To customize the device object that represents the Internet, see Define Internet Object.
How Do I Get Here?
In TOS Classic, go to