On This Page
Rule Viewer Details
Overview
When a user clicks on a rule in the Rule Viewer, details of the rule are displayed in the Rule Viewer Details window.

The following information about the rule is displayed if available.
General Information
-
Last Hit: The last time that traffic passed through the device and matched either the rule, user, or application identities details. This field is supported for security rules only, and not NAT rules, with the exception of Check Point, which supports Last Hit for both security rules and NAT rules.
-
Last Modified: The last time a revision showed that the source, destination, or service changed in the rule, including changes group members.
- Expiration: The rule expiration date.
-
Permissiveness level (high/medium/low) – An indication of how widely a rule is defined, for example:
-
A rule with one source host, one destination host or one service is low permissiveness
-
A rule with Source "ANY", Destination "ANY" or Protocol "ANY" is high permissiveness
Rules with high permissiveness can be a security risk because they allow too much access through the firewall. N/A indicates that the platform is not supported for permissiveness calculations.
-
- Shadowed: Rules that never have hits from traffic because rules above them in the policy handle the traffic.
-
Violations: The number of times the rule violates the USP
- Device: The device that the rule applies to
- Domain
- Source
- Source User
- Destination
- URL Category
- Service
- Application
- Action
- Comment
- Miscellaneous: Tags, direction, From zone, To zone, Log (Yes/No), Security Profiles and other information.
- Documentation
Documentation
Rule documentation helps you keep track of who made changes to a rule and why the changes were made. It includes the following rule information:
-
Technical Owner: SecureTrack user responsible for the rule
-
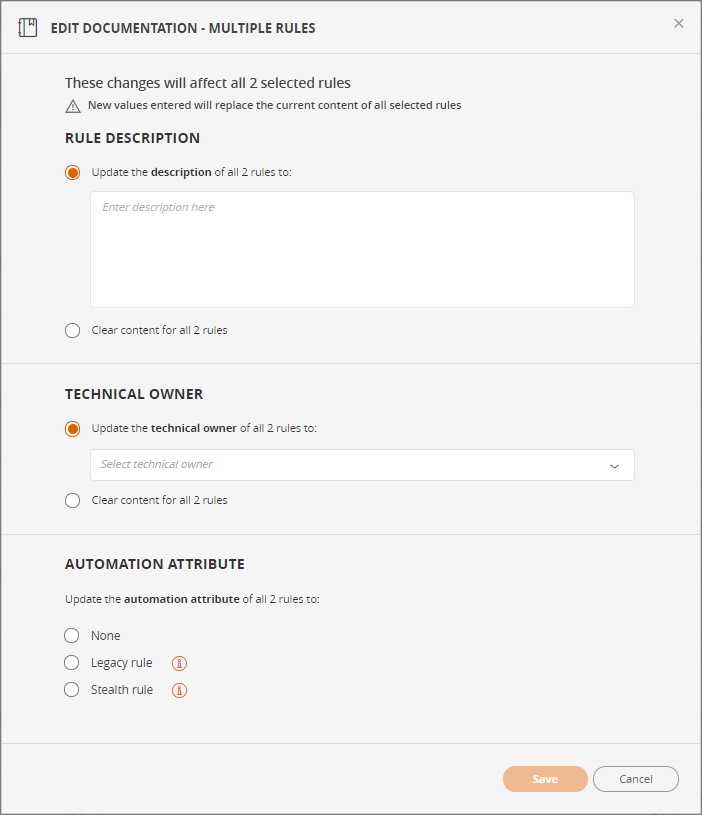
Automation attribute
-
None
-
Legacy rule
A legacy rule is a rule that is no longer needed and is typically a candidate for future decommissioning. When a rule is marked as legacy, SecureChange Designer will treat it as a shadowed rule when making recommendations, and SecureChange Verifier will ignore it when verifying access.
-
Stealth rule
A stealth rule is a 'deny' rule (cannot be 'allow') placed at the top of the policy whose purpose is prevent all access that hasn't been explicitly granted by other rules, thus protecting the entire network including the firewall itself.
For users of SecureChange, when a rule is marked as stealth, Designer recommendations will place any new rules recommended for an access request below the stealth section of the policy.
-
-
Rule description: Description of the rule
-
Certification status: Whether the rule has been certified (Certified or Decertified).
-
Certification date: Date that the rule was certified.
-
Certification expiration: Date that the certification for the rule expires
-
Number of related tickets
What Can I Do Here?
- Hover over items to display more detail.
- View violations - click on Violations
- View related tickets - click on Related Tickets
Edit Rule Documentation
-
Select one or more rules.
-
In the Actions menu
 select Edit Rule Documentation
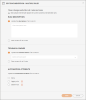
-
Add or edit the following information:
-
Rule description - free text
-
Technical Owner - TOS Classic administrators can select any user from the list. Other users can assign only themselves.
-
Automation attribute - used by SecureChange Designer
- None - no automation attribute
- Legacy rule
- Stealth rule
-
Add Ticket to Rule
A ticket is a change request or other rule related activity that is tracked in a ticketing system. Linking ticket information to a rule may be helpful for auditing as it allows you to track why each change was made, who requested the change, and who authorized it. You can manually enter this information into a related ticket in the Rule Viewer or include a URL which links the ticket in your ticketing system.
You can add details of tickets to a rule or multiple rules, this allows you to track all rule-related information in the Rule Viewer.
To add a ticket to rules:
-
In the Rule Viewer, select the checkbox next to one or more rules.
-
In the Actions menu
select Add Related Ticket, and add the following ticket information:- Ticket ID (required)
- External URL
- Business Owner
- Expiration date
- Comment
If SecureTrack is connected to SecureChange, select SecureChange Ticket to create the ticket in SecureChange.
Once you have added a ticket to a rule, in the Rule Details you can click the Related Tickets link on the left to view details about all related tickets.
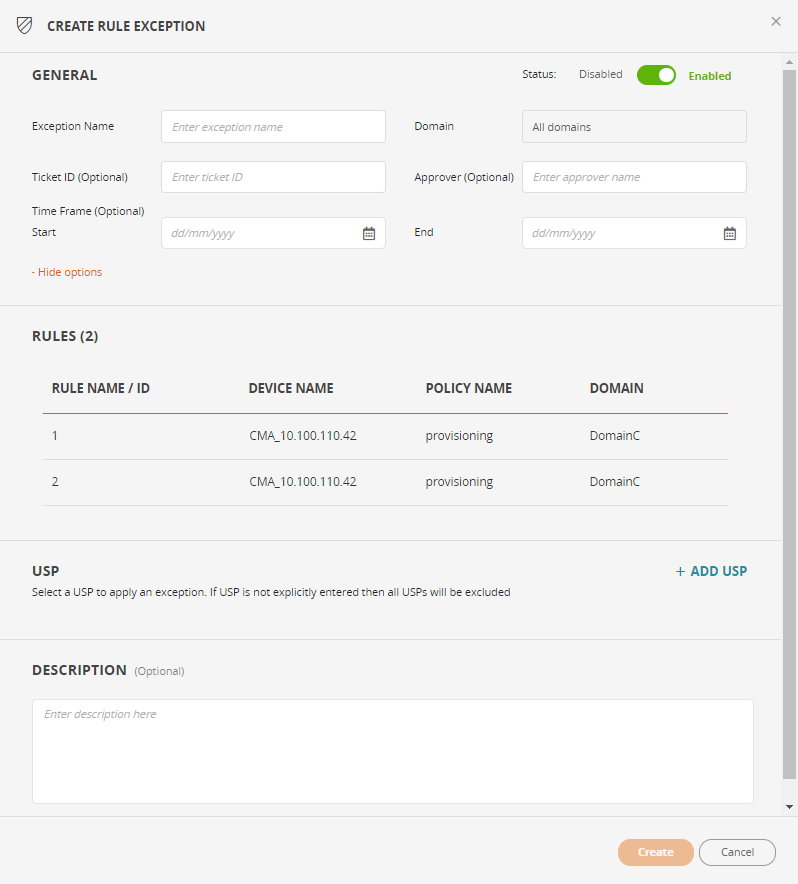
Create a USP Rule Exception
You can exempt specific rules from triggering a violation in the USP by creating a USP Rule Exception. These exceptions are useful for when:
-
You have to exempt certain rule violations for a limited period of time due to an urgent requirement.
-
You want to make an exception for specific devices. For example, if you have an HA configuration, and you don't want to receive duplicate violation notifications from the standby devices.
To create a USP Rule Exception:
-
In the Rule Viewer, select the checkbox next to one or more rules.
-
In the Actions menu
select Create USP Rule Exception. -
In the General section, enter the following information:
-
Exception Name: The name of the USP Rule exception
-
Ticket ID (Optional): The Ticket ID that relates to this exception.
-
Approver (Optional): The person who approved the USP rule exception.
-
Time Frame (Optional): The time frame in which the USP Rule exception is valid
-
-
In the USP section, Click +Add USP to select a USP to which to apply the rule exception. If you don't select a USP, the rule exception will apply to all USPs.
-
In the Description (optional) section, enter a description of the USP rule exception.
-
Click Create.
You can also add or edit tickets or documentation using GraphQL.
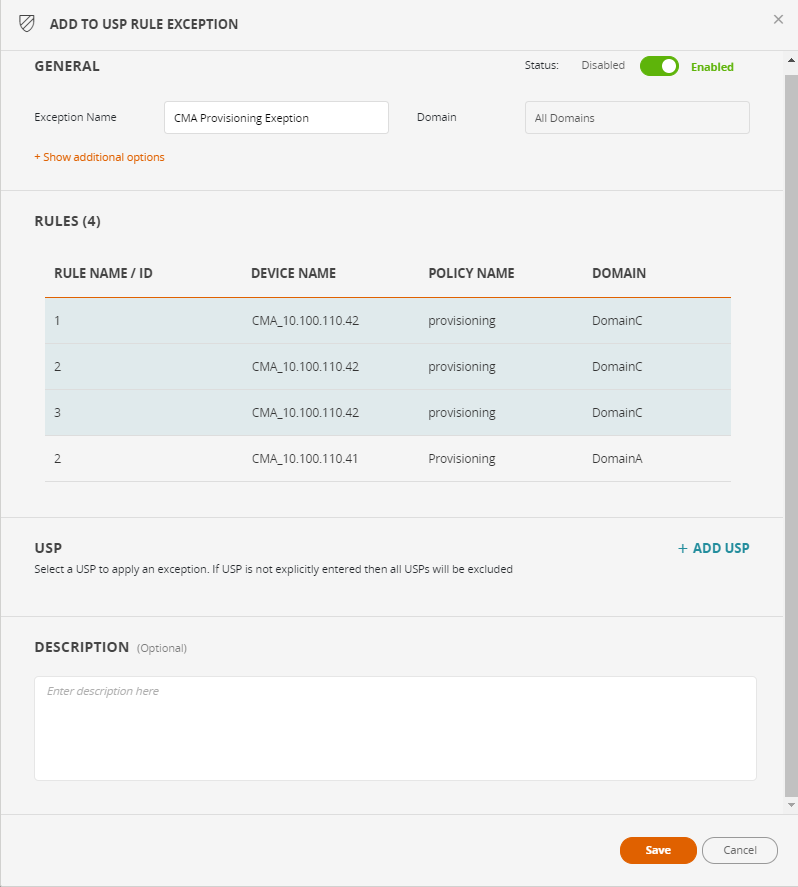
Add a Rule to an Existing USP Rule Exception
-
In the Rule Viewer, select the checkbox next to one or more rules.
-
In the Actions menu
select Add to Existing USP Rule Exception.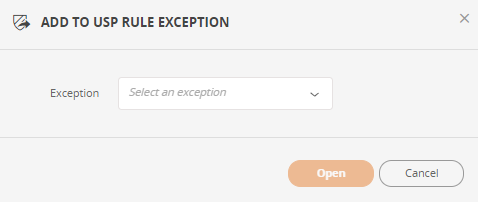
-
In the Exception field, select the USP Rule Exception, and click Open.
-
Review the information in the USP Rule Exception.
In the Rules section, the rules which you just added are highlighted in blue.
-
Click Save
How Do I Get Here?
From the menu, go to Browser ![]() > Rule Viewer and click on a rule.
> Rule Viewer and click on a rule.
