On This Page
Moving The etcd Database on T-1100 XL Appliances
All Gen 3.5 and Gen 4 Tufin Appliances come equipped with the etcd database. etcd is used for storing information which needs to be accessed simultaneously by multiple nodes, and needs to be capable of enabling TOS Aurora to meet high performance requirements. Therefore to enhance the performance of TOS Aurora, the etcd database needs to be stored in a separate disk on the data node server.
If you are running a High Availability deployment, this procedure needs to be repeated for each data node.
Gen 4 appliances come pre-configured with the etcd database already in a separate partition. Gen 3.5 T-1100 XL appliances require that you perform a manual procedure to move the etcd database to a separate partition. This requires that you split the RAID controller into two groups:
-
4 discs which will run TufinOS and TOS Aurora
-
2 discs which will run the etcd database
Prerequisites
Network Requirements
-
When logging into the appliances, you will need to log in as user root or another user with root permissions
General Requirements
-
Check the appliance model by running the following command as user root.
dmidecode -s chassis-version 2> /dev/null
This procedure is only relevant for Gen 3.5 T-1100XL. Gen 4 appliances do not require this procedure, and you cannot split the RAID controller on other appliance models.
-
Check the TufinOS version installed on the appliance by running the following command.
cat /etc/redhat-release
-
Backup your data.
-
Appliances running TOS Aurora: See the One-Time Backup Procedure.
-
Appliances running TOS Classic: See Backing up TOS Classic
-
Split the RAID Controller
-
Log in to the appliance command line interface (via the physical console or via RMM), and reboot the appliance
-
 Enter the Adaptec RAID Configuration Utility
-
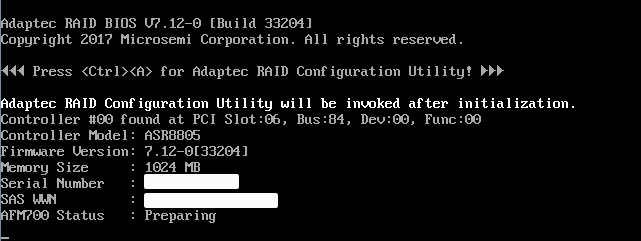
While the appliance is booting, press CTRL+A when the message for the utility is displayed.

The following message is displayed while the utility initializes.
-
-
 Validate the current raid configuration
-
After the utility initializes, select Logical Device Configuration and press Enter.
-
Select Manage Arrays, and press Enter.
-
In the List of Arrays verify that only 00 TUFIN RAID 10 is displayed. Select the array and press Enter.
-
Verify that there are only three Raid 1 Array Members.
-
Press Esc to return to the List of Arrays.
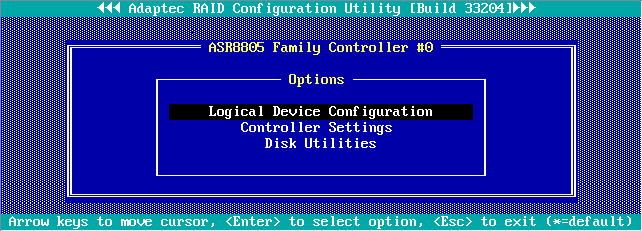
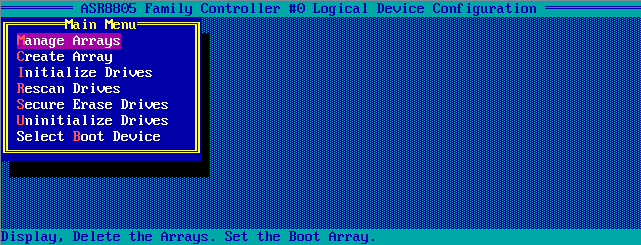
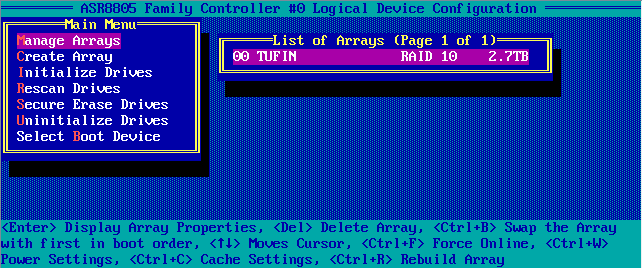 If multiple arrays are displayed, do not continue this procedure, and contact Tufin Support.
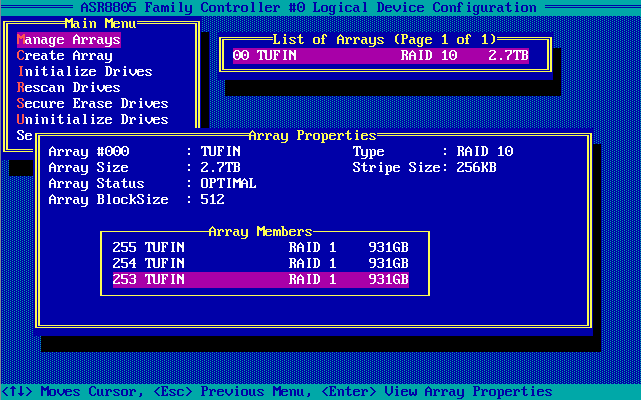 If there is a different number of arrays, do not continue this procedure, and contact Tufin Support.
 -
-
 Delete the TUFIN array
-
In the List of Arrays page, select the TUFIN array, and press Delete.
-
Press Delete.
-
Press Y.
-
After the arrays are deleted, press any key to continue.
The Array Properties page is displayed.
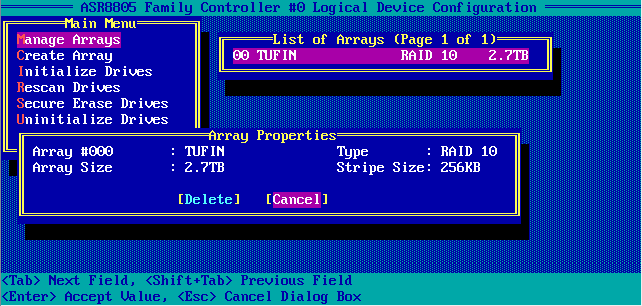
A warning is displayed.
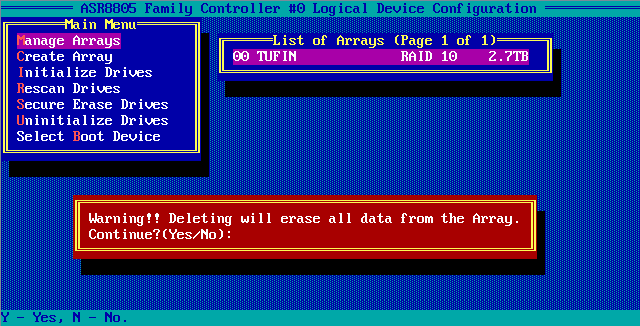
-
-
 Initialize the drives
-
In the Main Menu, select Initialize Drives and press Enter.
-
Press Space and select all six drives.
-
Press Enter.
-
Press Y.
-
After the drives are initialized, press any key to continue.
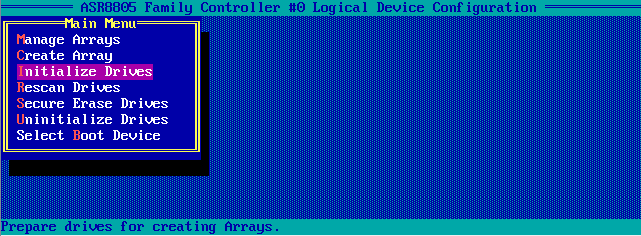
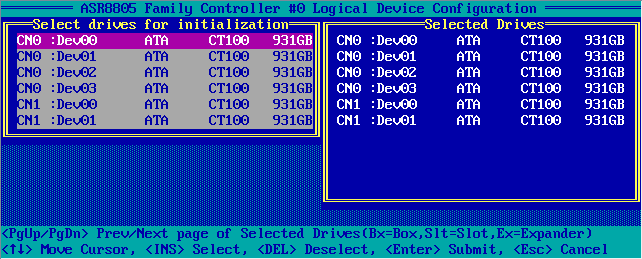
A warning message is displayed.

-
-
 Create the first RAID array - TUFIN
-
In the Main Menu, select Create Array and press Enter.
-
Use the Space key to select the first four drives.
-
Press Enter.
-
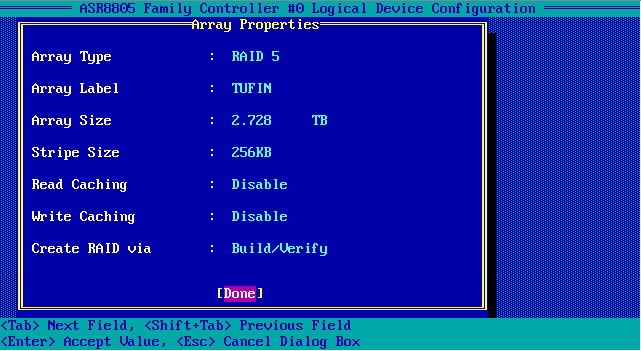
Configure the Array Properties:
-
Array Type: Select RAID 5
-
Array Label: Enter TUFIN
-
The Array Label is case sensitive. All letters need to be capitalized.
-
Array Size: leave unchanged
-
Stripe Size: Select 256KB
-
Read Caching: Select Disable
-
Write Caching: Select Disable
-
Create RAID via: Select Build/Verify
-
-
Select Done.
-
Press Y to disable the cache settings.
-
After the array is created, press Y to continue.
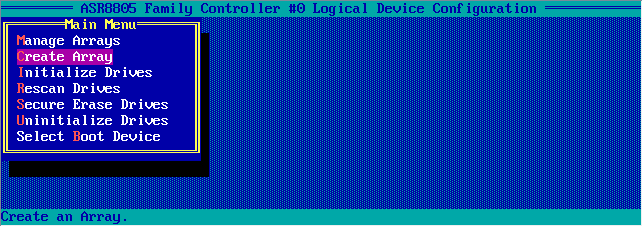
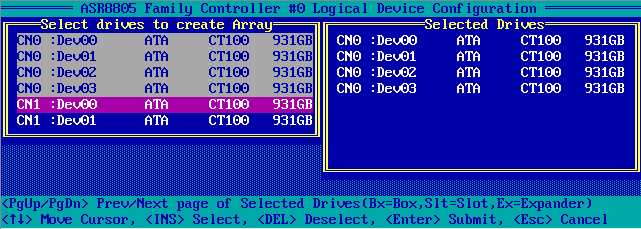
A message is displayed recommending that you disable cache settings.
 The array is available immediately, but array performance will be impacted during the Build/Verify process.
 -
-
 Verify that the first array was created correctly
-
In the Main Menu, select Manage Arrays and press Enter.
-
In the List of Arrays select 00 TUFIN RAID 5 and press Enter.
-
In the Array Properties, there should be four drive members.
-
Press Esc twice to return to the main menu.

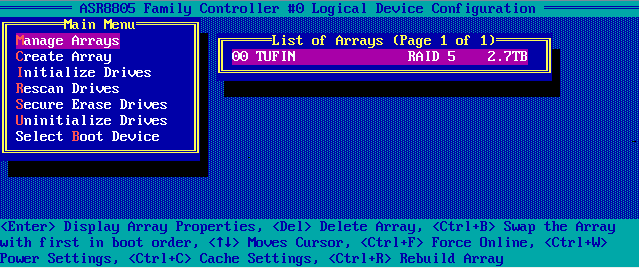 If the array 00 TUFIN RAID 5 is not displayed, or if the name of the array is not TUFIN in all capital letters, delete the array and recreate it using the instructions above.
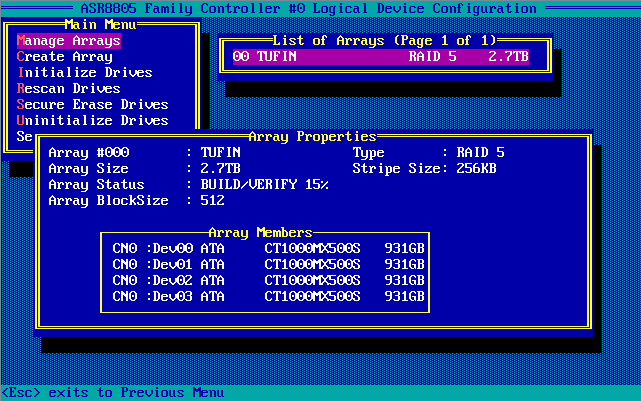 If the number of drive members is different, delete the array and recreate it using the instructions above.
 -
-
 Create the second RAID array - ETCD
-
In the Main Menu, select Create Array and press Enter.
-
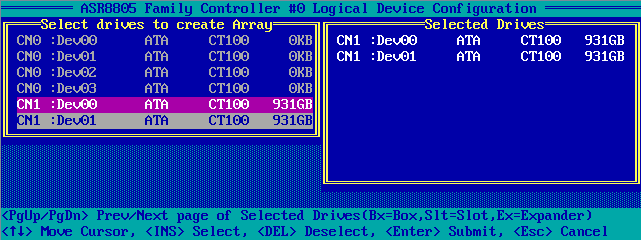
Use the Space key to select the last two drives.
-
Press Enter.
-
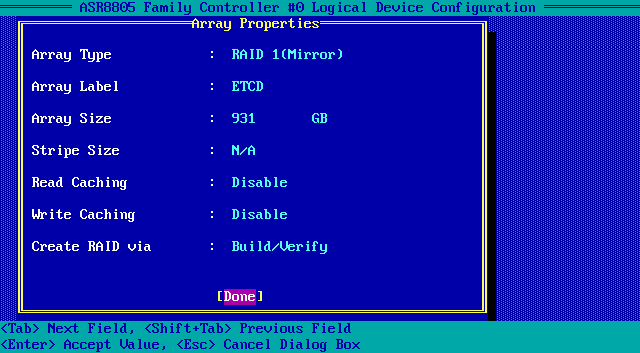
Configure the Array Properties:
-
Array Type: Select RAID 1
-
Array Label: Enter ETCD
-
The Array Label is case sensitive. All letters need to be capitalized.
-
Array Size: leave unchanged
-
Stripe Size: N/A
-
Read Caching: Select Disable
-
Write Caching: Select Disable
-
Create RAID via: Select Build/Verify
-
-
Select Done.
-
Press Y to disable the cache settings.
-
After the array is created, press Y to continue.

A message is displayed recommending that you disable cache settings.
 The array is available immediately, but array performance will be impacted during the Build/Verify process.
 -
-
 Verify that the second array was created correctly
-
In the Main Menu, select Manage Arrays and press Enter.
-
In the List of Arrays select 01 ETCD RAID 1 and press Enter.
-
In the Array Properties, there should be two drive members.
-
Press Esc twice to return to the main menu.

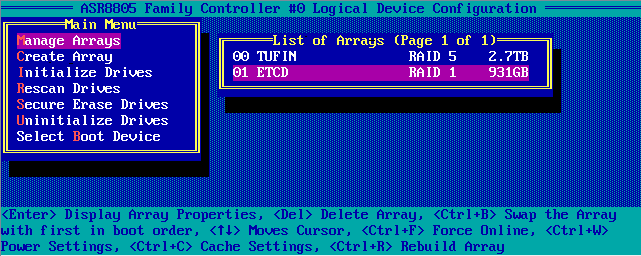 If the array 01 ETCD RAID 1 is not displayed, or if the name of the array is not ETCD in all capital letters, delete the array and recreate it using the instructions above.
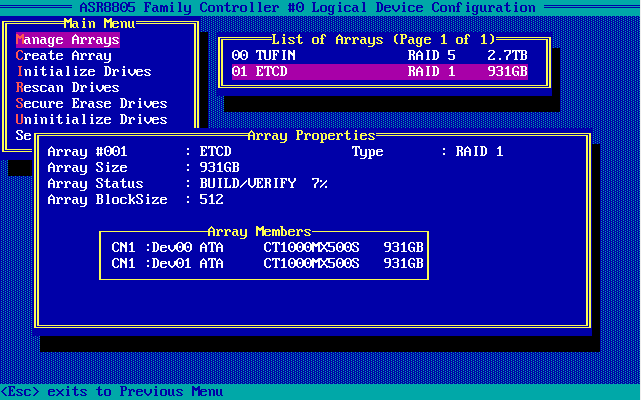 If the number of drive members is different, delete the array and recreate it using the instructions above.
 -
-
 Exit the Adaptec RAID Configuration Utility
-
Press Esc twice
-
Select Yes to exit.
-
The appliance will be rebooted.
-
During the reboot process, verify that you see two logical devices at the end of the Adaptec RAID initialization.
-
reboot
Install TufinOS and TOS
TOS Aurora was Previously Installed
-
Install the latest version of TufinOS and the version of TOS that was previously installed on the appliance.
See:
-
Restore the data to the appliance. See Backup Restore Commands
TOS Classic was Previously Installed
-
Install the latest version of TufinOS. See Installing TufinOS on an Appliance Using a USB Key
-
Install the version of TOS classic that was previously installed on the appliance. See Installing TOS Classic
-
Restore the data to the appliance. See Restoring TOS Classic from a Backup
-
Upgrade to TOS Aurora. See Upgrade from TOS Classic to TOS Aurora
