On This Page
Creating Accounts for NSX Devices
NSX-T Devices
- In the NSX-T manager go to System > Settings > User and Roles
-
Click on ADD and select a role assignment for LDAP
-
Add the LDAP domain
- Add a User, and select Role “Auditor” for read only or “Enterprise Admin” for read write user , and click on Save.
NSX-V Devices
SecureTrack uses the NSX API to monitor NSX-V devices. To retrieve revisions, use NSX Role Based Access Control (RBAC) to create an NSX-CLI user with read-only access to the NSX API as follows:
Create an NSX Manager User Account with Read-only Permission for the API.
- Connect to the NSX manager via SSH, switch to enable mode, and enter the configuration terminal.

- From the configuration terminal, create a new user account on the NSX Manager with the following command:
user username password (hash | plaintext) password
- After you create the CLI user, use the following command to assign the user web-interface privileges so that it can be authenticated against the NSX Manager web interface:
user username privilege web-interface
- Save the configuration.
- To view the running configuration, enter the following commands:
exit-
write memory -
show running-config
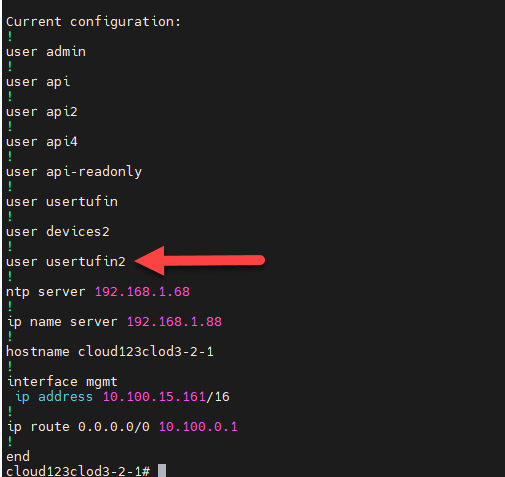
- In the vSphere Web Client, navigate to Menu > Networking & Security > Users and Domains > Users tab.
In the example below, the new user usertufin2 is not listed and therefore has no assigned role:
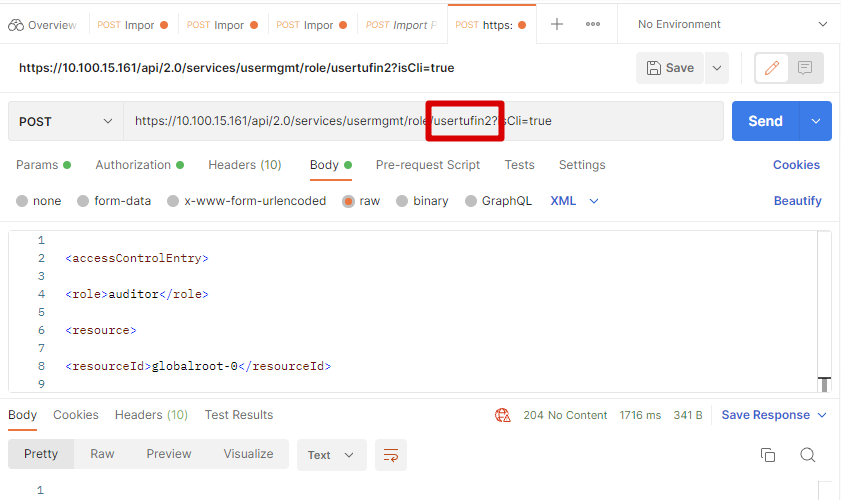
- Create a user using the following REST API POST call, using CURL, Postman, or another REST client:
https://<NSX-Manager-IP-Address>/api/2.0/services/usermgmt/role/userId?isCli=true- Authorization
To authenticate the request, add an Authorization header with the admin user/password for the NSX Manager device.
- Headers
The REST call must also include the
AuthorizationandContent-Typeheaders.The example below shows the headers in the Postman client:

- Request Body
<accessControlEntry><role>auditor</role><resource><resourceId>globalroot-0</resourceId></resource></accessControlEntry>The options for
roleare:- auditor (Auditor for monitor changes only from ST)
- security_admin (Security Administrator if needed provision changes from SC)
The example below shows the results in the Postman client:
- Authorization
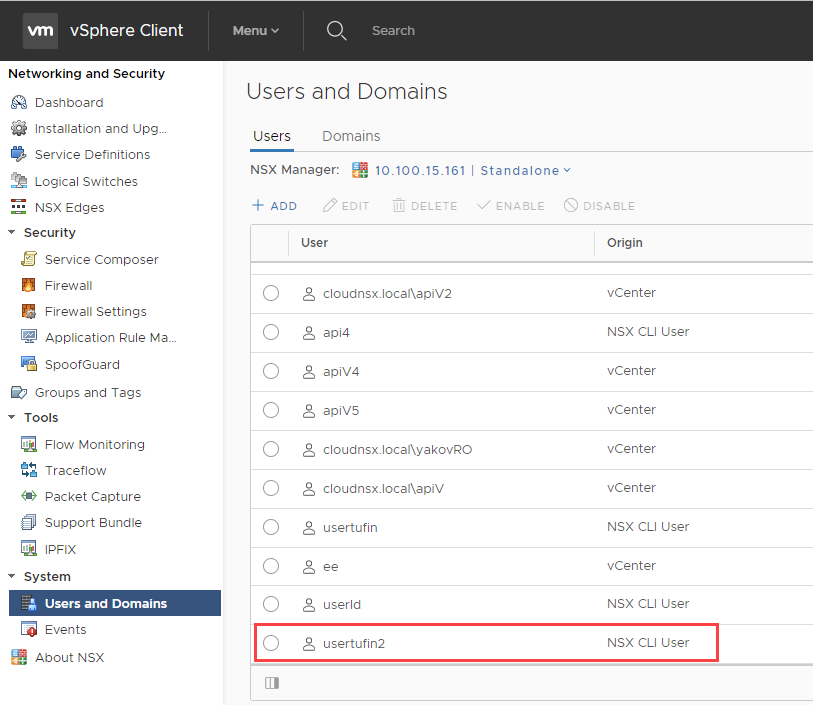
- To verify that the user is created, in the vSphere Web Client navigate to Menu > Networking & Security > Users and Domains > Users tab.
In the example below, the new user usertufin2 is listed with the role you assigned:
For more information, see the Sneaku.com article "How to create a NSX-v API Only User Account".
Create a vCenter Single Sign On (SSO) User with the vSphere Web Client
- Log in to vCenter and browse to Menu > Administration > Single Sign-On > Users and Groups in the vSphere Web Client.
- To add a new user, in the Users tab, click
 .
. - Enter a user name and password for the new user.
- You cannot change the username after you create a user.
- The password must meet the password policy requirements for the system.
- Optional: Enter a first and last name for the user.
- Optional: Enter an email address for the user.
- Click OK.
This user should have access to view DFW policies, with read-only permission. For more information, see the VMware vSphere 5.1 Documentation Center article "Add a vCenter Single Sign On User with the vSphere Web Client".
Assign Permissions to a vCenter Client User
- In the vSphere Web Client navigate to Administration > Access Control > Global Permissions.
- Select the user and click
 to open the Add Permission window.
In Assigned Role, select Read-only (or Administrator for user provisioning permissions) from the list of roles.
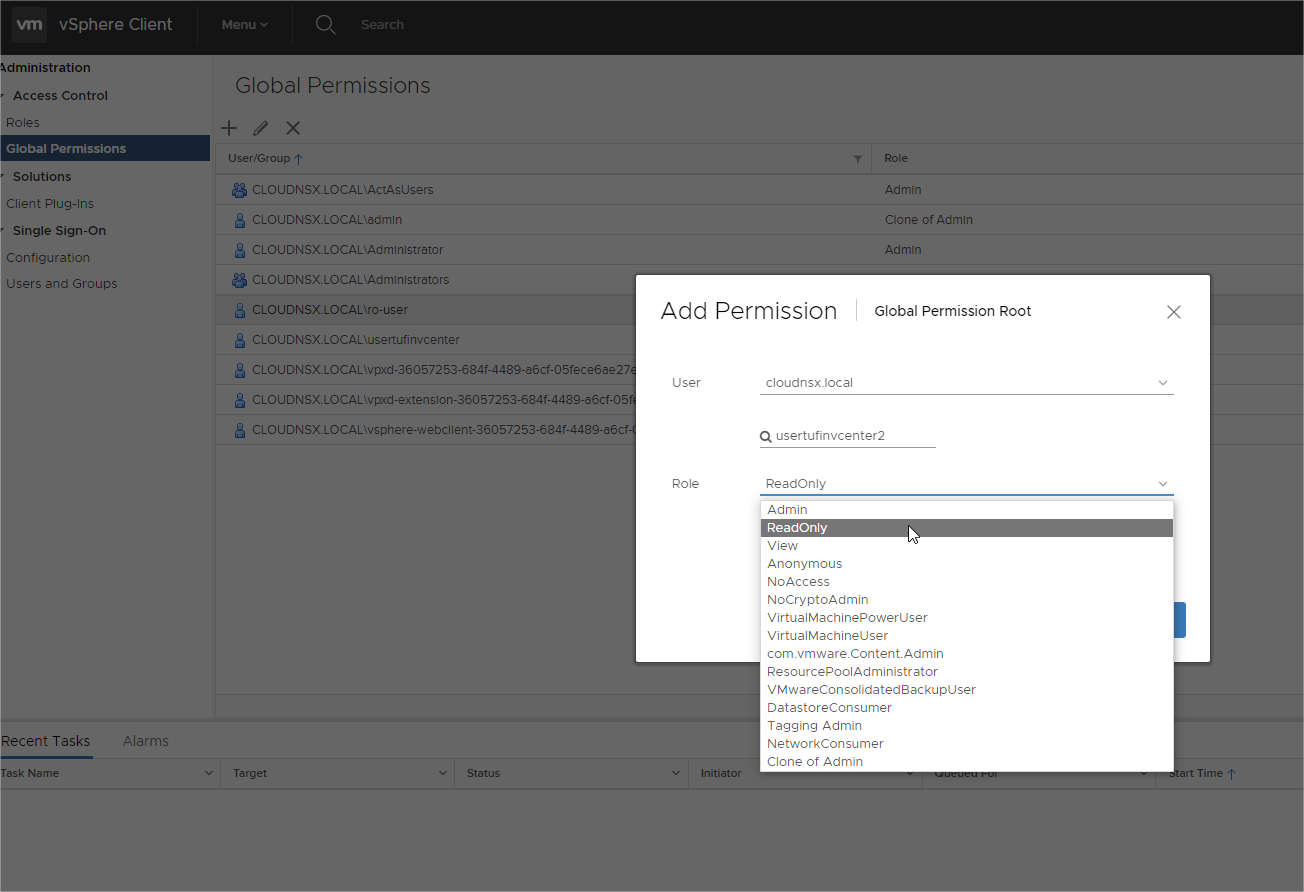
- Optional: Select the Domain from the list.
- Click OK.
The user appears in the list with the assigned Read-only role.
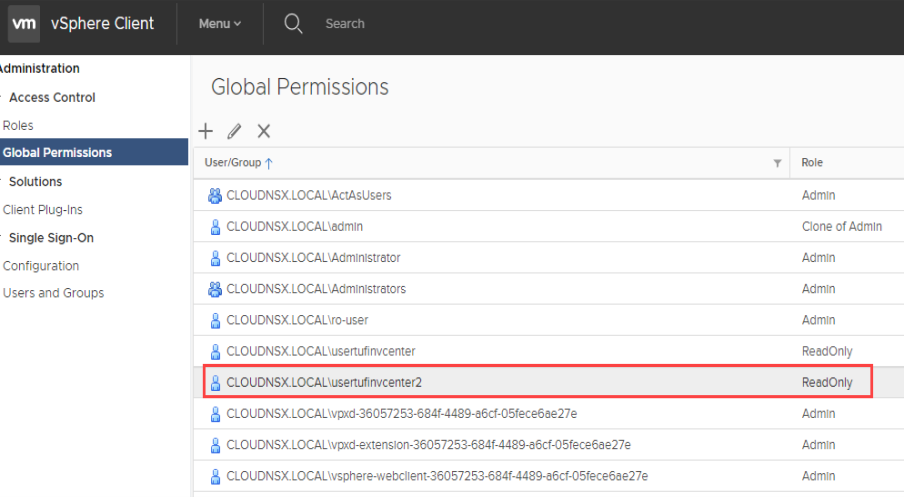
For more information, see the VMware vSphere 5.1 Documentation Center article "Assign Permissions in the vSphere Web Client". In step 6 of the procedure, select the Auditor role from the Assigned Role menu.
