On This Page
Managing Tags
Tags are labels that name a connection to an application pack. The tag can be used to identify the functionality of the connection for users. Every connection to application pack must be associated with a tag before it can be published. A single tag can be associated with multiple connections, letting you group related connections with a single, meaningful name. Tags are unique to a specific customer.
Tag management is available if multi-domain mode is set to interconnected.
Manage Tags
- Go to the application inventory window:
- SecureApp > Home to view the inventory for the default customer
- SecureApp > Customers and select a customer to view the inventory for a specific customer
- Select an application pack.
- Click
 to display the Tags dialog.
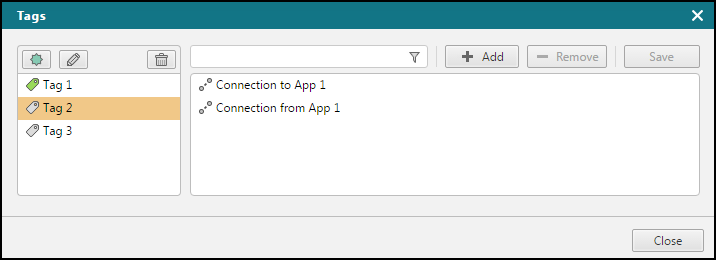
On this dialog you can:
- Add a tag - Click
 to add a new tag.
 - Edit a tag - Click
 to edit the tag name.
 - Delete a tag - Click
 to delete a tag.
 - Filter - Filter the available connections by the text entered.
- Associate a tag with a connection - Select a connection for a tag and click
 to associate the tag with the connection.
 - Remove a tag association - Select a connection for a tag and click
 to remove the tag association for the connection.
 - Save tag associations - Click
 to save the current associations.
Associate a Tag With a Connection
A tag can be associated with multiple connections. The dialog lets you manage the connection to application pack associations for each tag.
-
Select a tag from the left panel of the Tags dialog.
-
Click Add.
The Add Interfaces dialog appears.
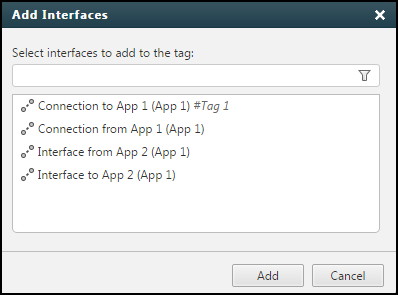
-
Click and select the desired interfaces.
Use the <CTRL> and <SHIFT> keys while clicking to select the multiple interfaces.
- Click Add and then Save.
Remove Associations From a Tag
A tag can be associated with multiple connections. The Tags dialog lets you remove one or more connection associations from a tag.
- Select a tag from the left panel of the dialog.
- Select an interface from the right panel of the dialog.
- Click Remove and then Save.
