On This Page
Auto-Associate Cloud Resources
The auto-associate feature lets you automatically associate VMs with a SecureApp application, by specifying which tag in the VM will contain the name of the SecureApp application. When a new VM is created, SecureApp will look for the specified tag and automatically associate the new VM with the application named in the tag.
The auto-associate button identifies if auto-associate is currently enabled:
-
 - currently enabled
 -
 - currently not enabled
When auto-associate is first enabled, SecureApp checks all existing instances for the specified tag. Each existing VM instance with the specified tag will be associated with the named SecureApp application.
If the application is not already listed in SecureApp, it will be created in SecureApp. If a decommissioned application of the same name is in SecureApp, the association will fail. If multi-customer mode is enabled but the application exists for a different customer, the association will fail. Servers that have been deleted from the resources of an application will not be re-added by subsequently by auto-associate. You can manually add the association.
Every server in SecureApp requires a unique name. If you import a server with a name that is not unique in SecureApp, SecureApp will add a number to the end of the name provided to ensure uniqueness. When multi-domain is enabled, of a VPC is detached or migrated to a different domain, the instance will be terminated in SecureApp.
Prerequisites
Make sure that you have enough licenses available in your SecureApp Bundle for the number of SecureApp applications you plan to use. Contact your Tufin representative if you have licensing questions.
Enable Auto-associate
-
Click
. The Auto-associate dialog appears.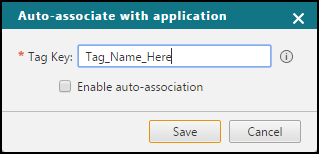
-
Enter the desired tag name.
-
Select Enable auto-association.
-
Click Save.
Disable Auto-associate
-
Click
. The Auto-associate dialog appears.
-
Clear the Enable auto-association checkbox.
-
Click Save.
Delete The Auto-associate Tag Name
- Click . The Auto-associate dialog appears.
- Delete the Tag Key entry.
- Clear the Enable auto-association checkbox.
- Click Save.
