On This Page
Configuring a Custom Role and Assigning it to a Tufin Application
-
Log in to your Azure Account through the Azure portal.
-
Go to the Access Control page, and click Add > Add Custom Role.
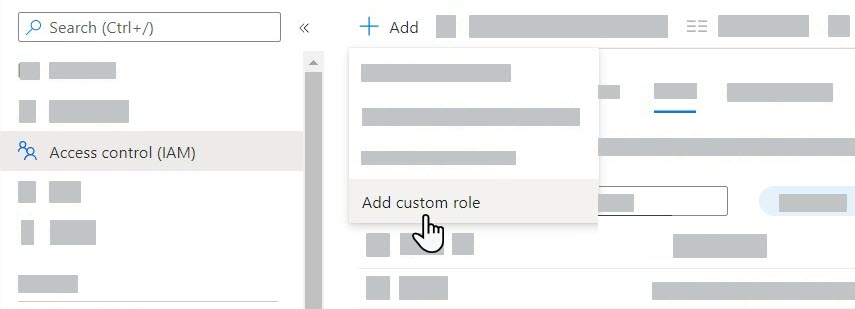
The Custom Role Editor is displayed.
-
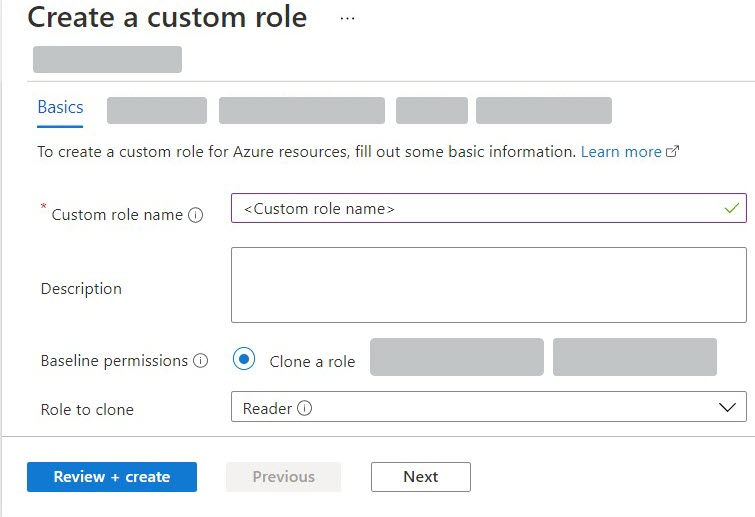
In the Basics tab, fill out the following information:
-
Custom role name and Description: Enter a name and description for the custom role.
- Baseline Permissions: Select Clone a role.
- Role to clone: Select Reader.
-
-
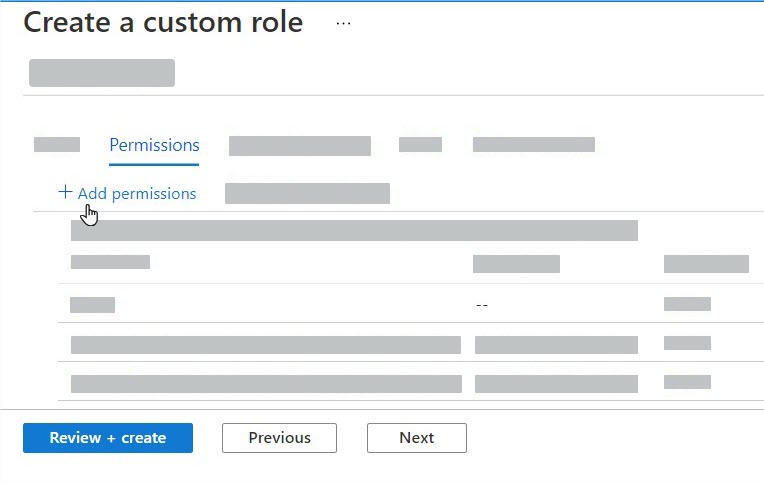
Click Next to move to the Permissions tab.
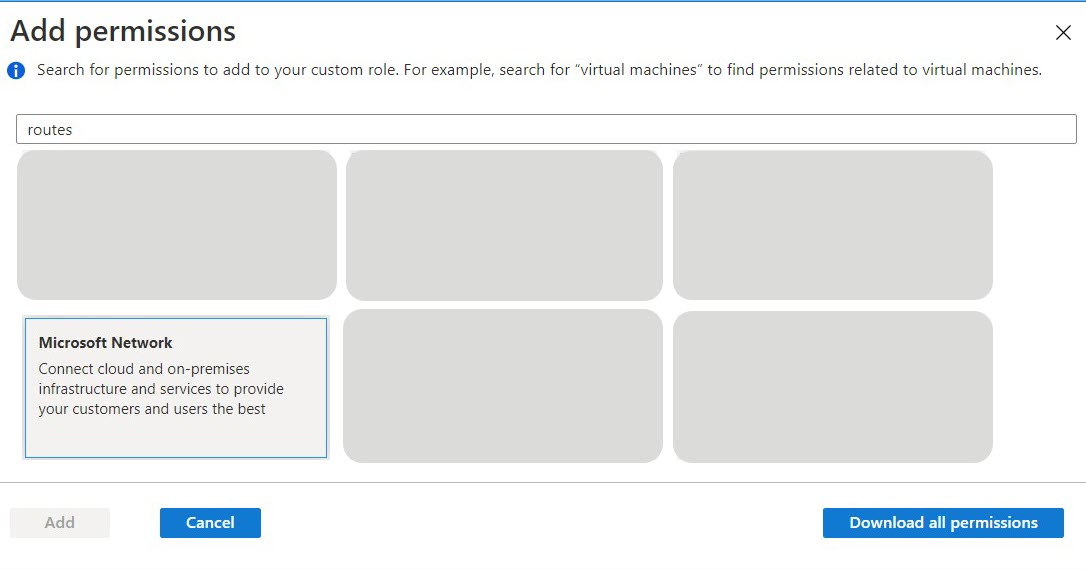
- Click Add Permissions.
-
Search for Microsoft Network.
-
Click on the Microsoft Network tile, and select the following permissions:
-
Read: Get Express Route Service Provider
-
Write: Create or Update Route
-
Other: Gets virtualNetworkGateway advertised routes
-
Other: Gets virtualnetworkgateway learned routes
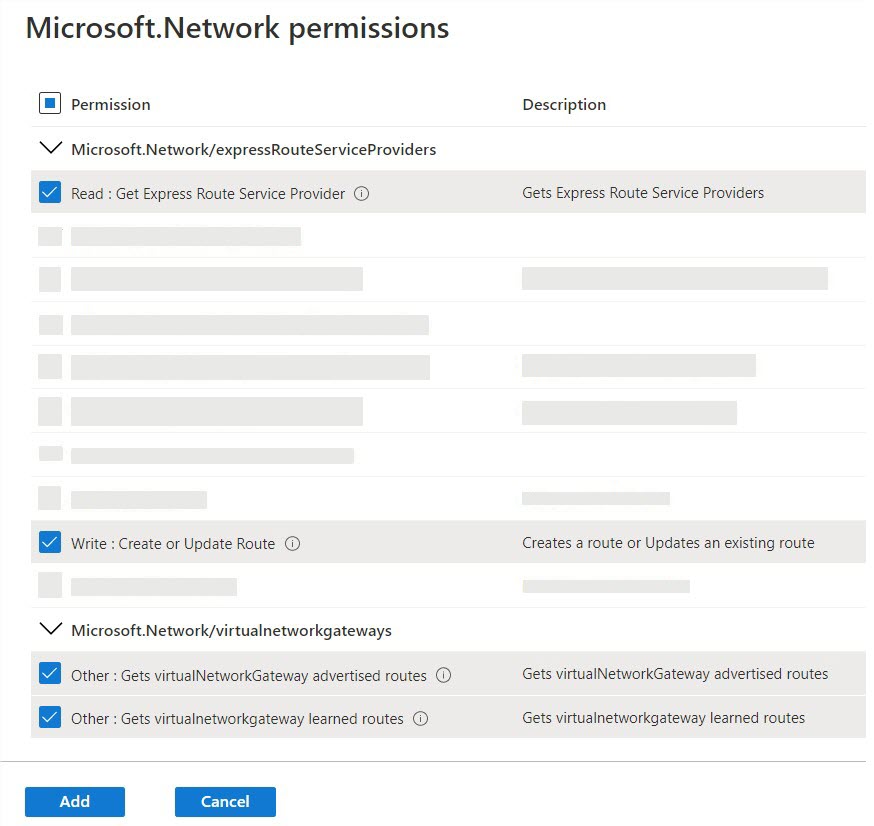
-
-
Click Add.
-
Create the custom role by clicking Review+Create.
-
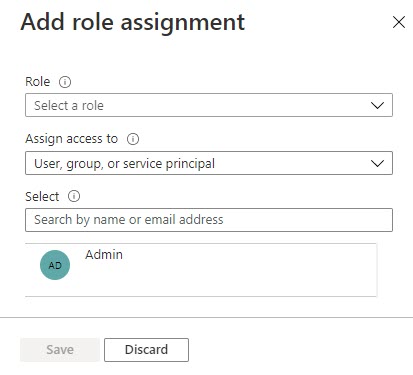
In the Access Control page, click Add > Add Role Assignment.
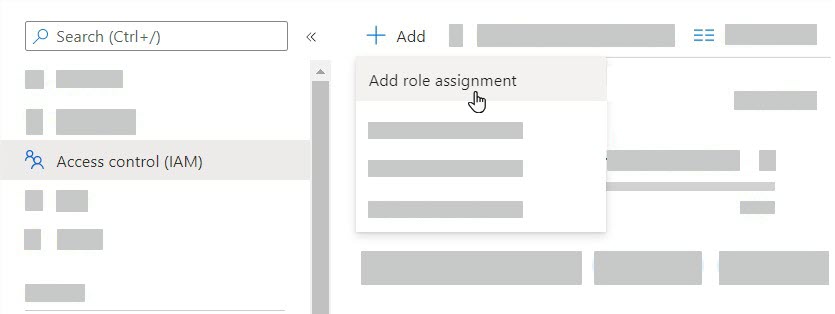
- In the Role field, select the role you created.
- In the Select field, select the SecureTrack App registration.
- Click Save.
The Add Role Assignment pane is displayed.