On This Page
Adding Amazon AWS Cloud Platform
Overview
TOS Classic monitors the Amazon AWS cloud platform for policy revision changes. To help you organize the information for your devices, you can use the device information worksheet. To see which TOS features are supported for your device, review the feature support table.
Prerequisites
Before you begin, make sure that you have an AWS user that has a policy that has all the permissions you require for the TOS features you will be using.
|
Feature |
AWS Permissions |
|---|---|
|
Visibility and Change Tracking
|
AmazonEC2ReadOnlyAccess, AmazonVPCReadOnlyAccess, AWSDirectConnectReadOnlyAccess |
|
Application Discovery |
CloudWatchLogsReadOnlyAccess |
|
Routes for Transit Gateways |
SearchTransitGatewayRoutes |
|
Provisioning |
User must have either:
or create a custom IAM policy with the following permissions:
|
|
Cross-Account Access |
To use the For more information, see Amazon AWS AssumeRole Support. |
You can assign the policy to the user directly or through a role that it is assigned to. For more about AWS policies or creating a custom IAM policy, see the Amazon AWS documentation. This following is a sample custom IAM policy:
{
  "Version": "2012-10-17",
  "Statement":[
  {
    "Effect":"Allow",
    "Action":[
      "ec2:AuthorizeSecurityGroupEgress",
      "ec2:AuthorizeSecurityGroupIngress",
      "ec2:RevokeSecurityGroupEgress",
      "ec2:RevokeSecurityGroupIngress"
    ],
      "Resource": [
        "arn:aws:ec2:*"
      ]
    }
  ]
}
Automatic Import of VPCs
When you select Automatic Import of VPCs, SecureTrack automatically detects changes to the AWS environment (adding, deleting, and editing VPCs) and reflects them in the device list and revision history. Changes to the VPCs will be reflected in the Interactive Map when a scheduled sync occurs or when you click Sync in the Interactive Map.
With Automatic Import enabled, devices that have been deleted from the AWS are automatically deleted from the list of devices in SecureTrack and their history will no longer be available. Therefore, if your continuous integration/continuous deployment (CICD) pipeline regenerates VPCs, the history of the deleted VPC will not be available in the new replacement VPC. To retain revision data in SecureTrack for devices that have been deleted from your Amazon account, use manual import.
There is a limit to the number of VPCs that can be supported for Automatic Import, depending on your TOS deployment. For more information, contact Tufin Customer Support.
Adding an AWS Device
-
In TOS Classic, go to
-
Select the appropriate device type:
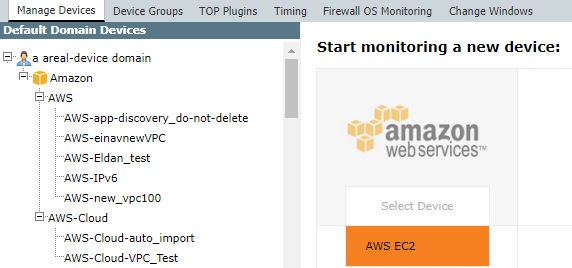
-
Configure the device settings:
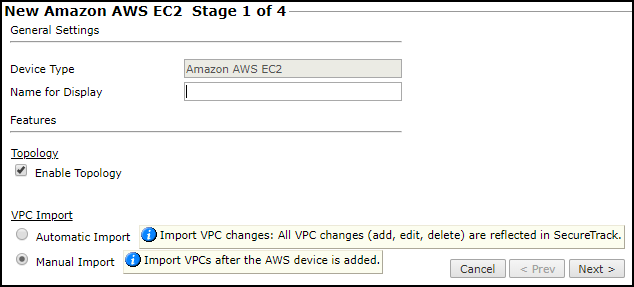
- Name for Display
-
Domain: Available only if you have configured your system for managing multi-domains and All Domains is currently selected. Select the domain to which to add the device. The Domain can only be entered when adding a device; to change the Domain, you must migrate the device.
- ST server: In a distributed deployment, the AWS parent device and its VPCs must be monitored by the same server (Not shown in image).
- Features >Enable Topology: Collects routing information for building the network Interactive Map.
Topology options for Advanced management mode are configured when you import managed devices. -
Features > VPC Import:
- Automatic Import: For a given AWS account, automatically detect deleted VPCs and add new VPCs in SecureTrack.
- Manual Import: Import VPCs after the AWS device is added.
- Click Next.
-
Configure the SecureTrack connection to the Amazon AWS device, according to the parameters required by the device:
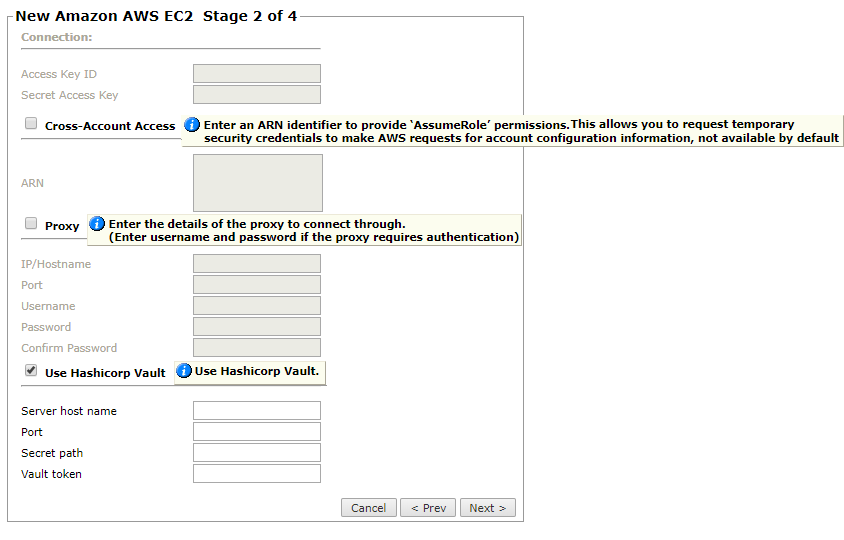
-
Enter the Access Key ID and the Secret Access Key.
You can get the access keys from the AWS Identity and Access Management (IAM) console.
-
For Cross-Account Access, enter an Amazon Resource Name (ARN) identifier to use the
AssumeRolepermissions.This allows you to request temporary security credentials to make AWS requests for the account configuration information that is not available by default, and to access VPCs that are not part of your Account configuration.
For more information, see Amazon AWS AssumeRole Support. -
Proxy: Select this option if you connect to AWS through a proxy which requires authentication and enter the proxy details:
- IP address or Hostname of the proxy
- Port that you connect to on the proxy
- Username to use for authentication
- Password (and password confirmation) to use for authentication
If SSL decryption is enabled on the Proxy server and applied to the traffic from SecureTrack to AWS, you must configure a white list on the proxy server. The white list allows the traffic from SecureTrack to bypass SSL decryption and authentication.
-
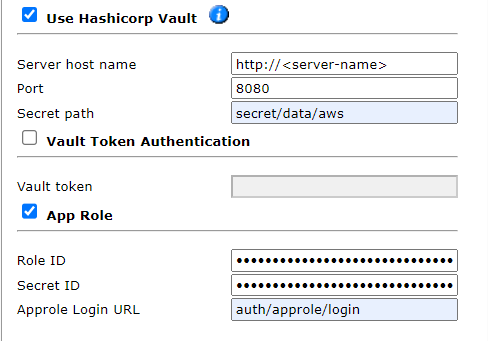
Use Hashicorp Vault: Select this option if you use Hashicorp Vault to store your AWS authentication credentials
- Server host name: Name of the server used to host the Hashicorp Vault.
- Port: TCP / UDP port that SecureTrack uses to communicate with the Hashicorp Vault.
- Secret path: Path to the AWS authentication details within the Hashicorp Vault.
On the Hashicorp Vault server, configure the following key-value pairs, which SecureTrack expects to retrieve:Key
Value
access_key_id<Access Key ID>secret_access_key<Secret Access Key> - Select either Vault Token Authentication or App Role:
- Vault Token Authentication: Select this option to add the Vault token. This token is required for SecureTrack to authenticate AWS using the Hashicorp Vault.
For example:
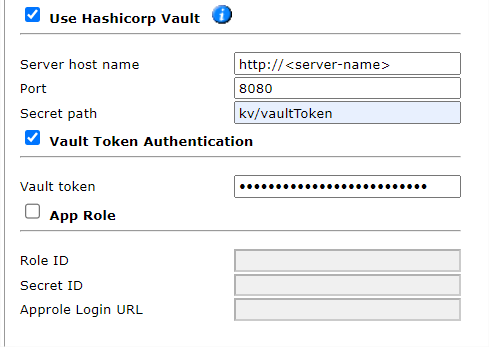
- App Role: Select this option to add the App Role fields:
Role ID: Vault server RoleID that SecureTrack uses to authenticate the Hashicorp Vault server.
Secret ID: Hashicorp Vault server SecretID that SecureTrack uses to authenticate the Hashicorp Vault server.
Approle Login URL: Path to AppRole login details within the Hashicorp Vault.
For example:
- Vault Token Authentication: Select this option to add the Vault token. This token is required for SecureTrack to authenticate AWS using the Hashicorp Vault.
- Click Next.
Tufin does not support using the Hashicorp Vault with a proxy or Cross-Account Access (ARN). -
-
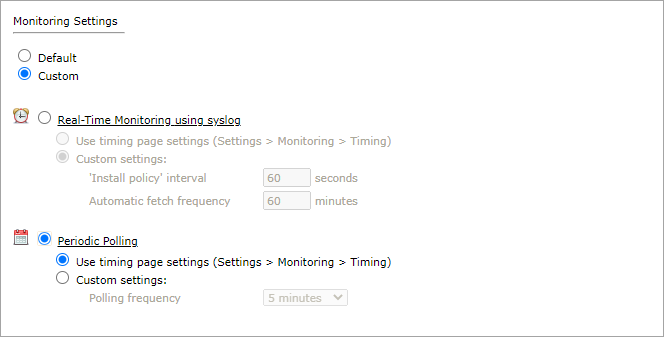
The Monitoring Settings page appears:
-
Periodic Polling, select Custom settings and configure the Polling frequency: How often SecureTrack fetches the configuration from each device.
If you select 1 day, you can then select the exact time (hour and minute) for the daily polling.
-
- Click Next.
- Save the configuration.
The Amazon AWS device now appears in the Monitored Devices tree.
-
To manually add Virtual Private Clouds to your device, wait for a revision to be received from the device (you can see the revision in Compare view). This may take several minutes. Then, add the Virtual Private Clouds:
- In the Monitored Devices tree, select the device.
-
Click Import Virtual Private Clouds (only enabled for Manual Import):

-
Select all the Virtual Private Clouds to be added.
-
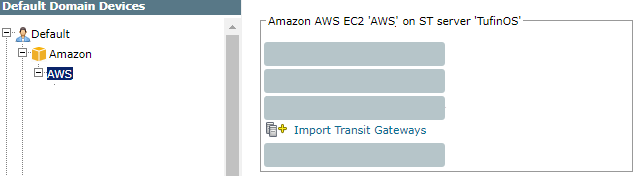
To add Transit Gateways (supported for Topology only):
- In the Monitored Devices tree, select the device.
-
Click Import Transit Gateway:
-
Select the Transit gateways to import and the domain for each Transit Gateway
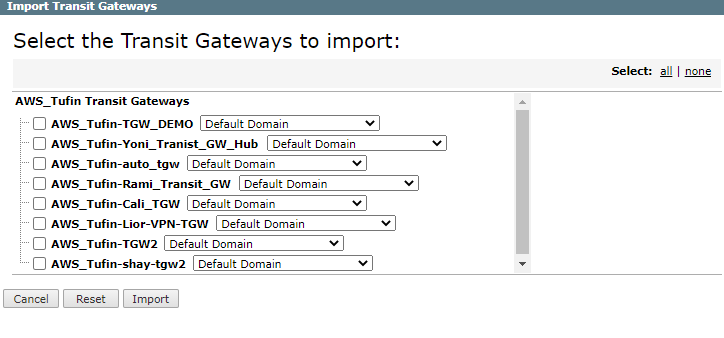
- Click Import.
- Click Save.
How Do I Get Here?
In SecureTrack, go to
