On this page
Changing the DNS Server
This topic explains how to change the DNS Server on your TOS nodes. We recommend performing this task during an IT change window because changing the DNS server may cause a network disruption (especially if an incorrect DNS server is entered in error).
We recommend backing up your TOS data before changing the DNS server. See Backup and Restore.
This procedure is relevant for deployments on TOS appliances and VMWare VMs.
Change DNS address
-
Locate the first network interface.
-
Run the command:
-
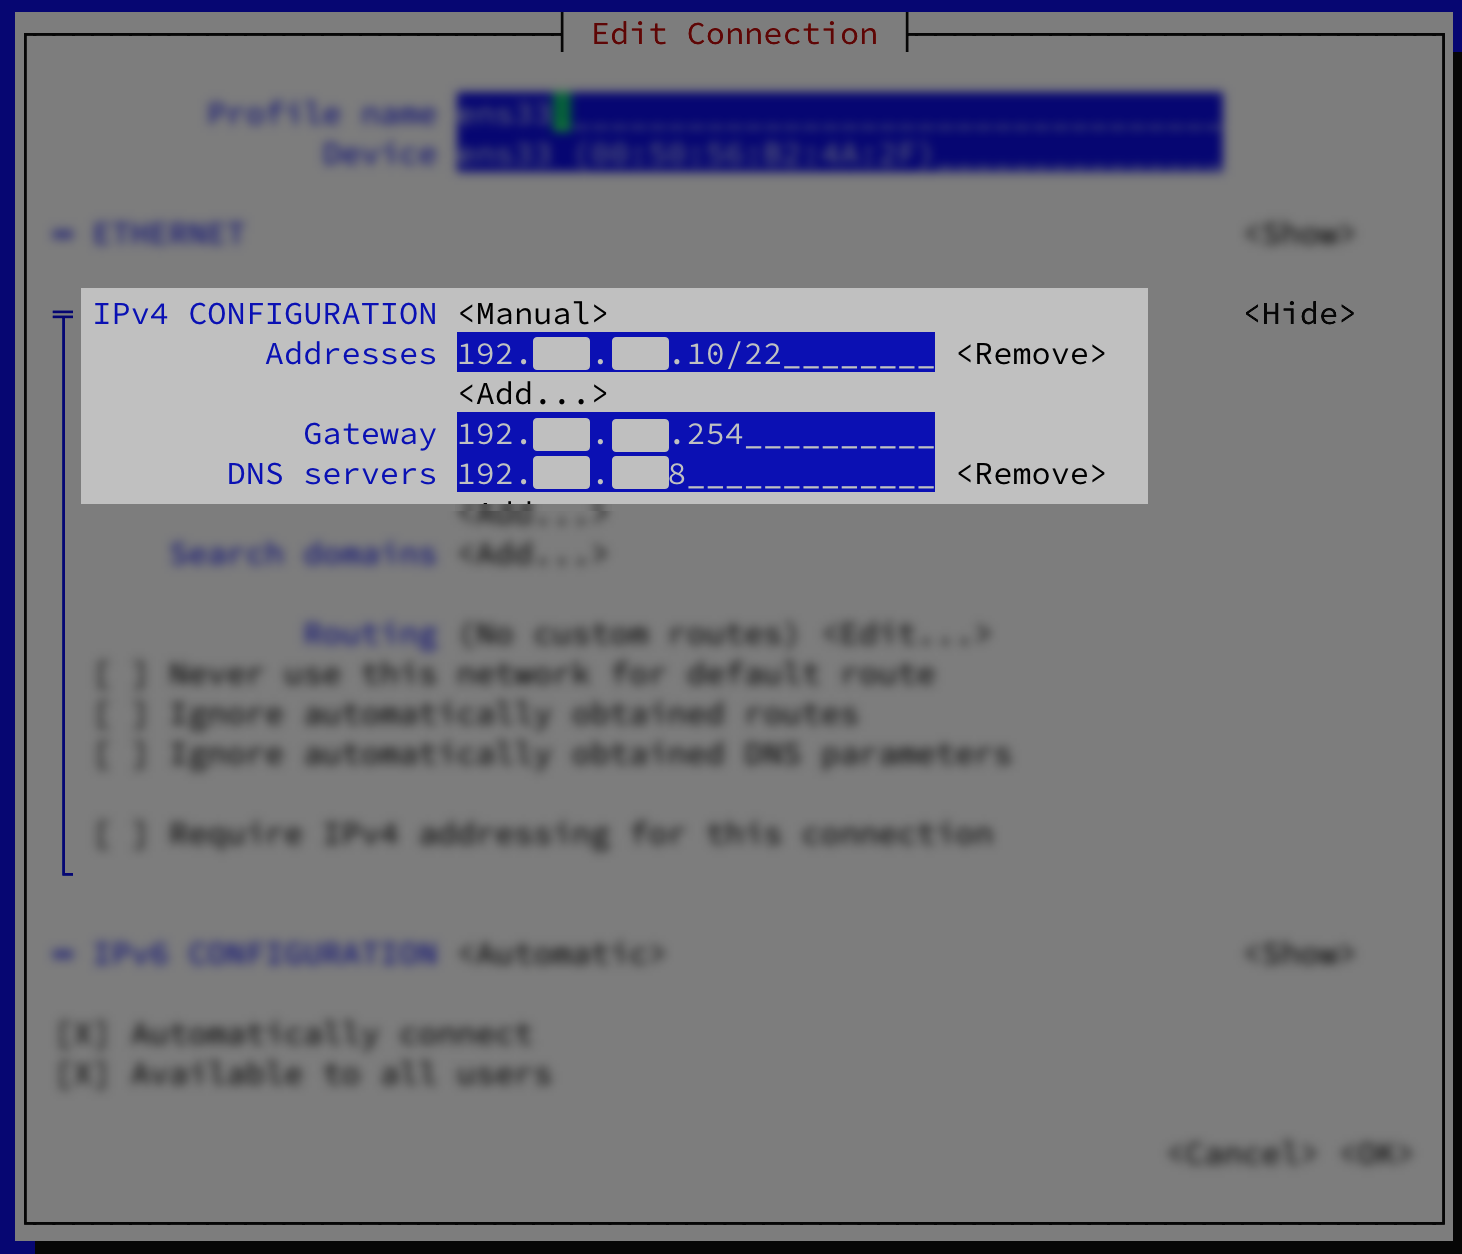
Set the gateway and DNS Servers to the IPs used by your organization.
-
Restart the network service.
-
To apply the changes, restart the kube-system pods:
-
 Verify that the DNS server can resolve its own address using a reverse lookup
Run:
If the name of the server appears, the DNS server can resolve its own address using a reverse lookup.
Example Output
[<ADMIN> ~]$ sudo nslookup  1.2.3.4
4.3.2.1.in-addr.arpa	name=EXAMPLE.company.com
If the name of the server does not appear, set it using a reverse lookup entry at /etc/hosts.
Example Output where
1.2.3.4 4.3.2.1.in-addr-arpawas added.[<ADMIN> ~]$ sudo cat /etc/hosts 127.0.0.1 localhost localhost.localdomain localhost4 localhost4.localdomain4 ::1 localhost6 localhost6.localdomain6 1.2.3.4 admin.company.com admin 2.3.4.5 5.4.3.2.in-addr-arpa
[<ADMIN> ~]$ sudo systemctl restart NetworkManager.serviceWas this helpful?
Thank you!
We’d love your feedback
We really appreciate your feedback
Send this page to a colleague