On this page
Customizing the Logo and Disclaimer
Overview
To customize the look of SecureChange, you can add your organizational logo and add text to login page.
What can I do here?
Change the logo
-
Prepare a graphics file for the logo.
This file is used for the header bar and the login window. You can use these file formats: BMP, JPG, GIF, JPEG, and PNG.
The logo is resized to 200x50 in the header. The logo does not maintain its aspect ratio.
-
In SecureChange, go to
 Settings > Customization:
 -
Click Browse and open the logo file:

-
Click Preview to see the effects in the preview pane.
-
To apply the changes, click Publish.
To revert to the default logo, click Default Settings.
Enable formatting features for login page text
By default the text displayed on the login page is plain text. However, you have the option of adding basic formatting to the text you display.
-
Edit the General Configuration table in the database by running the following API query in the CLI:
PUT -u <user>:<password> https://<IP>/securechangeworkflow/api/securechange/internal/configuration/set?key=encodeDisclaimer&value=falsePUT -u <user>:<password> https://<IP>/securechangeworkflow/api/securechange/internal/configuration/set?key=encodeDisclaimer&value=falseWhere <user>:<password> are your login credentials and <IP> is the ip address of the machine.
-
Reboot the pod.
Add text to the login screen
-
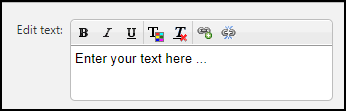
In the Disclaimer area, enter text to be displayed in the login page.
-
Format the text and add hyperlinks, as required.
By default, hyperlinks are disabled when TOS is installed. Contact Tufin support to enable hyperlinks.
-
To apply the changes, click Publish.
How do I get here?
SecureChange > ![]() Settings > Customization
Settings > Customization
Was this helpful?
Thank you!
We’d love your feedback
We really appreciate your feedback
Send this page to a colleague