On this page
Configuring Check Point Server for OPSEC Communication
The LEA protocol is expected to be discontinued by Check Point and if you use LEA with version R81 or above you may already experience technical issues. We therefore recommend using syslog instead of LEA.
You can monitor Check Point devices without OPSEC.
Use OPSEC when:
-
The Check Point device is managing VSX systems
-
The Check Point device is managing R77 gateways
-
You are working with LEA logs for accountability/usage analysis
OPSEC requires that both LEA and CPMI be enabled.
Configure OPSEC communication
-
Open the management application:
-
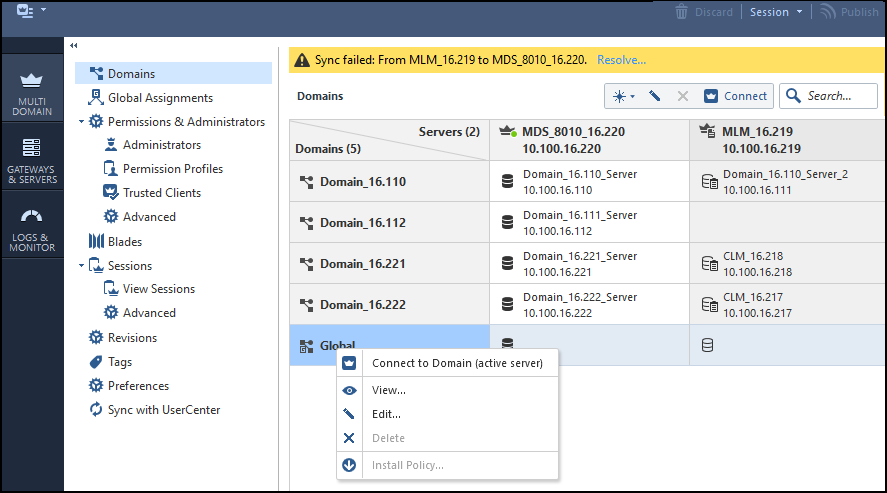
For a Provider-1 MDS: Open the MDG for the MDS and, in Global Policies, right-click a Global Policy and select Open selected global policy.
-
For a CMA, SmartCenter or Log Server: Open SmartDashboard.
-
-
Create a SecureTrack Host:
For a CMA: If you already configured monitoring for the MDS, use the global host object that you configured and skip this step.
-
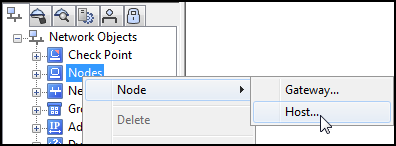
In the Objects menu, select More > Network Object > Host...:
- In the Host Node - General Properties window, enter a Name and the IP Address of SecureTrack (use the network IP address, not the VIP):
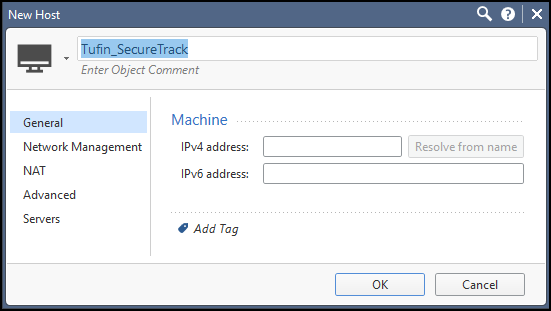
-
Click OK.
-
-
Create an OPSEC Application for SecureTrack for Check Point R80:
- In the Global Domain Manager GDM, connect to a Domain server.
- In the Objects menu, select: More object types > Server > OPSEC Application > New Application
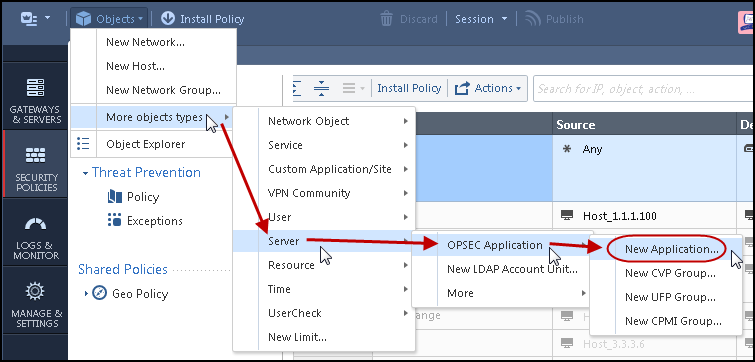
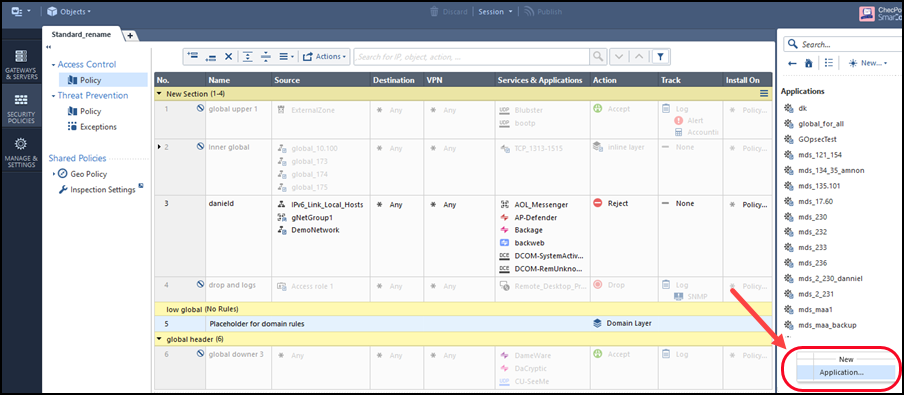
The OPSEC Application Properties window opens.
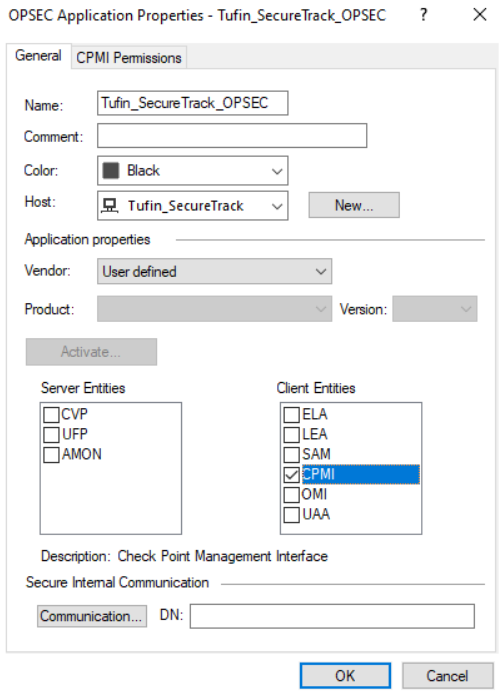
- Enter a Name for the OPSEC Application.
For a CMA: Do not use the same name as the OPSEC Application in the MDS.
- Select the SecureTrack Host object:
For a CMA: You can use the SecureTrack host global object that you created on the MDS.
For all others: Select the Host object that you created for SecureTrack.
For Vendor, do not select Tufin. This will not work, due to a known Check Point issue.
-
In Client Entities, select CPMI, but do not click OK.
If you are using LEA monitoring, check that option as well.
- In the Global Domain Manager GDM, connect to a Domain server.
-
Set the CPMI Permissions:
- In the CPMI Permissions tab, select Permissions Profile.
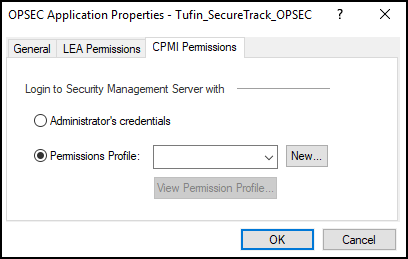
- Select a Permissions Profile:
For a CMA: Select from the list the Permissions Profile global object that you created for the MDS, and click OK.
- For all others: Click New, enter a name for the profile, and make sure that Read Only All is selected.
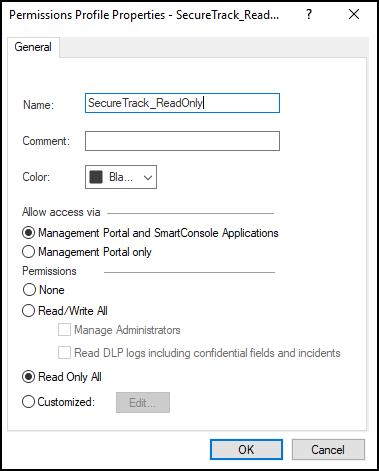
Note: For the SecureChange Designer to apply changes directly to Check Point policies, you must configure TOS to use an OPSEC object that has Read/Write All permissions. (Do not select Manage Administrators.)
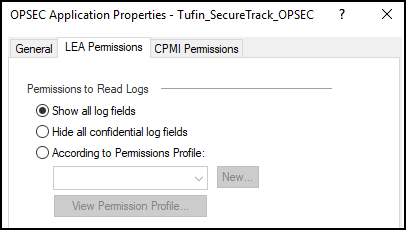
 If you are using LEA monitoring, set the permissions in the LEA permissions tab.
- In the LEA Permissions tab, select Show all log fields.
- In the CPMI Permissions tab, select Permissions Profile.
-
Initialize trust with TOS:
- In the OPSEC Application Properties window, click Communication.
- In the Communication window, enter and confirm an Activation Key and click Initialize:
You will need to enter the same Activation Key when you add the server to SecureTrack.
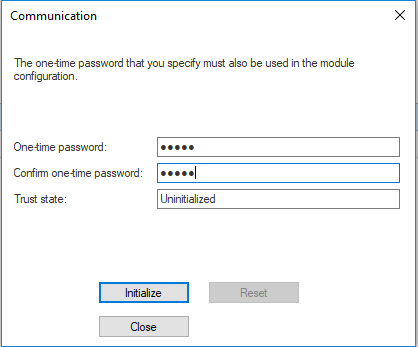
The Trust state changes to: Initialized but trust not established.
-
Close the Communication window.
-
Click OK.
-
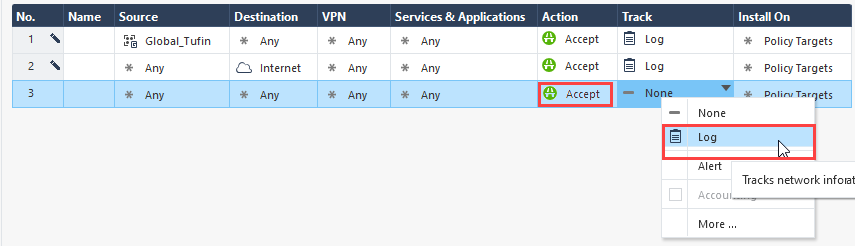
If you have an Application Control Policy layer, create a Cleanup rule that will send rule UIDs to SecureTrack.
If you already have an existing cleanup rule, skip to step 8c.-
Go to Access Control > Policy, and select the Application Control Policy Layer.
-
Click the message, and select Add Cleanup Rule.

-
Edit the following settings:
- Action: Change to Accept
- Track: Change to Log
If you are missing a cleanup rule, a message will be displayed.

-
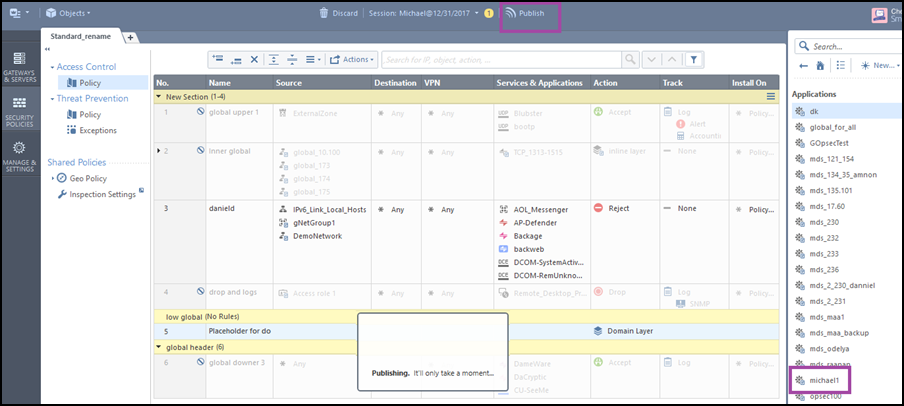
- To save the changes for an MDS device, click Publish in the Global Domain Manager.
-
For SMC and CMA devices:
- Select Install database....

- In the Install database dialog, select the relevant options and click Install.
If there is a CLM/Log Server device, select the relevant option.

- Select Install database....
Was this helpful?
Thank you!
We’d love your feedback
We really appreciate your feedback
Send this page to a colleague