On this page
Processing Self-Service Requests
Overview
When a user submits a self-service request, the application owner receives an email notification and is required to process the request.
Process a self-service request
-
In SecureApp, select the application specified in the email notification and display its Connectivity tab.
-
To review requests for access, click the
 button:
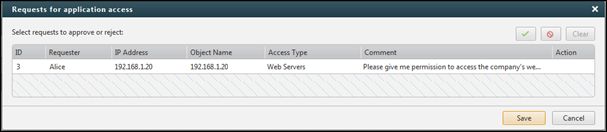
The Requests for application access dialog box shows all pending requests:
-
To handle a request, select it from the list, review its details and then click
 to approve it or click
  to reject it.
The Action column of the request shows whether it is approved or rejected. To remove the specified Action, click Clear.
-
To execute the specified Action, click Save.
-
If the request is approved, SecureApp creates a server object that represents the IP address in the request for application access. This object is shown in the Servers list and is added to the group indicated by the request Access Type.
-
If the request is rejected, SecureApp sends the user an email notification that the request was denied.
-
-
Click Create Ticket. The ticket is automatically filled with the details of the request for access.
-
Click Submit to submit the ticket in order to update the firewall rules and allow this user to access the requested application.
The ticket now moves through the steps of the selected workflow. After this ticket is closed by the ticket handler:
- If this ticket is completed, the firewall allows this user to access the application and SecureApp sends the user an email notification that the request has been approved.
- If this ticket is rejected, SecureApp sends the user an email notification that the request has been denied.
How do I get here?
SecureApp > Applications
Was this helpful?
Thank you!
We’d love your feedback
We really appreciate your feedback
Send this page to a colleague