On this page
Monitoring Cisco Meraki Dashboard
Overview
TOS monitors the Cisco Meraki dashboard for policy revision changes.
To see which TOS features are supported for your device, review the SecureTrack Features by Vendor.
TOS supports the following Meraki devices:
- MX Firewall
- Z-series Firewall
Prerequisites
To complete the Cisco Meraki dashboard configuration procedures, you must have the following connection information from the Meraki Dashboard:
|
ID Information |
Description |
|---|---|
|
API Key |
An API Key is the unique ID provided by Cisco Meraki so that the device can communicate with TOS. When you log into the Cisco Meraki site:
|
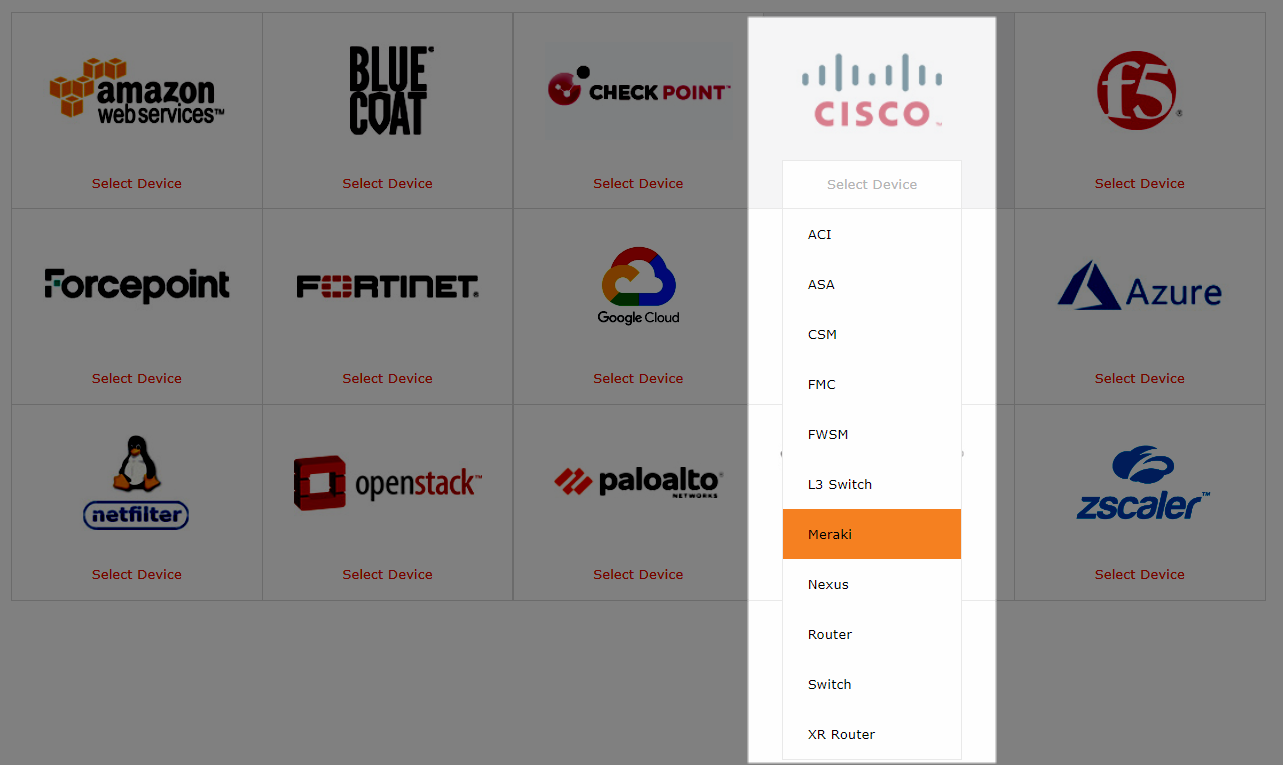
Add a device
-
Select Meraki:
-
Configure the device settings:
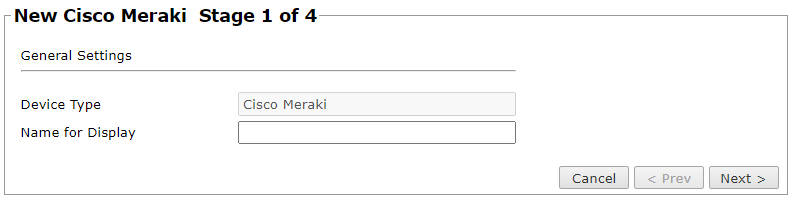
- Name for Display
- Click Next.
-
Configure the TOS connection to the Cisco Meraki device with the API key that you saved (see Prerequisites):
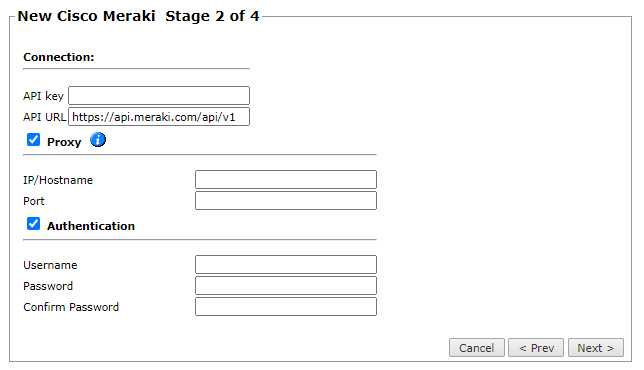
In addition, you can add the ability to connect SecureTrack to the Cisco Meraki device using a local proxy server.
The proxy acts as an intermediary between the client and the server, providing secure access to resources while protecting the server from threats such as malware.
If you connect to the device with a proxy server, select Proxy and enter the Hostname, Port, Username, and Password.
If the proxy performs TLS inspection, you must import the proxy’s trusted certificate into TOS before configuring the proxy. See Import a Proxy Certificate for TLS Inspection.
- (Optional) You can edit the Meraki dashboard URL (API URL) based on geolocation preferences.
- Click Next.
-
In Monitoring Settings, configure the time interval for periodic polling:
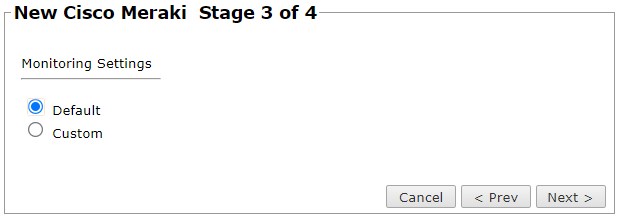
For Cisco Meraki devices, both the Default and Custom options set periodic polling automatically. If you select Custom, you can configure the time interval for periodic polling by selecting Custom settings > Polling frequency. Polling frequency determines how often TOS fetches the configuration from each device. If you select 1 day, you can then select the exact time (hour and minute) for the daily polling.
- Click Next.
-
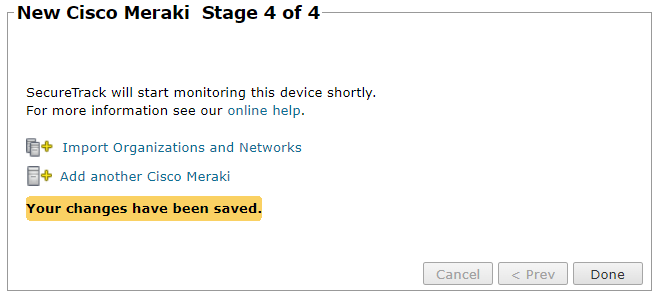
Save the configuration.
The Cisco Meraki device now appears in the Monitored Devices tree.
-
You can now do one of the following:
-
Import Organizations and Networks
-
Add another Cisco Meraki
-
- Select the organizations and networks that you want to import.
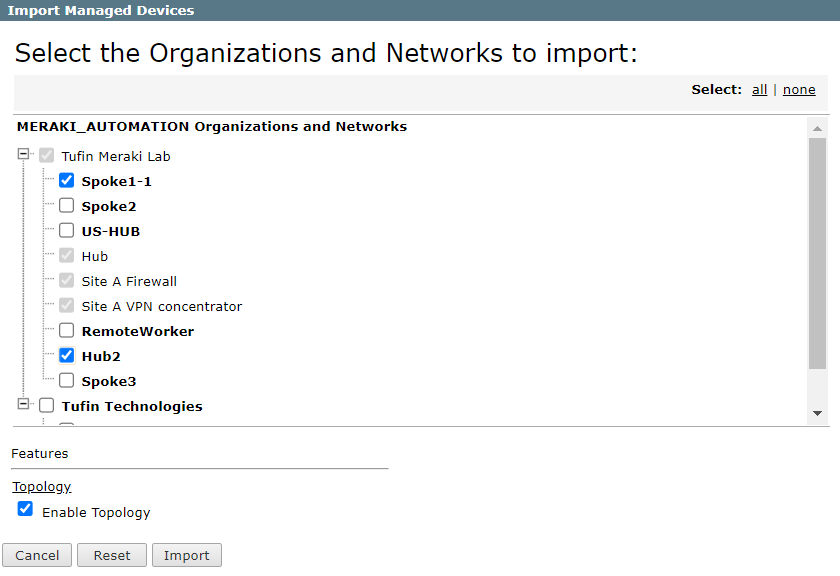
- Enable Topology: Collects routing information for building the network Map.
The Enable Topology check box applies to the entire organization and not to individual networks. If you add or remove networks in the organization, they will not appear in the Topology map. - Click Import.
Configure a monitored device
After you add a device, further configuration options are available.
Options vary depending on your environment.
Example
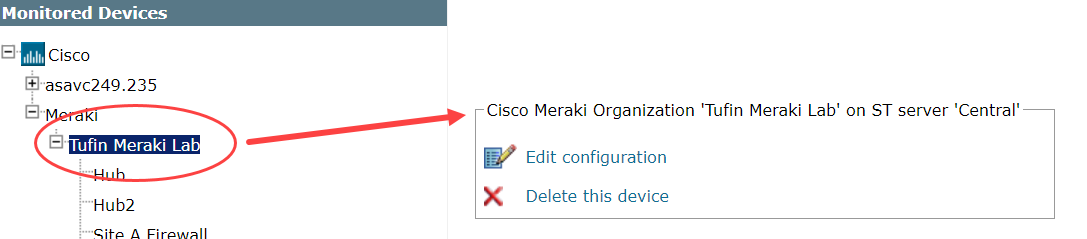
-
Edit configuration: Use the wizard to modify selected device settings. See Add a Device in this topic.
-
Delete this device: Type yes to confirm that you want to delete the device.
How do I get here?
SecureTrack > Monitoring ![]() > Manage Devices
> Manage Devices
Was this helpful?
Thank you!
We’d love your feedback
We really appreciate your feedback
Send this page to a colleague