On this page
Monitoring Aruba CX Devices
Overview
Add Aruba CX switches or CX 10000 distributed service switches to TOS using the Open Policy Model (OPM). OPM expands device coverage in TOS to additional vendors, by providing device connectors to collect the device's configuration and policy data and import it into SecureTrack.
The Aruba device connectors support onboarding Aruba switches and firewalls. SecureTrack connects to these devices over HTTPS/API to pull topology and rule data based on the sync schedule set in Tufin-Integrations.
For supported features, see Features by Vendor in SecureTrack and Features by Vendor in SecureChange.
Prerequisites
-
CX 10000 devices: AFC (Automated Frequency Coordination) and PSM (Privileged Session Manager) access
-
CX Switches: HTTPS API access
-
Customer Portal access to download the OPM package
-
Admin credentials for SecureTrack and SecureChange
-
TOS server:
-
sudo permissions to run the installer
-
File upload permissions to /opt/misc
-
-
On systems with non-Tufin OS, python3 and bzip2 packages installed
Install the OPM package
Install the OPM package from the shell on the TOS server. The steps are identical for both new installations and upgrades.
-
Go to the Download center.
-
Select HPE Aruba Networking Switches (CX).
-
Click Download to Computer.
-
Upload the downloaded file to /opt/misc (recommended) on the TOS server:
where:
<package-name> is the name of the package you downloaded in the format install-<vendor>-1.0.0.aur.run
-
When prompted, enter:
-
SecureTrack Username and Password
-
SecureChange Username and Password
-
-
Wait for the installation to complete. The installer installs PS Proxy and Tufin Integrations if they don't exist. If an older version is installed, the script upgrades it.
These credentials are used by the OPM scripts to make API requests. You can always update them later in Tufin Integrations.
Device properties
The properties for HPE Aruba devices are based on the device type: CX Switch or CX 10000.
CX Switch device properties

Username and Password: The SSH username and password for the device.
CX 10000 device properties
|
Device Property |
Description |
|---|---|
|
AFC username |
The username for authentication to the AFC (Automation Framework Controller) account. |
|
AFC password |
The password for authentication to the AFC account, that matches the account defined for the AFC username. |
|
PSM IP |
The IP address of the Pensando Policy & Services Manager (PSM) server hosting the PSM service. Required for network communication between the AFC and PSM. |
|
PSM user tenant |
Applies to multi-tenant environments. The tenant or domain context under which the PSM user operates. The PSM username and password are scoped to the correct environment. For single-tenant environments, leave empty. |
|
PSM username |
The username for authentication to the PSM account. |
|
PSM password |
The password for authentication to the PSM account defined by the PSM username. |
Add a device
Add an Aruba CX Switch or a CX 10000 distributed service switch with firewall capabilities to TOS.
-
In SecureTrack, go to Monitoring > Devices > Device Viewer.
-
Click Add Device, and then select Add OPM Device.
-
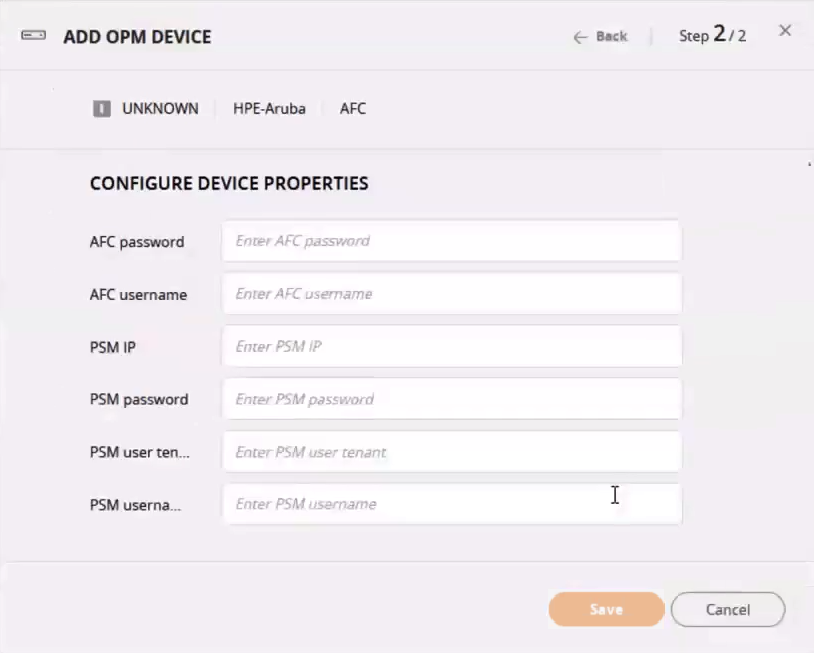
In the ADD OPM DEVICE define the device details:

-
Vendor: The vendor with the device to add, HPE Aruba in this case.
-
OPM agent: The registered agent for the vendor. The agent is displayed only if it was installed successfully.
-
Type: The supported device type, such as CX Switch or AFC.
-
Display name: The name to display for this device in SecureTrack
-
IP: The IP address of the device.
-
-
Click Next.The Configure Device properties form is displayed according to the selected device type.
-
Configure the properties according to the device type, as described in Device properties.
-
To confirm settings and add the device, click Save.
Sync device with SecureTrack
Use Tufin Integrations to configure how SecureTrack syncs with your OPM-managed device. Tufin Integrations is the updated web interface for managing OPM devices, automatically installed by the OPM package if it does not exist.
Configuring SecureTrack to sync with your OPM-managed device includes:
-
Defining user credentials
For API configuration, define the username and password to connect to SecureTrack and SecureChange.
-
Importing devices
Run discovery to import the devices for vendors, and selectively enable and start them for monitoring.
-
Assigning the device to a cluster
You can assign devices to different TOS clusters for monitoring. For example, you can monitor one OPM device from the main cluster and another from a Remote Collector. Remote collectors are available only if they are configured in TOS.
-
Scheduling sync jobs
Schedule automated syncs or trigger a manual sync on demand when monitoring is enabled for the device.
-
Reviewing job history
View per-device status, start/end time, and message after each agent run.
When configuration is complete, SecureTrack runs a script that connects to the device, retrieves configuration data (such as interfaces, routes, and rules), and imports the data. This process replaces real-time monitoring with scheduled or manual data collection.
-
To open Tufin Integrations, do one of the following:
-
Go to https://<tos-vip>/apps/integrations.
-
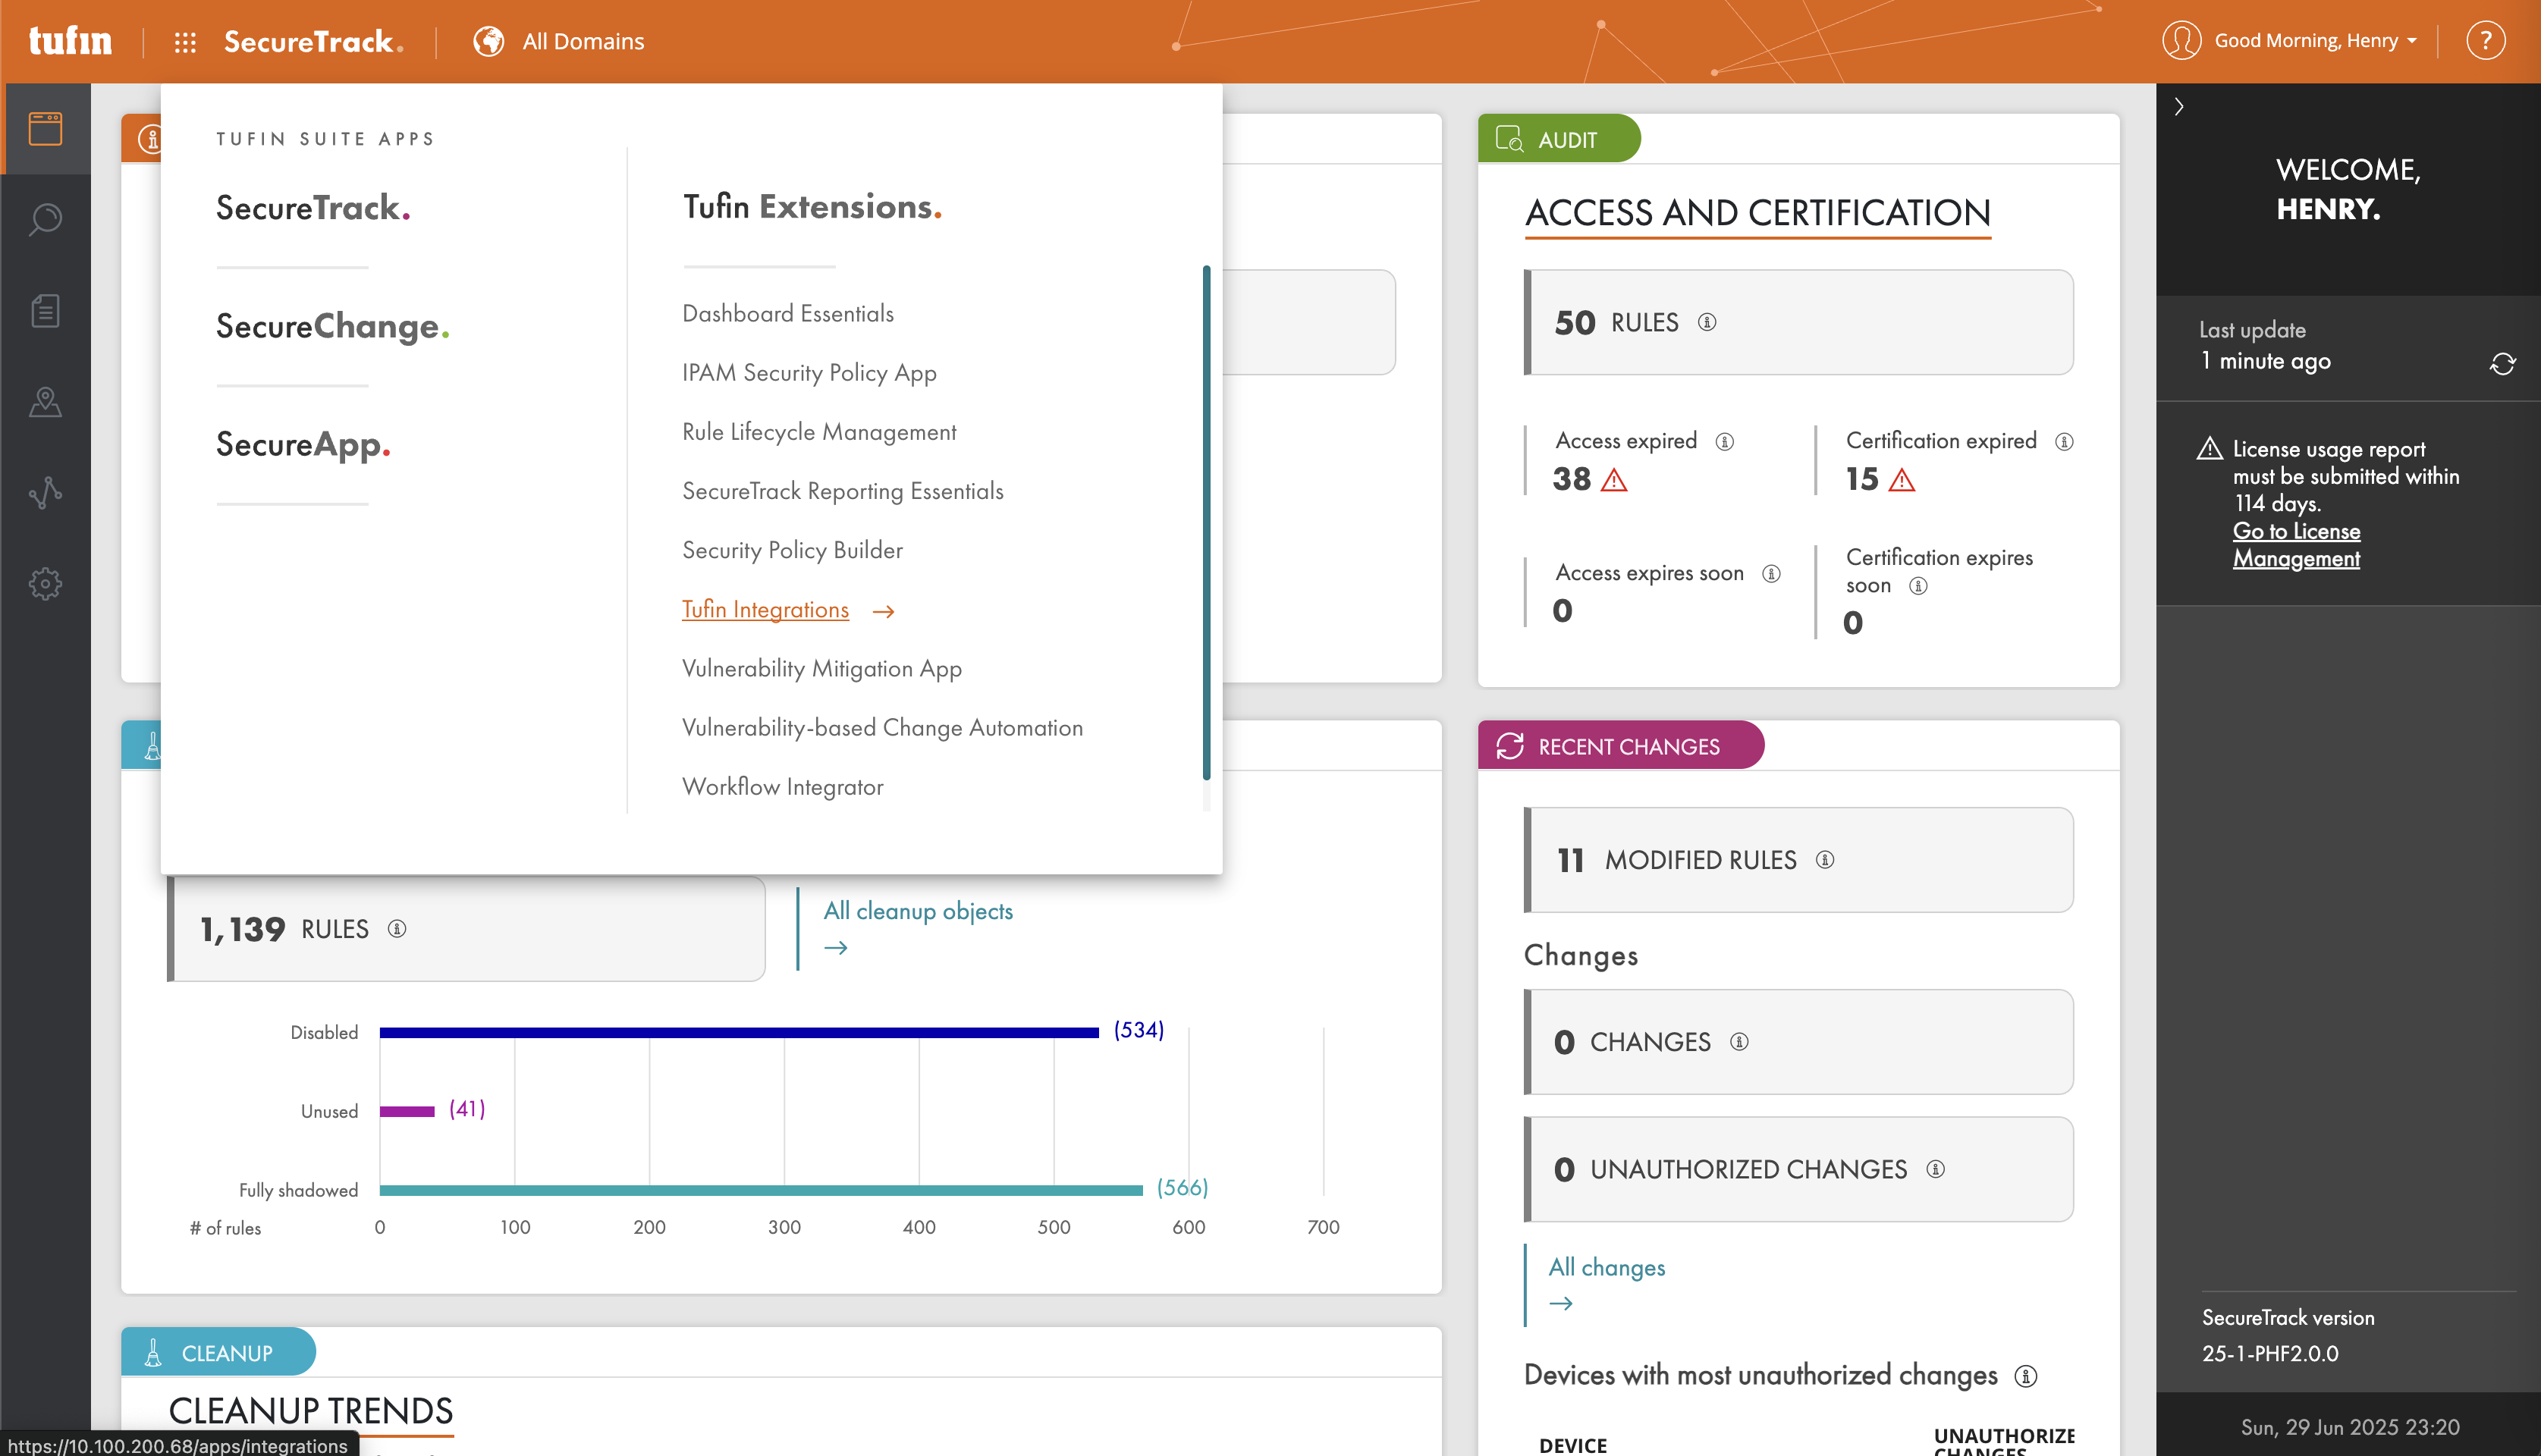
In SecureTrack , from the list of Tufin Extensions , select Tufin Integrations.
-
-
Set the user credentials for Tufin API:
-
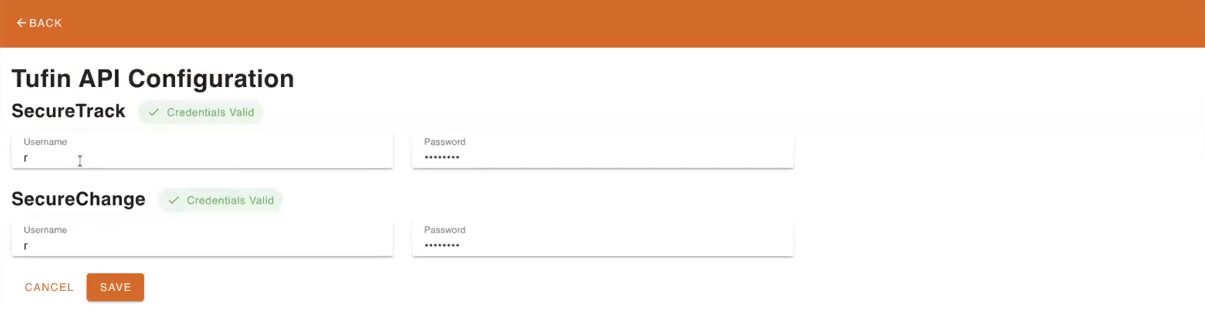
From the DASHBOARD, select Advanced, and then select TUFIN API CONFIGURATION.
-
Define the username and password credentials for SecureTrack and SecureChange.
-
Click Save.
Credentials are automatically validated, and flagged if incorrect.
-
-
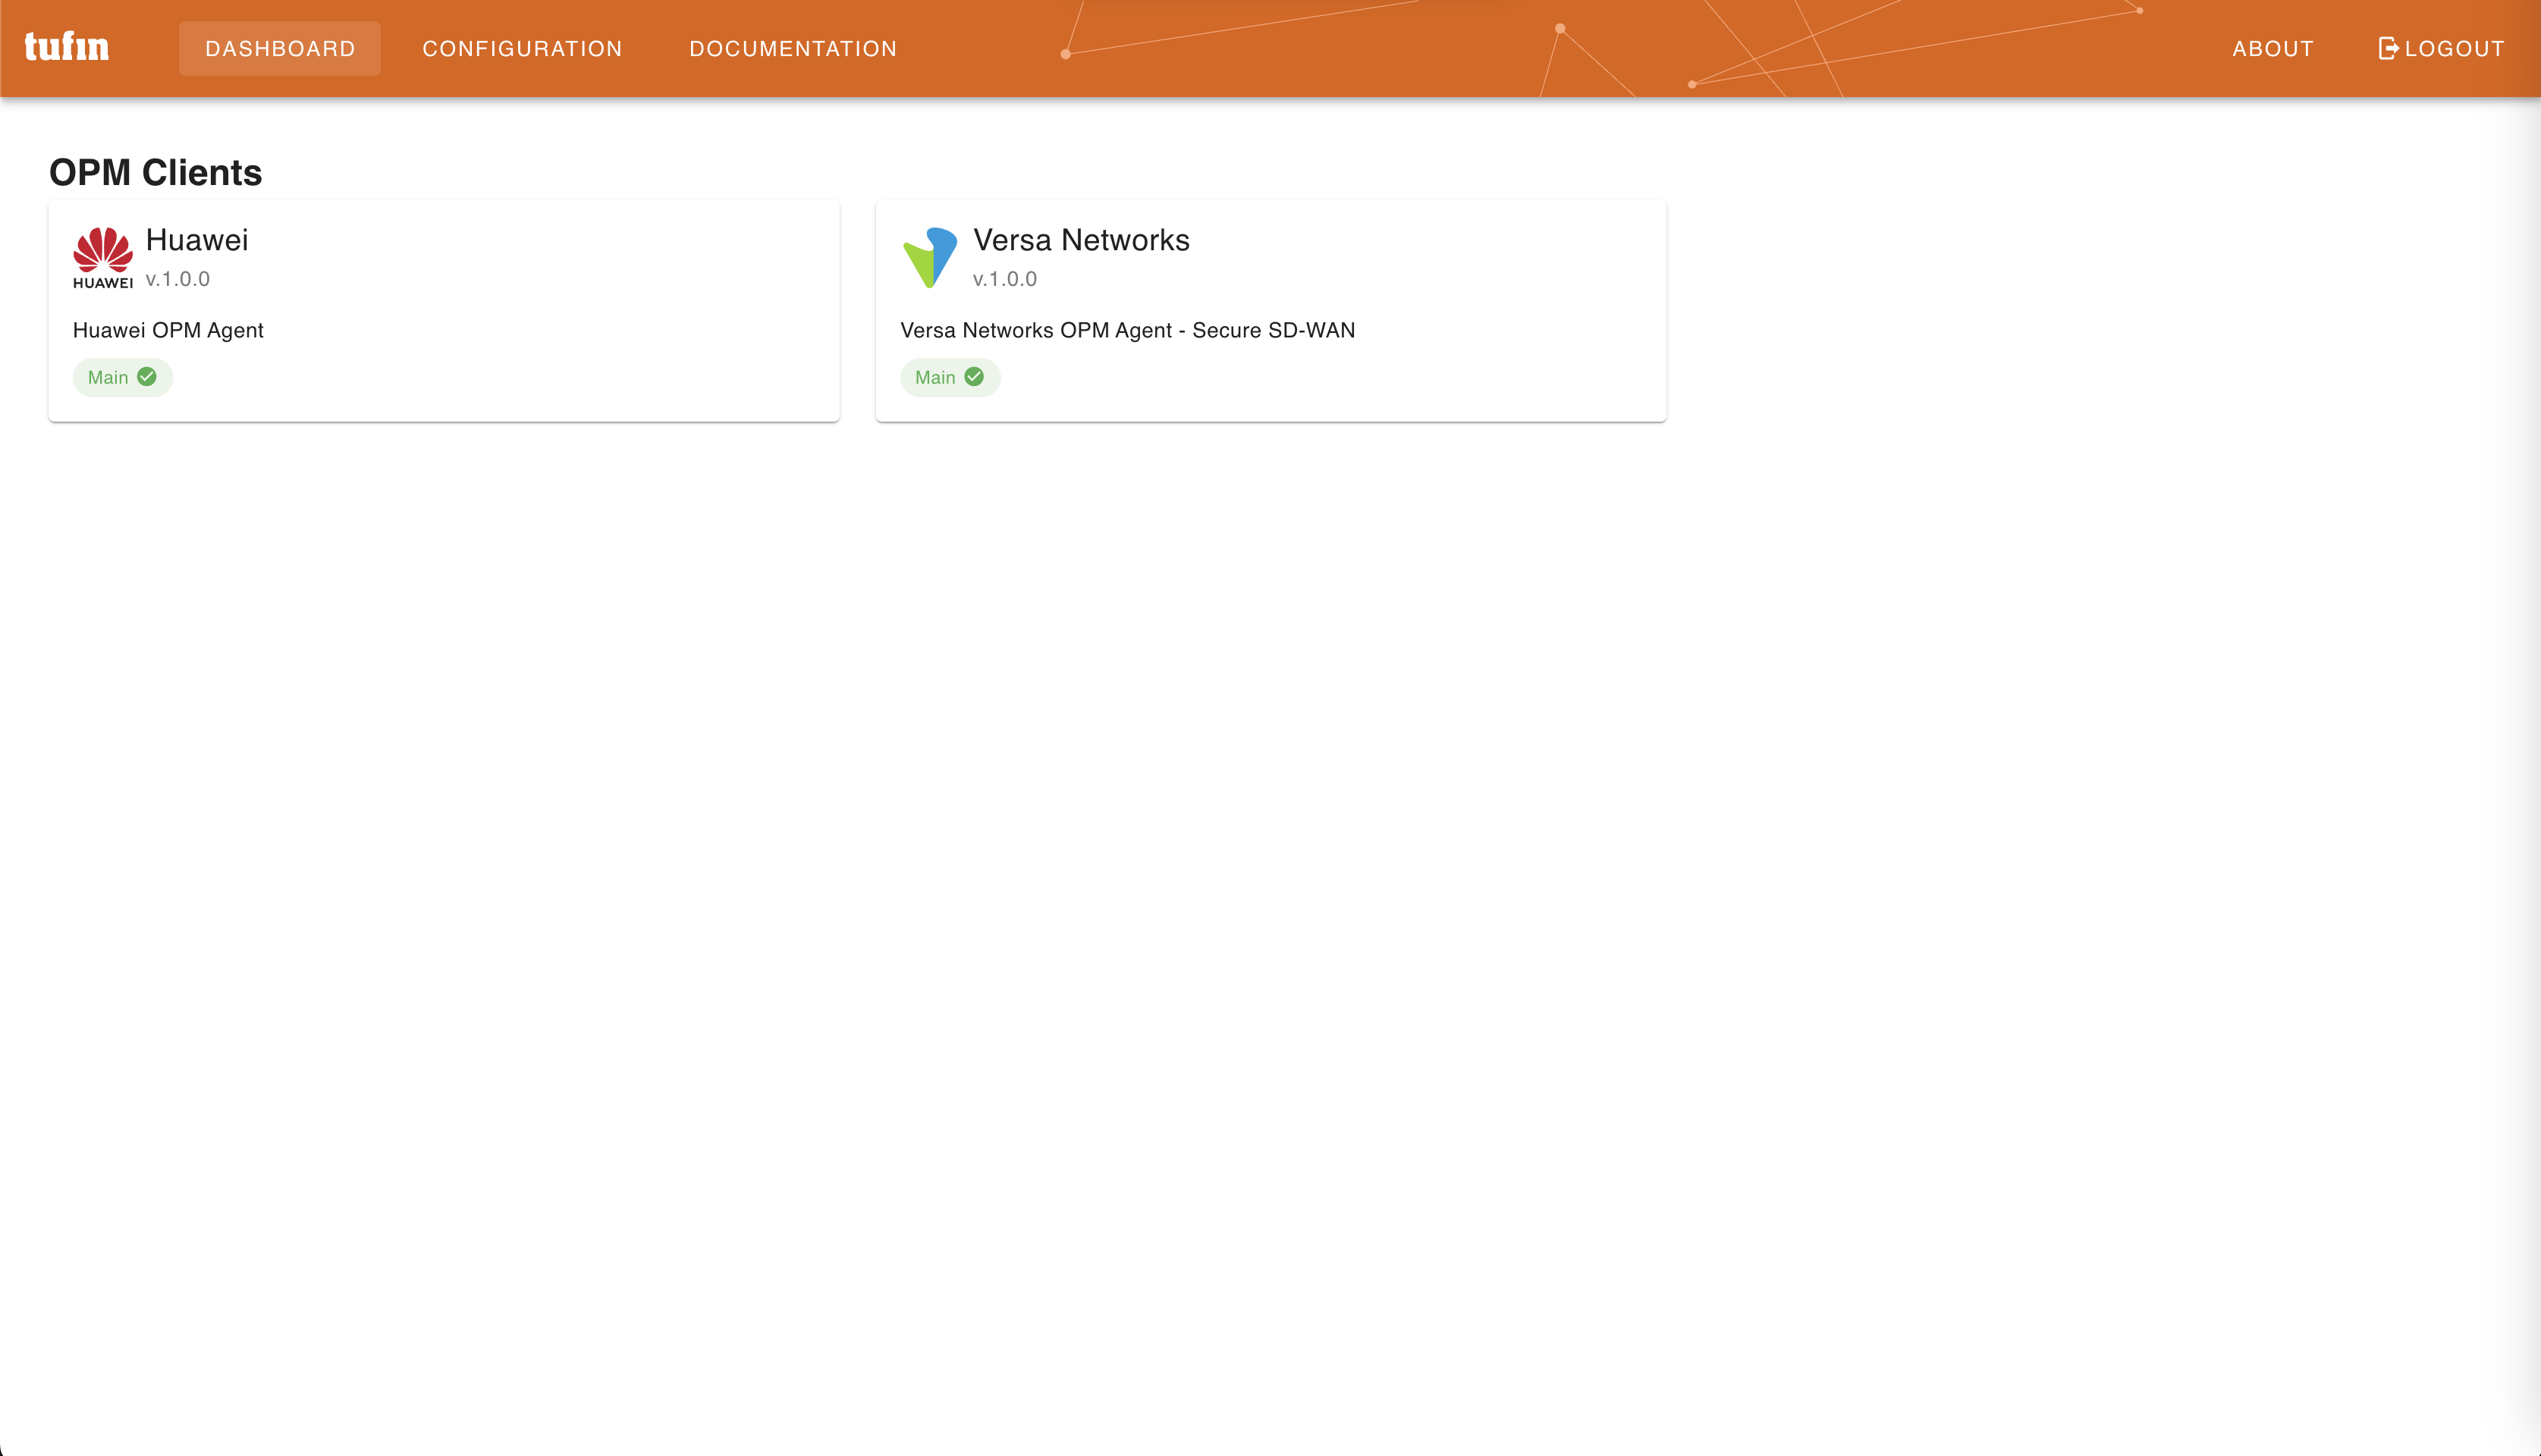
Return to the Dashboard and select the OPM client or vendor with the devices to monitor.
-
To import devices, do the following:
-
Click IMPORT DEVICES and then click RUN DISCOVERY.
The devices are displayed in the list.
-
Select the parent management device, or select a specific device.
-
Right-click and select Enable.
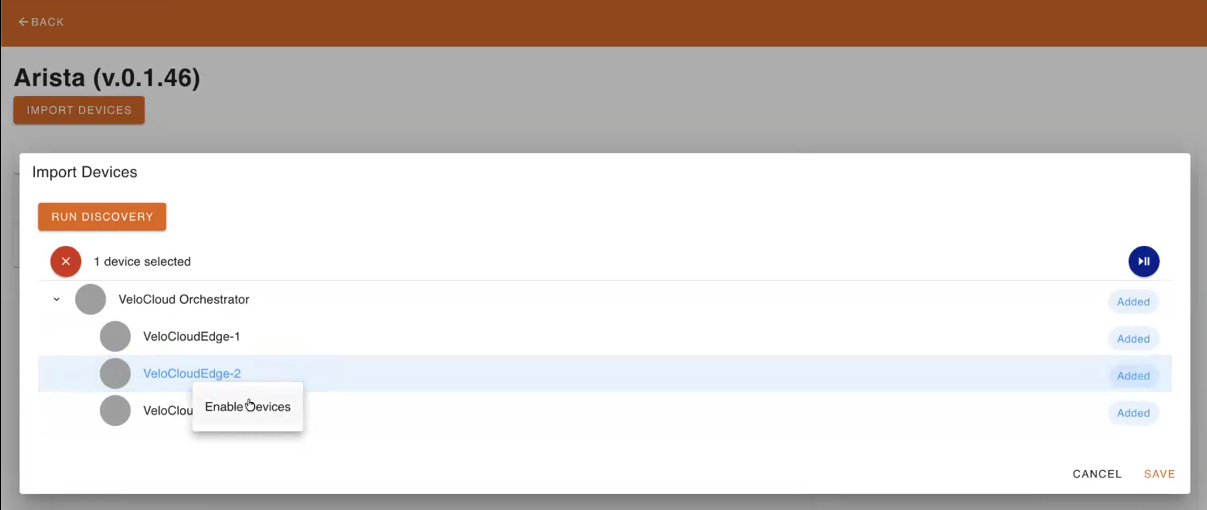
-
Click Save.
The enabled devices are added to the vendor list.
-
-
To monitor enabled devices, right-click the device and select Start.
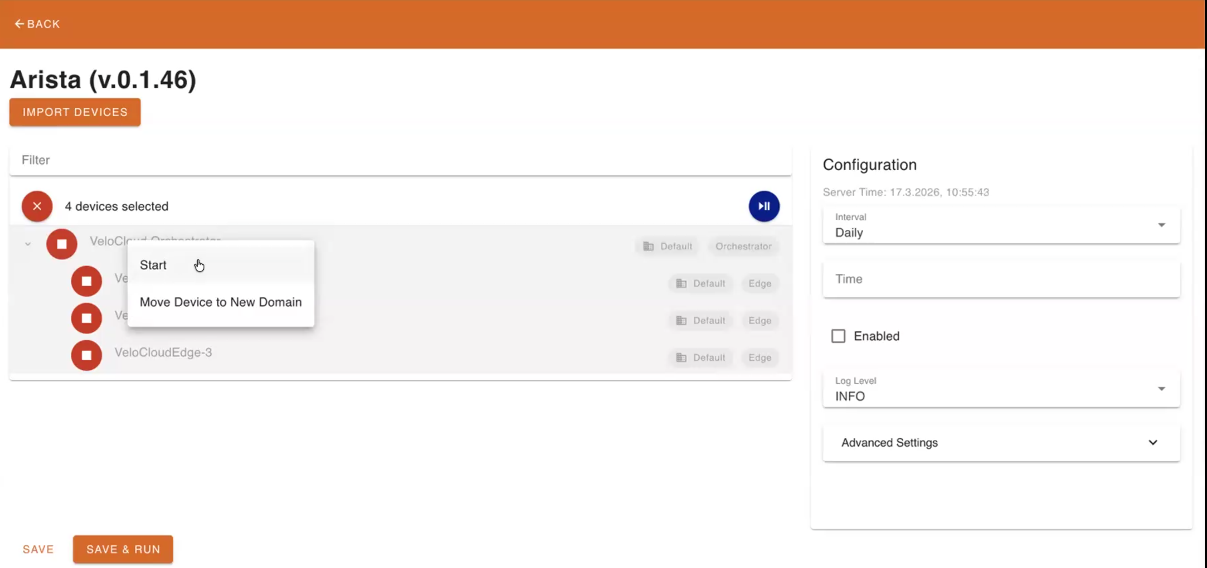
-
From the list of available devices, right-click the required device, and select the cluster from which to monitor the device:
-
Migrate to main: Monitor the device from the primary cluster.
-
Migrate to <remote_collector>: Monitor the device from a Remote Collector, for example, RC4. Available only if a Remote Collector is configured in TOS. The actual name of the Remote Collector differs by environment.
For automated or manual sync to run, you must enable monitoring for the device. -
-
In the Configuration section, set the automated sync schedule:
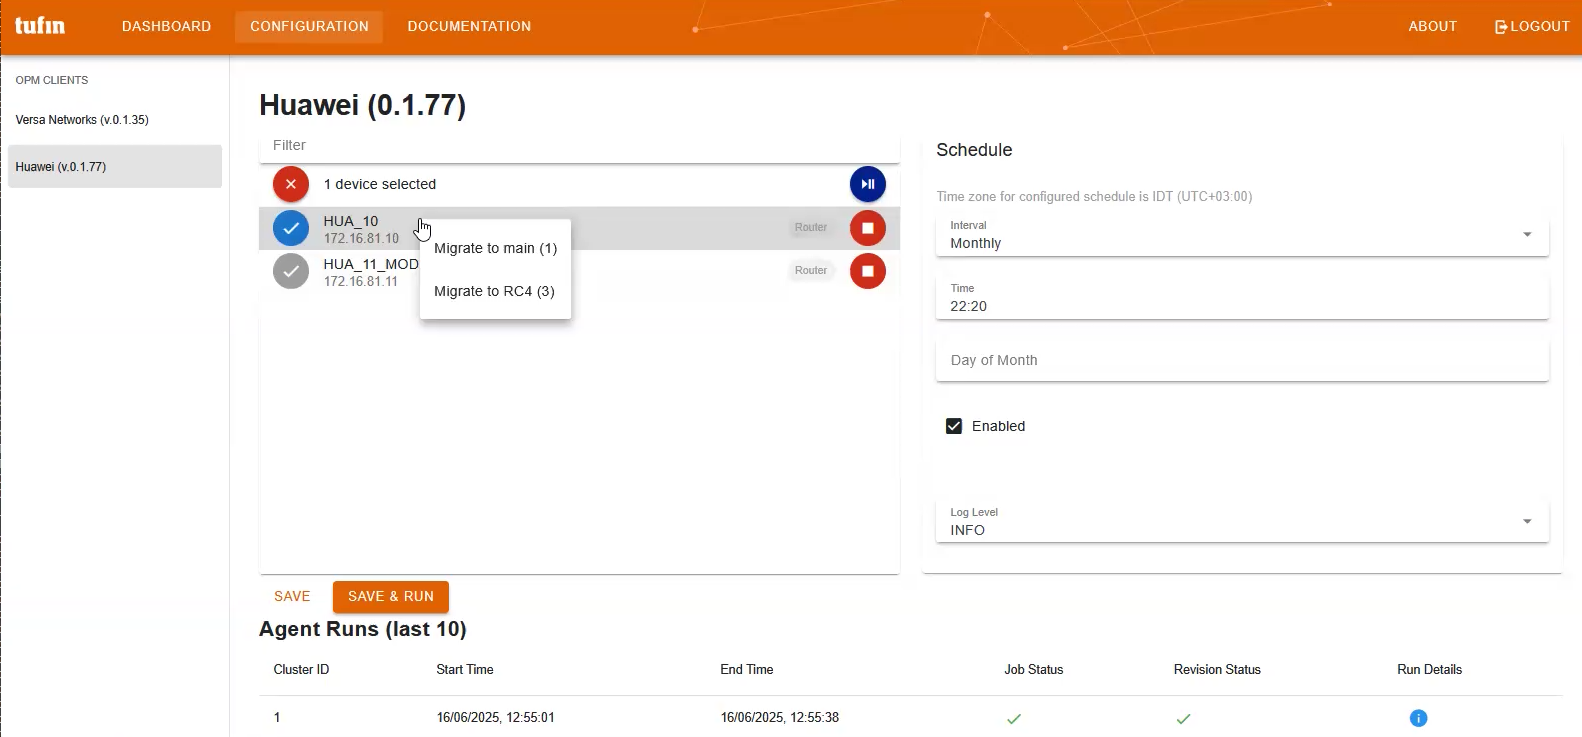
-
Set Schedule interval, for example: daily, weekly, or monthly.
-
Choose the Time or Day of execution.
-
Select the Log Level. The default is INFO.
-
To enable the script, select Enabled.
-
Click Save.
-
-
To start collecting revisions immediately, click SAVE & RUN.
If not triggered manually, the sync is triggered as scheduled.
Every script execution retrieves the configuration from all devices assigned to the vendor’s OPM agent. -
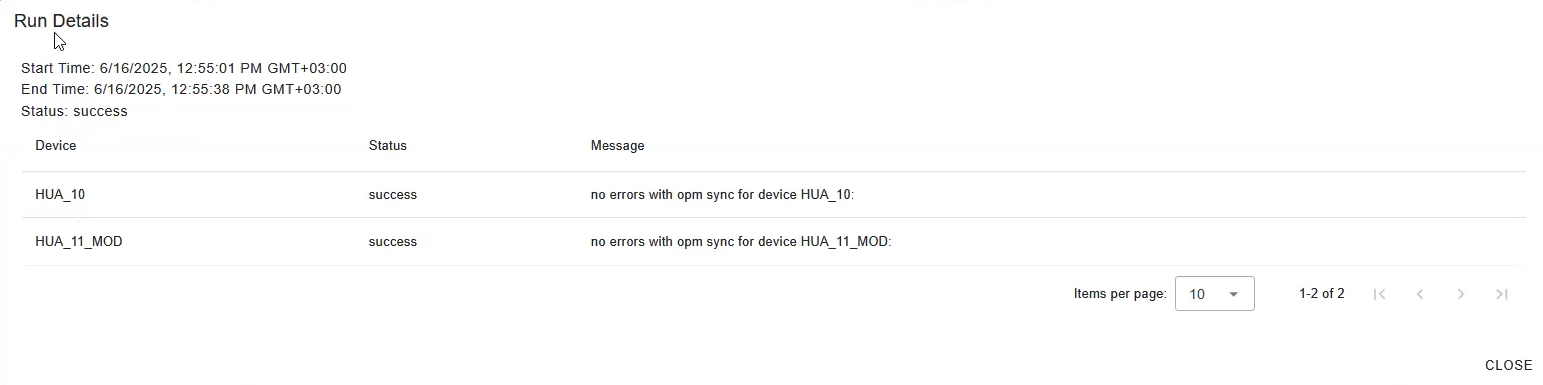
Verify the results in the Run Details popup:
In the Agent Runs table, click the blue information icon
 in the Run Details column.
The popup shows the status, start and end time, and a message for each device in the run.
How do I get here?
SecureTrack > Monitoring > Devices > Device Viewer
Was this helpful?
Thank you!
We’d love your feedback
We really appreciate your feedback
Send this page to a colleague