On This Page
Update TOS Aurora
Overview
This procedure is for updating TOS to R24-2 and it is identical for all platforms and operating systems.
Before starting, create a backup and export it to an external location in case you need to roll back. After the update completes successfully, make a new backup as previous backups made on one product version cannot be restored to another.
You can update from up to three major TOS Aurora versions back - see TOS Release History and Update Paths.
For all information on this release. including new features, resolved and known issues, EOL announcement and additional information, see the R24-2 Release Notes.
For all other installation and update options, see the appropriate procedure in the table of contents.
How Should I Update My Deployment?
Worker Nodes
Only the primary data node needs to be update. It will automatically update TOS on all other worker and data nodes in the same cluster. The TOS CLI will be updated on the other nodes when you next run a TOS CLI command on them.
Remote Clusters
All clusters need to be running the same TOS version. Therefore, make sure to update the primary data node in both the central cluster and remote clusters. Update the central cluster first.
High Availability (HA)
If you are updating a high availability deployment, you are going to need to prepare the other data nodes before updating TOS. This will require logging into them separately in a different session.
Disaster Recovery (DR)
If you have disaster recovery, first update the active deployment and then update the standby deployment.
Prerequisites
For R24-2 PGA.0.0, if you are using NFS, your backup server must be running NFS 4.
From R24-2 PHF1.0.0, the rpcbind service is disabled by default when updating to this version, preventing NFS 3 from working. However, it can be enabled by running the commands:
Port and Services
-
If your deployment incorporates remote clusters and you are updating from a release lower than R23-1, be aware that an additional port 9090 is now required for successful running of TOS - see remote collector ports.
Required Steps Before Starting
-
Run the command tos status. In the output, make sure system status is "OK", all nodes are "healthy" and under "Disk usage" /opt is not more than 70%. If any of these conditions are not met, the update will fail.
-
Make sure you have at least 25 GB free on the primary data node in the
/tmpdirectory. -
If you monitor devices managed by a management device/domain that does not have a dedicated license because it inherits its license status from its monitored devices/domains e.g. FMC, FMG, Panorama, make sure all such monitored devices/domains are licensed or removed. Failure to do this will cause the management device/domain to be unlicensed after the update.
-
If you are updating a remote collector cluster:
-
Do not start the update until the update to the central cluster has completed.
-
It must run it under the same release as the central cluster.
-
-
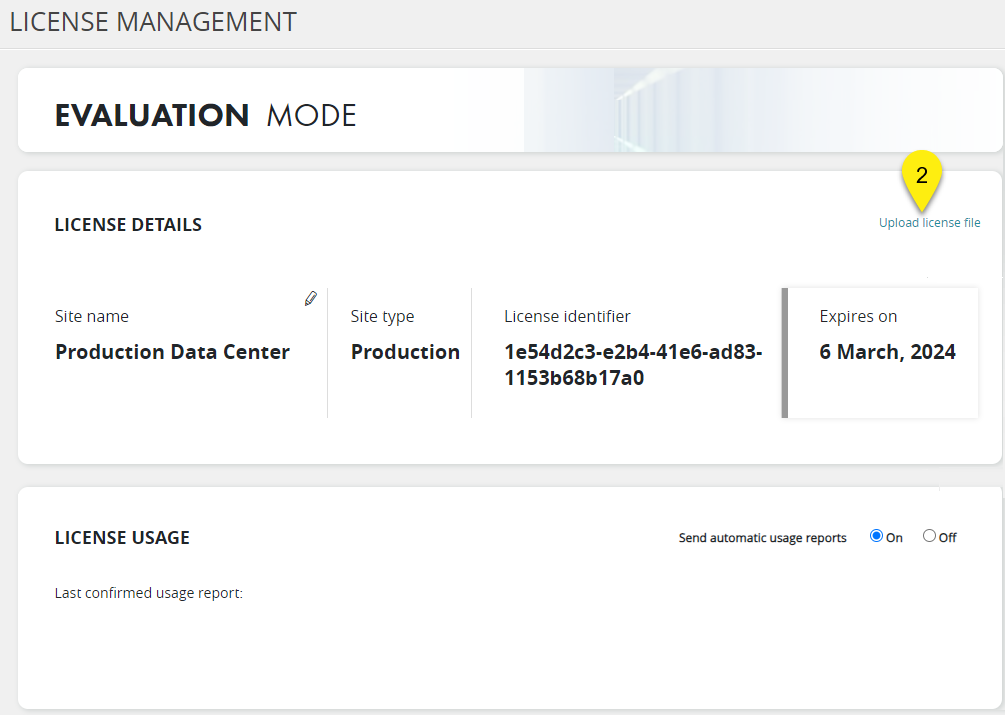
You must have a valid license before starting the update, otherwise the procedure will abort.
-
Select Admin
 > Licenses.
 -
If your license has expired, or if there is no license uploaded, upload a valid license. For more information see, Uploading License Files to TOS (Solution Tiers)
The License Management page appears.
-
-
Create a backup of the installation file that was used for your current TOS Aurora installation - /opt/tos/tos.tar - to a directory outside of /opt/tos This is necessary in case there is a need to roll back.
-
Create a backup of your TOS Aurora data (see One-Time Backup Procedure).
-
Check if the etcd database is on a separate disk. If it is not on a separate disk, you are required to move it before updating TOS.
Run the following command:
If the output contains /var/lib/rancher/k3s/server/db, etcd is already on a separate disk, and you do not need to perform this procedure.
If no output is returned, see Mount the ETCD Database to a Separate Disk.
-
If you use automated provisioning, make sure there are no queued provisioning tasks. You can check this using the waiting_tasks API.
-
 Verify that the DNS server can resolve its own address using a reverse lookup
Run:
If the name of the server is displayed, the DNS server can resolve its own address using a reverse lookup.
Example Output
[<ADMIN> ~]$ sudo nslookup  1.2.3.4
4.3.2.1.in-addr.arpa	name=EXAMPLE.company.com
If the name of the server is not displayed, set it using a reverse lookup entry at /etc/hosts.
Example Output where
1.2.3.4 4.3.2.1.in-addr-arpawas added.[<ADMIN> ~]$ sudo cat /etc/hosts 127.0.0.1 localhost localhost.localdomain localhost4 localhost4.localdomain4 ::1 localhost6 localhost6.localdomain6 1.2.3.4 admin.company.com admin 2.3.4.5 5.4.3.2.in-addr-arpa
-
See the R24-2 Pre-Installation Information in the Release Notes
Pre-Update System Evaluation
TOS precheck assesses the health of your TOS environment, identifying potential issues that can impact your update.
This procedure must be performed at least one week before the update of your TOS Aurora central cluster. It is not required on remote clusters. Run TOS precheck to check for any misconfigurations that might interfere with the success of the update, and send the output to Tufin Support for assessment. Do not begin the update procedure until Tufin Support sends a confirmation. The precheck tool must be run on all data nodes.
-
If you have downloaded the precheck previously, delete it.
-
Go to the Download Center > Product > Tools, and download the latest version of ARK. The version number is appended to the name.
-
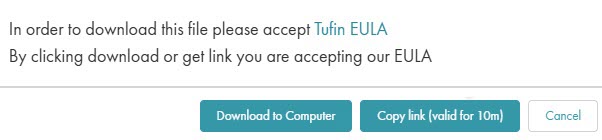
Select the method for downloading the installation package: Download to Computer or Copy link (valid for 10m). Using the link requires the server to have access to download from https://tosportaldownloads.tufin.com.
-
If you downloaded the package, upload it from your local computer to the primary data node to the directory /opt. Upload the file as is; do not extract it first.
-
If you copied the link, run the following command. If the link has expired, get a new link from the Download Center.
where <LINK> is the link you copied from the Download Center.
-
Extract the contents of the compressed file:
where <FILENAME> is the compressed file.
The file,
ark, is extracted. -
Copy the extracted file to /usr/local/bin.
-
If prompted, confirm the overwrite
-
Add permissions to run the file:
-
Run the TOS precheck:
The TOS precheck creates an output file -
/tmp/tos_check/tsc-[HOSTNAME]-[DATETIME].tgz -
Download the output file to your personal computer.
-
In the Tufin portal, go to Support Center > System Evaluation.
-
In the Upload the TOS Precheck output section, upload the output file, and click Submit for Analysis.
-
Select the TOS release version you currently have installed.
-
Click Submit for Analysis.
An SR will be automatically opened and Tufin Support Engineers will contact you.
-
Do not proceed with the update until you receive confirmation from Tufin Support.
Update Procedure
Download New TOS Aurora Version
-
Run the tmux command.
-
Go to /opt/tufin/data.
-
Go to the Download Center and click the TOS R24-2 PHF6.0.0 installation file.
-
Select how you want to download the installation package: Download to Computer or Copy link (valid for 10m).
-
If you copied the link, run the following command within ten minutes:
Where <LINK> is the link you copied from the Download Center.
Make sure the server can download from https://tosportaldownloads.tufin.com.
-
If you downloaded to the computer, copy the compressed file from your local computer to the server.
-
Verify the integrity of the TOS installation packages by entering the following commands and comparing the output with the checksum information.
-
Extract the TOS run file from its archive.
[<ADMIN> ~]$ sha256sum tos-xxxx-xxxxxxxx-final-xxxx.run.tgz[<ADMIN> ~]$ sha1sum tos-xxxx-xxxxxxxx-final-xxxx.run.tgzThe run file name includes the release, version, and build number.
TOS file example: R24-2-pga0.0-final-4577.run
Check System Compatibility for Update
The pre-check performs all the necessary validations required for updating TOS. If an issue is encountered, the pre-check stops and the issue is printed to the output.
-
Unpack the CLI of the new TOS version.
-
Run the command:
In some cases, the CLI will prompt you to run additional commands such as tos update prepare -d. If you are running an HA environment, you will be instructed to prepare each node. Follow the process as prompted.
If the output returns an issue, contact Tufin Support.
Revert CLI to Previous Version
If you are unable to proceed with the update immediately but need to continue working in your environment, you must revert the CLI to its previous version. This will restore compatibility and allow you to resume using CLI commands.
Run a CLI command from the previous version, for example:
The following warning appears:
-
Type "y".
The previous CLI version is restored.
Update TOS Aurora
-
Log in to the primary data node using SSH as user tufin-admin or another user with sudo or root privileges.
-
Check your current version by running the following command:
-
Check that your cluster status is healthy.
-
Run the following command on the primary data node:
Example Output
[primary data node]# systemctl status k3s [root@TufinOS ~]# systemctl status k3s Redirecting to /bin/systemctl status k3s.service k3s.service - Aurora Kubernetes Loaded: loaded (/etc/systemd/system/k3s.service; enabled; vendor preset: disabled) Active: active (running) since Tue 2021-08-24 17:14:38 IDT; 1 day 18h ago Docs: https://k3s.io Process: 1241 ExecStartPre=/sbin/modprobe overlay (code=exited, status=0/SUCCESS) Process: 1226 ExecStartPre=/sbin/modprobe br_netfilter (code=exited, status=0/SUCCESS) Main PID: 1250 (k3s-server) Tasks: 1042 Memory: 2.3G -
In the output under the line k3s.service - Aurora Kubernetes, check that two lines appear - Loaded... and Active... similar to the example above. If they appear, continue with the next step, otherwise contact Tufin Support for assistance.
-
-
Make sure all users are logged out from the browser.
-
Update TOS:
When the command completes, you will again be able to run any TOS CLI command.
-
If the update returns an error, see Update Errors.
-
Verify.
Check again the tos version as described in update procedure step 2 above. Make sure that the version displayed is the one to which you intended to update.
Check again the cluster status.
Example Output
[primary data node]# systemctl status k3s
[root@TufinOS ~]# systemctl status k3s
Redirecting to /bin/systemctl status k3s.service
 k3s.service - Aurora Kubernetes
   Loaded: loaded (/etc/systemd/system/k3s.service; enabled; vendor preset: disabled)
   Active: active (running) since Tue 2021-08-24 17:14:38 IDT; 1 day 18h ago
     Docs: https://k3s.io
  Process: 1241 ExecStartPre=/sbin/modprobe overlay (code=exited, status=0/SUCCESS)
  Process: 1226 ExecStartPre=/sbin/modprobe br_netfilter (code=exited, status=0/SUCCESS)
 Main PID: 1250 (k3s-server)
    Tasks: 1042
   Memory: 2.3G
In the output under the line k3s.service - Aurora Kubernetes, check that two lines appear - Loaded... and Active... similar to the example above. If they appear, continue with the next step, otherwise contact Tufin Support for assistance.
-
Check TOS Status
-
On the primary data node, check the TOS status.
-
In the output, check if the System Status is Ok and all the items listed under Components appear as Ok. If this is not the case, contact Tufin Support.
Example output for a central cluster data node:
[<ADMIN> ~]$ tos status
[Mar 28 13:42:09]  INFO Checking cluster health status
TOS Aurora
Tos Version: 24.2 (PRC1.1.0)

System Status: "Ok"

Cluster Status:
   Status: "Ok"
   Mode: "Multi Node"

Nodes
  Nodes:
  - ["node1"]
    Type: "Primary"
    Status: "Ok"
    Disk usage:
    - ["/opt"]
      Status: "Ok"
      Usage: 19%
  - ["node3"]
    Type: "Worker Node"
    Status: "Ok"
    Disk usage:
    - ["/opt"]
      Status: "Ok"
      Usage: 4%

registry
  Expiration ETA: 819 days
  Status: "Ok"

Infra
Databases:
- ["cassandra"]
  Status: "Ok"
- ["kafka"]
  Status: "Ok"
- ["mongodb"]
  Status: "Ok"
- ["mongodb_sc"]
  Status: "Ok"
- ["ongDb"]
  Status: "Ok"
- ["postgres"]
  Status: "Ok"
- ["postgres_sc"]
  Status: "Ok"

Application
Application Services Status OK
Running services 50/50

Remote Clusters
Number Of Remote Clusters: 2
  - ["RC"]
     Connectivity Status:: "OK:"
  - ["RC2"]
     Connectivity Status:: "OK"

  Backup Storage:
  Location: "Local
s3:http://minio.default.svc:9000/velerok8s/restic/default "
  Status: "Ok"
  Latest Backup: 2024-03-23 05:00:34 +0000 UTC
Example output for a remote cluster data node:
[<ADMIN> ~]$ tos status [Mar 28 13:42:09] INFO Checking cluster health status TOS Aurora Tos Version: 24.2 (PRC1.0.0) System Status: "Ok" Cluster Status: Status: "Ok" Mode: "Single Node" Nodes Nodes: - ["node2"] Type: "Primary" Status: "Ok" Disk usage: - ["/opt"] Status: "Ok" Usage: 19% registry Expiration ETA: 819 days Status: "Ok" Infra Databases: - ["mongodb"] Status: "Ok" - ["postgres"] Status: "Ok" Application Application Services Status OK Running services 16/16 Backup Storage: Location: "Local s3:http://minio.default.svc:9000/velerok8s/restic/default " Status: "Ok" Latest Backup: 2024-03-23 05:00:34 +0000 UTC -
-
HA only. Copy the TOS CLI to all data nodes.
On the primary data node, copy TOS from /usr/local/bin/ to the same location on the other data nodes.
-
Make a new backup.
Before allowing users to start work, make a new one-time backup. This is necessary because the data schemas have been modified and any backups made before the update can no longer be restored to the new version of the product. See Backup Procedure.
-
If you monitor FortiManager devices, add a SAN signed certificate to each device.
-
To enable automatic license usage reporting, requests from user browsers to the sub-domain aus.tufin.com must be allowed. For more information, see Sending License Usage Reports Automatically.
-
Enabled by default, system information is sent periodically to Tufin Support for the purpose of troubleshooting and identifying performance issues. It can be disabled (see Sending Cluster Health Status). The information includes:
-
DB status and size
-
Backup status
-
Kubernetes status and metrics
-
CPU metrics
-
Memory status
-
I/O
-
Configuration changes
-
TOS status
-
Cluster performance
It does not include IP addresses, personal user information, or device information. All the information sent is encrypted and is accessible only to Tufin support teams.
The information is sent to Tufin from TOS users' browsers to the Tufin sub-domain
mailbox.tufin.com, therefore requests from user browsers to this sub-domain must be allowed. -
-
Make sure users clear their browser cache.
-
Reactive your license if necessary.
In some cases, particularly when hardware is changed, license validity gets lost in the update process. If activation is lost, this will not limit the functionality of TOS Aurora but future update will not be possible until the license is reactivated.
-
Check the status - go to Admin > Licenses. The License window appears.
- If the status shown in the window is anything other than Activated, follow the instructions in Activate License.
-
Where <user> is the user on the data node you are connecting with and <non-primary data node> is the IP address of the non-primary data node.
Update Errors
The TOS update has several steps on which a validation is performed to identify issues that can impact the update and prevent it from completing (for example: missing license file, missing backup file, node stability). If an issue is detected, the output returns an error with detailed information and instructions on how to proceed.
These instructions include three possible courses of actions:
-
Continue the update: Contact Tufin support to resolve the issue. After resolving the issue, continue the update from the point where it stopped. Continue is not available for all steps.
-
Abort the update: Abort the update and revert back to the old CLI. Abort is not available for all steps.
-
Contact customer support: This is relevant for errors where you do not have the option of continuing or aborting.

