On This Page
Updating Generation 3.5 Appliance Firmware
Appliances T-510, T-1100 and T-1100 XL are being phased out and will reach EOL (end of life) in June 2025.
Warranties that expire after June 2025 will remain in effect until their expiry date, but they cannot be extended. For continued performance, reliability and support we recommend upgrading to the latest Tufin appliances.
Overview
This topic presents the required steps to update the firmware (flash the BIOS) in your Generation 3.5 (T-510/T-1100/T-1100XL) appliance.
Before you flash the BIOS, you will identify the current firmware version on your appliance and save the current settings. After you flash the BIOS, you will validate the flash. In each of these steps (excluding the flash step), you have an option to use one of two methods:
-
RMM: This method requires access to the remote management module (RMM) system - Intel BMC.
-
Appliance console: You must attach a monitor and keyboard to your appliance.
Prerequisites
Prepare USB Drive
Before you begin updating the firmware on your appliance, you must have a single partition USB drive with 2 GB available storage formatted to FAT32.
-
Download this file - Download G3.5 firmware package- from the Tufin Download center.
The download file contains all firmware version updates, each in a separate folder. When performing the upgrade, you will use these files to upgrade the firmware on the appliance.
-
Extract the contents to the USB drive.
Back up TOS Data
Updating the firmware should not affect the hard drives or storage devices. However, before changing the firmware, we always recommend backing up Tufin Orchestration Suite (TOS) and storing the backup externally.
Identify Current Firmware Version
Overview
Before any firmware update, you must identify the current firmware version on your appliance to determine the update path. You will update the current version with each version in the supported update path (which becomes the current version) up to and including the target version.

The following table shows the supported update path.
|
Current Version |
Supported Update Version |
|---|---|
| 01.01.0024 | 01.01.1029 |
| 01.01.0019 | 01.01.0024 |
| 01.01.0005 | 01.01.0019 |
For each version in the Current column, you update to the version in the Supported column. For example, if your current version is 01.01.0019 and the target version is 01.01.1029, you must first update to 01.01.0024 and then from 01.01.0024 to 01.01.1029. The update process is identical for all versions.
Identify Firmware Version
Identify your current firmware version using one of these methods:
-
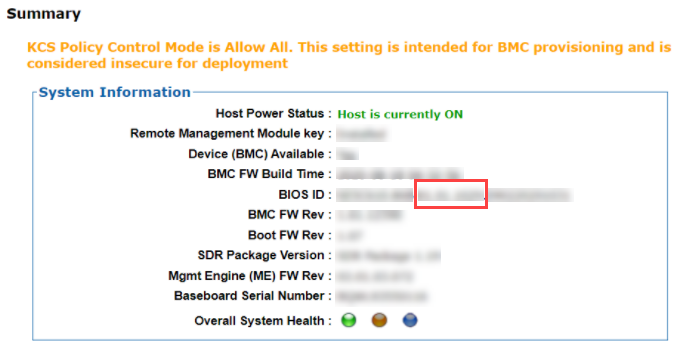
Login to your RMM system (see Configuring the RMM for Generation 3.5 Appliances).
-
On the System Information page, you can find the current BIOS version.
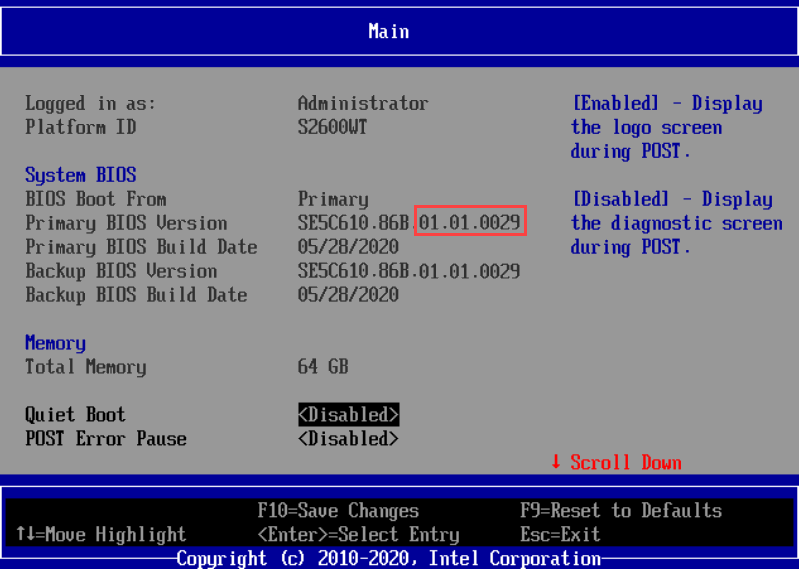
- Power on/reboot your Tufin appliance.
-
During the Power-on self-test (POST), press the F2 key to access the BIOS setup utility.
-
From the Main menu, press the F9 key to load the BIOS defaults.
Save Your Current Firmware Settings
We recommend that you save your current firmware settings. These settings include the appliance serial number, appliance part number, and chassis number. You will use this information when you flash the BIOS.
Save your appliance's current firmware settings using one of these methods:
-
Login to your RMM system (see Configuring the RMM for Generation 3.5 Appliances).
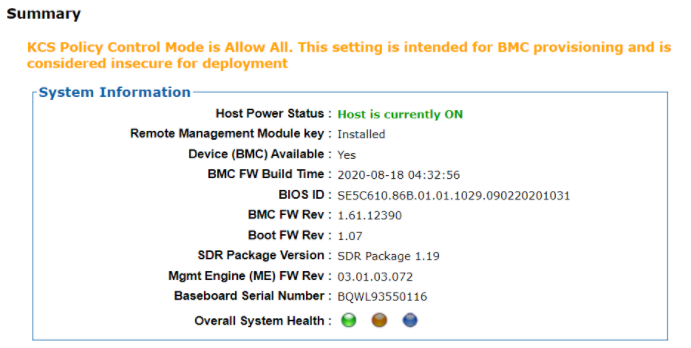
-
Copy the contents of the System Information Summary page and save this information externally.
-
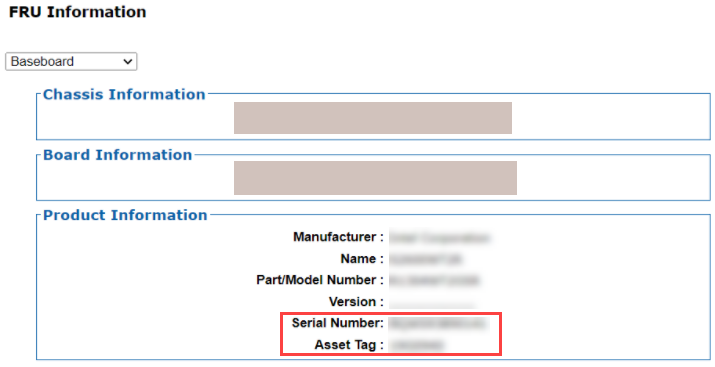
Navigate to the Field Replaceable Unit (FRU) Information page.
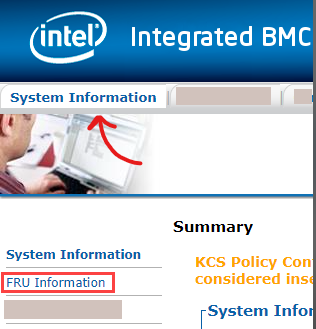
The following appears:
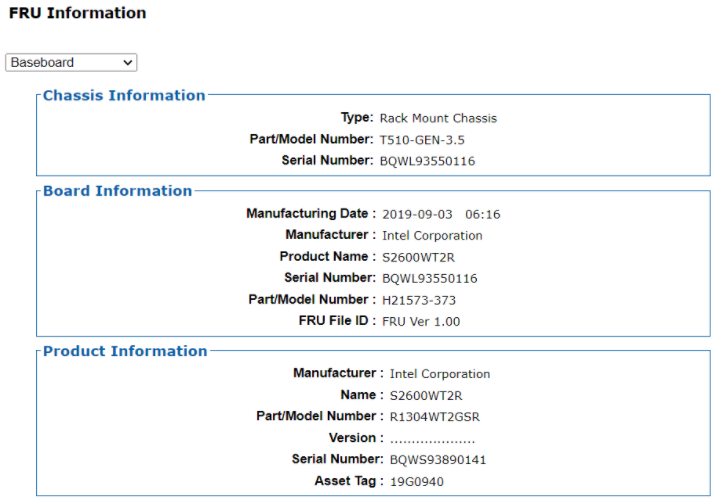
-
Copy and save this information externally.
-
Power on your Tufin Appliance.
-
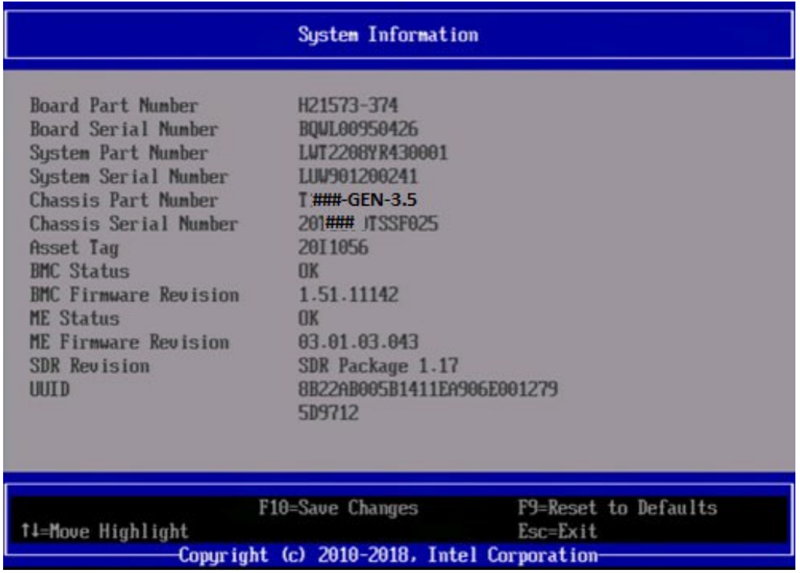
During the Power-on self-test (POST), press the F2 key to access the BIOS setup utility.
-
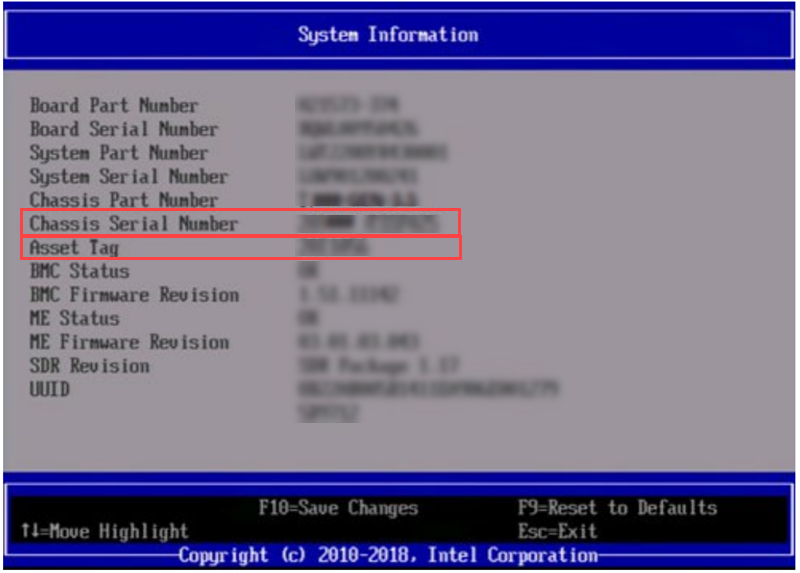
Go to the System Information page, and save the following information externally:
Update the Firmware
You must follow these steps for each version of firmware that you update, and repeat this process every time you need to flash a firmware version.
Flash the BIOS
Each flash cycle requires approximately 15-20 minutes.
-
Do not interrupt the BIOS update after the process has started. Interrupting the update may cause the BIOS to become corrupted and the appliance will malfunction. To return a malfunctioning device, you will need a return merchandise authorization (RMA).
-
Perform the BIOS update from the physical machine's console. Do not perform the update remotely.
-
Insert the prepared USB drive into the Tufin appliance.
-
Power on/reboot the Tufin appliance.
-
During the BIOS power-on self-test (POST), press F6.
-
Select Internal EFI Shell as the boot device.
The appliance boots to the Extensible Firmware Interface (EFI) shell:
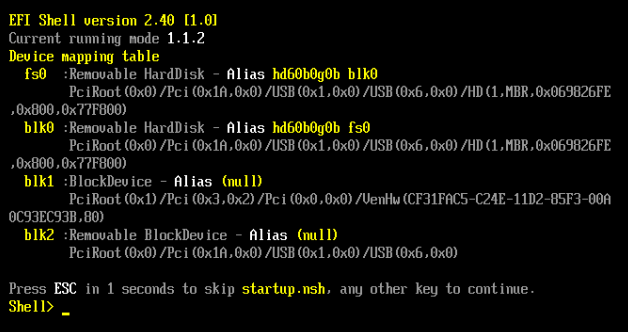
The device mapping table lists your removable USB drive as
fs0. -
Enter fs0: to mount the USB drive.
-
Enter ls to view the directories on the USB drive.
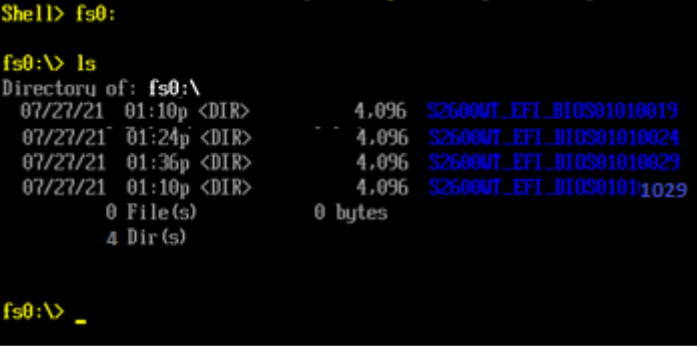
-
Navigate to the directory that contains the flash version to which you want to update:
cd 2600WT_EFI_BIOS0101<nnnn>
where
<nnnn>represents the last four digits of the version number. For example,2600WT_EFI_BIOS01011029. -
Run this command to flash the BIOS:
startup.nsh
-
When prompted, press any key (except q) to continue. Pressing q will cancel the update.
-
From the menu, select 3 to update the Field Replaceable Unit (FRU) fields.
-
When prompted, provide the appropriate value for the FRU fields from the information you saved (see Save Your Current Firmware Settings):
Prompt
Response
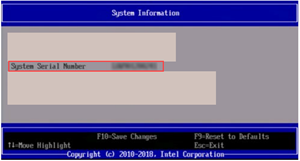
Do you want to update the Tufin info area of the FRU? Y Do you want to enter the Tufin appliance serial number? Y Type in your Tufin appliance serial number RMM:

Appliance console:
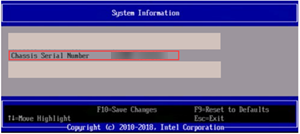
Is this correct? Please check your input carefully.
If the information is correct, type Y.
Otherwise, type N and try again.
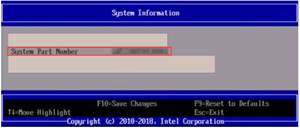
Do you want to enter the Tufin appliance part number? Y Type in your Tufin appliance model number and add -GEN-3.5to the end of the model.Appliance model:
-
T510-GEN-3.5
-
T1100-GEN-3.5
-
T1100XL-GEN-3.5
Is this correct? Please check your input carefully.
If the information is correct, type Y.
Otherwise, type N and try again.
Do you want to enter data into the additional chassis field 1?
Y
Enter this string.
Tufin
Is this correct?
Please check your input carefully.
If the information is correct, type Y.
Otherwise, type N and try again.
Do you want to enter data into the additional chassis field 2?
N
Do you want to enter the Intel Product info area of the FRU?
Y
Do you want to enter the Intel product version?
N
Do you want to enter the Intel product part number?
Y
Type in the Intel product code located on the Intel product label.
RMM:
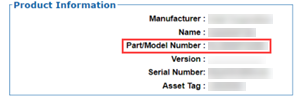
Appliance console:
Is this correct?
Please check your input carefully.
If the information is correct, type Y.
Otherwise, type N and try again.
Do you want to enter the Intel product serial number?
Y
Type in the Intel serial number located on the Intel product label.
RMM:
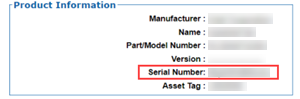
Appliance console:
Is this correct?
Please check your input carefully.
If the information is correct, type Y.
Otherwise, type N and try again.
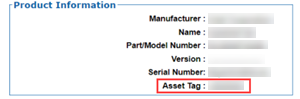
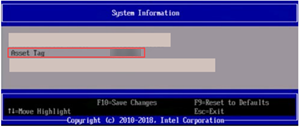
Do you want to enter the Tufin asset tag?
Y
Type in Tufin asset tag.
RMM:
Appliance console:
Is this correct?
Please check your input carefully.
If the information is correct, type Y.
Otherwise, type N and try again.
-
-
If you are updating to another firmware version, repeat this process from Step 2.
-
If you are not updating to another firmware version, remove the USB drive and press any key to reboot the appliance.
The appliance will power on and off three times before rebooting. After the firmware update, the appliance will take longer than usual to reboot because the backup firmware regions need to be updated. Do not interrupt this process!
When the update finishes, the Firmware Update Complete prompt appears.
The process is complete when the operating system login screen appears. We recommend that you login to the operating system to confirm that it booted successfully. In addition, confirm that you can access Tufin Orchestration Suite (TOS).
Validate the Flash
To validate the flash, compare the values that you now have in the firmware to the values that you saved (see Save Your Current Firmware Settings). Note that to validate the flash, you must reboot the appliance.
Validate the flash settings using one of these methods:
-
Login to your RMM system (see Configuring the RMM for Generation 3.5 Appliances).
-
Verify that the BIOS ID matches the supported update path version.
-
Verify that the Chassis Serial number matches the Tufin Serial Number and that the Asset Tag matches the Tufin Asset Number.
-
During POST, press the F2 key to access the BIOS setup utility.
-
From the main menu, press the F9 key to load the BIOS defaults.
-
Select the Main menu and verify that the Primary BIOS Version and Backup BIOS version match the target version.

-
Go to the System Information page.
-
Verify that the Chassis Serial number is the Tufin Serial Number.
-
Verify that the Asset Tag is the Tufin Asset Number.
-
-
Compare these values with those that you saved (see Back up BIOS Data). If necessary, configure the Tufin BIOS settings (see Modify BIOS Data).
-
After exiting the BIOS setup utility, the appliance will reboot.
If you have any issues with this update, contact Tufin Support.
Modify the BIOS After an Update
If any information needs to be edited after the update (for example, incorrect Desktop Management Interface (DMI) details), you can use the following procedure:
-
Navigate to the appropriate firmware folder, for example as shown in step 6.
-
Enter the following command:
frusdr.efi-cfg master.cfg
-
When prompted, provide the appropriate value for the FRU fields:
Prompt
Response
Do you want to update the Tufin info area of the FRU? Y Do you want to enter the Tufin appliance serial number? Y Type in your Tufin appliance serial number RMM:
Appliance console:
Is this correct? Please check your input carefully.
If the information is correct, type Y.
Otherwise, type N and try again.
Do you want to enter the Tufin appliance part number? Y Type in your Tufin appliance model number and add -GEN-3.5to the end of the model.Appliance model:
-
T510-GEN-3.5
-
T1100-GEN-3.5
-
T1100XL-GEN-3.5
Is this correct? Please check your input carefully.
If the information is correct, type Y.
Otherwise, type N and try again.
Do you want to enter data into the additional chassis field 1?
Y
Enter this string.
Tufin
Is this correct?
Please check your input carefully.
If the information is correct, type Y.
Otherwise, type N and try again.
Do you want to enter data into the additional chassis field 2?
N
Do you want to enter the Intel Product info area of the FRU?
Y
Do you want to enter the Intel product version?
N
Do you want to enter the Intel product part number?
Y
Type in the Intel product code located on the Intel product label.
RMM:
Appliance console:
Is this correct?
Please check your input carefully.
If the information is correct, type Y.
Otherwise, type N and try again.
Do you want to enter the Intel product serial number?
Y
Type in the Intel serial number located on the Intel product label.
RMM:
Appliance console:
Is this correct?
Please check your input carefully.
If the information is correct, type Y.
Otherwise, type N and try again.
Do you want to enter the Tufin asset tag?
Y
Type in Tufin asset tag.
RMM:
Appliance console:
Is this correct?
Please check your input carefully.
If the information is correct, type Y.
Otherwise, type N and try again.
The process is complete when the operating system login screen appears.
-
-
Press any key to reboot the appliance.
The appliance will power on and off three times before rebooting. After the firmware upgrade, the appliance will take longer than usual to reboot because the backup firmware regions need to be updated. Do not interrupt this process!
