On This Page
Adding Users to SecureChange/SecureApp
Overview
SecureChange and SecureApp permissions are based on users, groups and roles. SecureChange and SecureApp let you use either:
-
User accounts that you configure in SecureChange: SecureChange lets you maintain your users in the local SecureChange user management system.
-
User accounts that you import from an LDAP server:
SecureChange applies permissions to users according to the groups they are members of. LDAP users are given permissions of Roles associated with them directly, and of Roles associated with their parent groups, including Roles associated with the parent groups recursively by being associated with 'grandparent' Local groups.
LDAP users can also use alternative authentication methods to login to SecureChange.
We recommend that you assign roles to groups so that the role applies to any user that is a member of the group. Predefined roles are:
- Auditor: Can only create reports
- Business Owner: Can manage SecureApp applications and connection, and submit tickets
- Requester: Can only submit requests
- Security Administrator: Can create and manage workflows, handle requests, and can configure SecureChange and SecureApp settings in the Settings tab
- System Administrator: Can only configure SecureChange and SecureApp settings in the Settings tab
Just to get you started, create:
- Users with the Requester role for anyone who submits requests
- Users with the Security Administrator role reviews, approves or implements requests.
You can add users and groups to SecureChange and configure their roles and permissions. You can also configure an alternative authentication method so that the user passwords are verified with a separate authentication system.
Add a Local User or User Group
-
In the New list, select User or Group, and click Add:
-
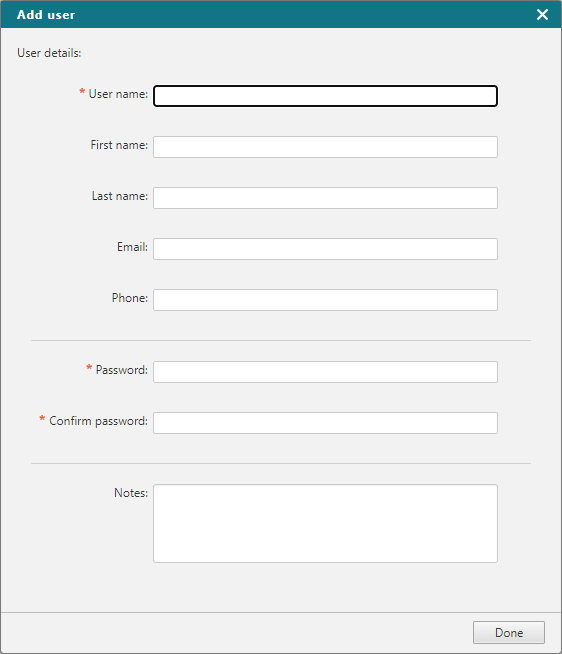
Provide user or group details:
-
Click Done.
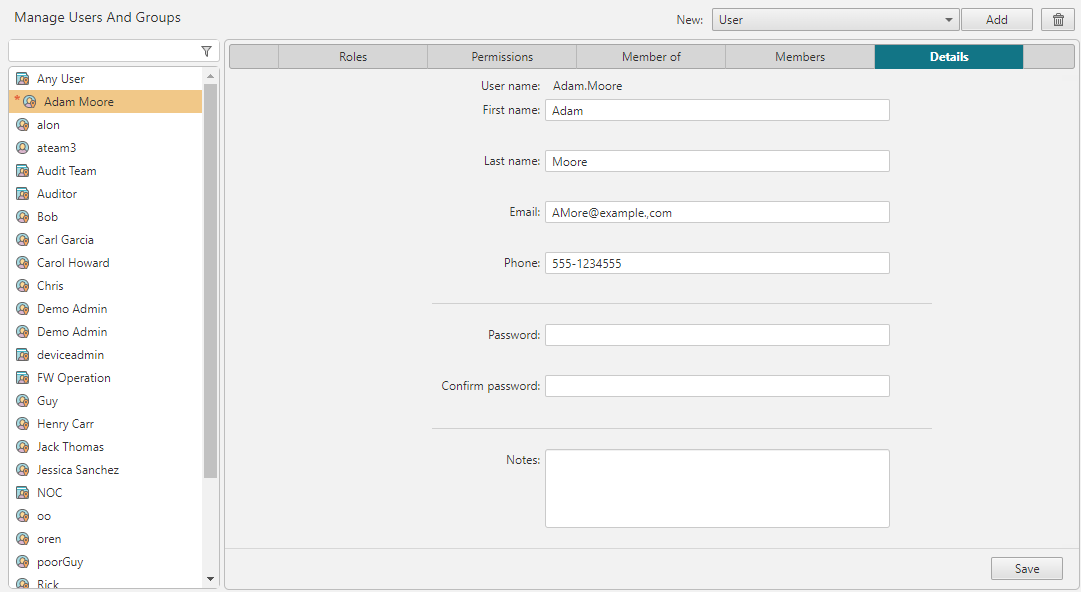
The details of the user or group are shown in the Details tab, where you can also edit the details:
Once users and groups are added, you can manage group membership.
-
To assign the new user permissions, click the Roles tab and select one or more roles.
-
Click Save.
Your new user accounts have permission to log into SecureChange. You now can configure workflows.
How Do I Get Here?
SecureChange> ![]() Settings > Users.
Settings > Users.
SecureApp> ![]() Settings > Users.
Settings > Users.


