On this page
Monitoring Amazon AWS
Overview
Add AWS accounts to TOS as devices to monitor and manage them. TOS monitors the AWS devices for configuration and policy changes, providing ongoing visibility into configuration and compliance.
AWS onboarding models
TOS supports different models to onboard AWS devices:
-
Single-account onboarding: Add one AWS account at a time using access keys for an IAM user in that account.
-
Cross-account onboarding: Add multiple AWS accounts using a management account and a single IAM user who assumes a role in each target account.
-
AWS Organizations onboarding: Add member accounts in AWS Organizations through automatic discovery, using a management account, and an IAM user in the management account who assumes an identically-named role in each member account.
SecureTrack cannot discover AWS opt-in Regions when you monitor AWS accounts through a Cloud Organization. You must manually add accounts in this case. For more information, see Opt-in Regions limitation for cloud organizations.
AWS and TOS configuration
All onboarding models require configuration in both:
-
AWS, to create the IAM identity and required permissions
-
TOS, to add the AWS account device and provide the required credentials
To see which TOS features are supported for your device, review the SecureTrack Features by Vendor.
AWS platform configuration requirements
The configuration requirements on AWS depend on the model you choose to onboard the AWS devices.
Management account configuration (cross-account and AWS Organizations)
Use this configuration to onboard AWS accounts through a management account.
Management account IAM user
Create a dedicated IAM user in the management account with programmatic access (Access Key ID and Secret Access Key).
The management-account IAM user:
-
Authenticates to AWS using the access keys.
-
Uses AWS STS to assume a standardized role in each target account and obtain temporary credentials.
IAM policies for management-account IAM user
-
STS AssumeRole: Permission to call sts:AssumeRole on the target role in each target account.
Permissions for AWS Organizations discovery/import
For AWS organization-based onboarding, create permissions that allow TOS to read the organization structure. For example, organization details, OUs, and accounts).
This policy allows the integration to discover and inventory the Organization structure (roots, OUs, and accounts).
organizations:DescribeOrganization
                        organizations:ListAccounts
                        organizations:ListTagsForResource
                        organizations:DescribeOrganizationalUnit
                        organizations:ListTagsForResource
                        organizations:ListRoots
                        organizations:ListAccountsForParent
                    organizations:ListOrganizationalUnitsForParent
                    organizations:ListTagsForResource
Member/target account configuration (all onboarding models)
Each AWS account that TOS monitors is a target account. Regardless of the onboarding model, you require permissions for the target account—either attached to an IAM user (single-account onboarding), or to an IAM role (cross-account/organization onboarding).
Target-account IAM user (single-account onboarding)
For single-account onboarding, create an IAM user in the target account with programmatic access and attach the required permission policies.
Target account IAM role (cross-account and AWS Organizations onboarding)
For cross-account and AWS Organizations onboarding, create an IAM role in each target account.
This role must include:
-
Trust policy defining who can assume the role. Allow the management account to assume the role.
-
Permissions policy defining what TOS can do. Attach the required permission policies for TOS to retrieve configuration and flow information for monitoring and discovery.
-
Amazon Resource Name (ARN) identifier to use the AssumeRole option for cross-account monitoring. For more information, see Amazon AWS AssumeRole Support.
Role name requirements for AWS Organizations
For the AWS Organizations onboarding, the role name must be identical across all member accounts. You will need the role name (not the role ARN to define the value of the Assume Rule field when you configure cloud organization settings.
Permission blocks for target accounts
Use the following permission blocks based on the features you want to enable:
These permissions allow SecureTrack to collect details about network components such as instances, security groups, subnets, interfaces, routes, and transit gateways.
VPC and Security Groups
ec2:DescribeRegions
ec2:DescribeVpcs
ec2:DescribeInstances
ec2:DescribeNetworkInterfaces
ec2:DescribeVpnConnections
ec2:DescribeSubnets
ec2:DescribeAddresses
ec2:DescribeRouteTables
ec2:DescribePrefixLists
ec2:DescribeCustomerGateways
ec2:DescribeVpnGateways
ec2:DescribeVpcPeeringConnections
ec2:DescribeSecurityGroups
ec2:DescribeInternetGateways
ec2:DescribeNatGateways
These permissions allow SecureTrack to retrieve network topology data used to build the network map and perform path analysis.
Transit Gateway
ec2:DescribeTransitGateways
ec2:DescribeTransitGatewayAttachments
ec2:DescribeTransitGatewayConnects
ec2:DescribeTransitGatewayPeeringAttachments
ec2:DescribeTransitGatewayRouteTables
ec2:DescribeTransitGatewayVpcAttachments
ec2:SearchTransitGatewayRoutes
Direct Connect
directconnect:DescribeDirectConnectGateways
directconnect:DescribeDirectConnectGatewayAssociations
directconnect:DescribeDirectConnectGatewayAttachments
directconnect:DescribeVirtualGateways
directconnect:DescribeVirtualInterfacesAWS cloud organizations
To onboard AWS accounts through AWS Organizations, referred to in TOS as cloud organizations, you need to first configure an AWS cloud organization.
Cloud organizations are the shared frameworks used to manage organization-level onboarding across supported cloud providers. See AWS cloud organizations.
VPC automatic import
When you add an AWS device, you can enable Automatic Import for Virtual Private Clouds (VPCs). When enabled, SecureTrack automatically detects changes to VPCs in the AWS environment (VPCs which were added, deleted, and updated), and reflects them in the device list and revision history. Changes to the VPCs are also reflected in the Map when a scheduled sync occurs or when you manually Sync the map.
When enabled, VPCs are automatically imported at 10-minute intervals.
With Automatic Import enabled, devices that were deleted from AWS are automatically deleted from the list of devices in SecureTrack, and their history is no longer available. Therefore, if your continuous integration/continuous deployment (CI/CD) pipeline regenerates VPCs, the history of the deleted VPC will not be available in the new replacement VPC. To retain revision data in SecureTrack for devices that have been deleted from your Amazon account, use manual import.
The maximum number of VPCs for Automatic Import depends on your TOS deployment. For more information, contact Tufin Customer Support.
Add a device
Add an AWS account as a device, either one at a time, using a cross-account, or through a cloud organization.
Prerequisites
Steps
-
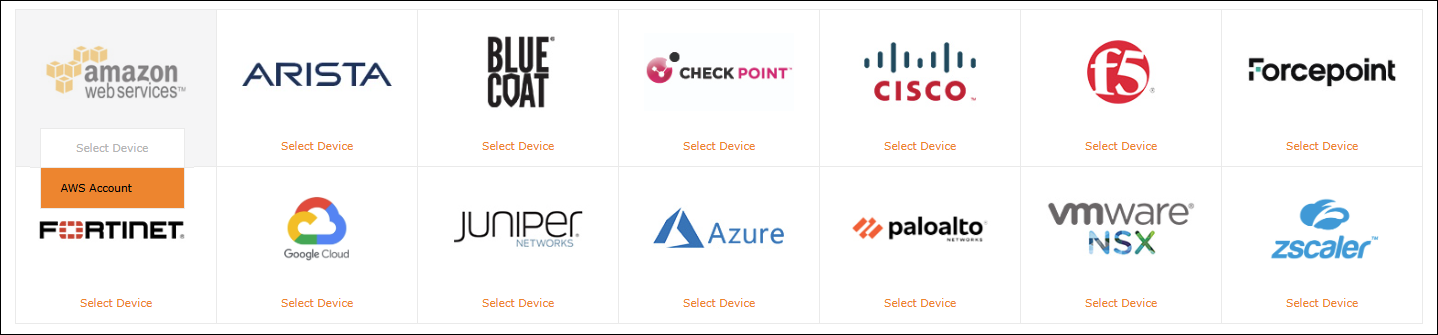
Do one of the following:
-
To add a device, either individually or through cross-account, select Amazon > AWS Account.
-
To add a cloud organization, select Amazon > AWS Organization, and then configure the settings for the cloud organization.
SecureTrack cannot discover AWS opt-in Regions when you monitor AWS accounts through a Cloud Organization. You must manually add accounts in this case. For more information, see Opt-in Regions limitation for cloud organizations.
-
-
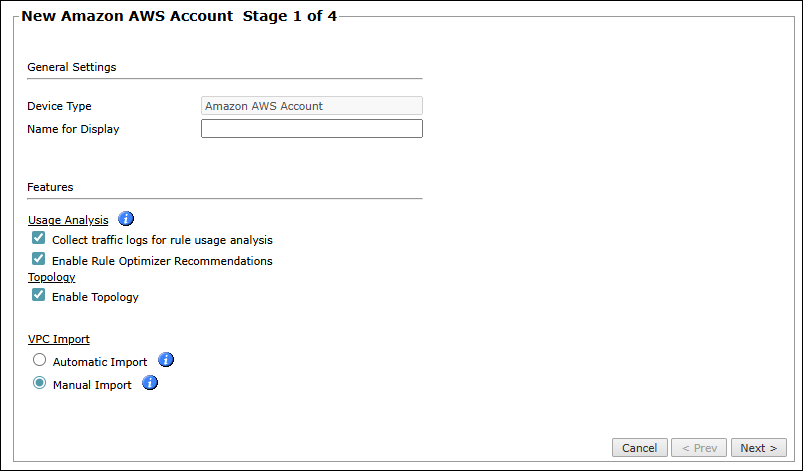
Configure the General settings:
-
Name for Display
-
Domain: Available only if you have configured your system for managing multi-domains and All Domains is currently selected. Select the domain to which to add the device. The Domain can only be entered when adding a device; to change the Domain, you must migrate the device.
-
-
Configure Usage Analysis settings:
-
Collect traffic logs for rule usage analysis: Select to enable SecureTrack to analyze flow log data and identify the last hit date for rules.
When selected, uses AWS CloudWatch (the default). To use S3 flow logs instead, select Enable S3 storage explicitly for the device and configure the storage credentials. -
Enable Rule Optimizer Recommendations: Select to collect and save traffic usage data for Rule Optimizer recommendations.
-
-
Enable Topology: Select to collect routing information for building the network Map.
Topology options for Advanced management mode are configured when you import managed devices. -
Configure VPC Import settings:
-
Automatic Import: To automatically detect updated, deleted, and new VPCs in the AWS account, and reflect the updates in SecureTrack. VPCs are automatically imported at 10-minute intervals.
-
Manual Import: To import VPCs after you add the AWS device.
-
-
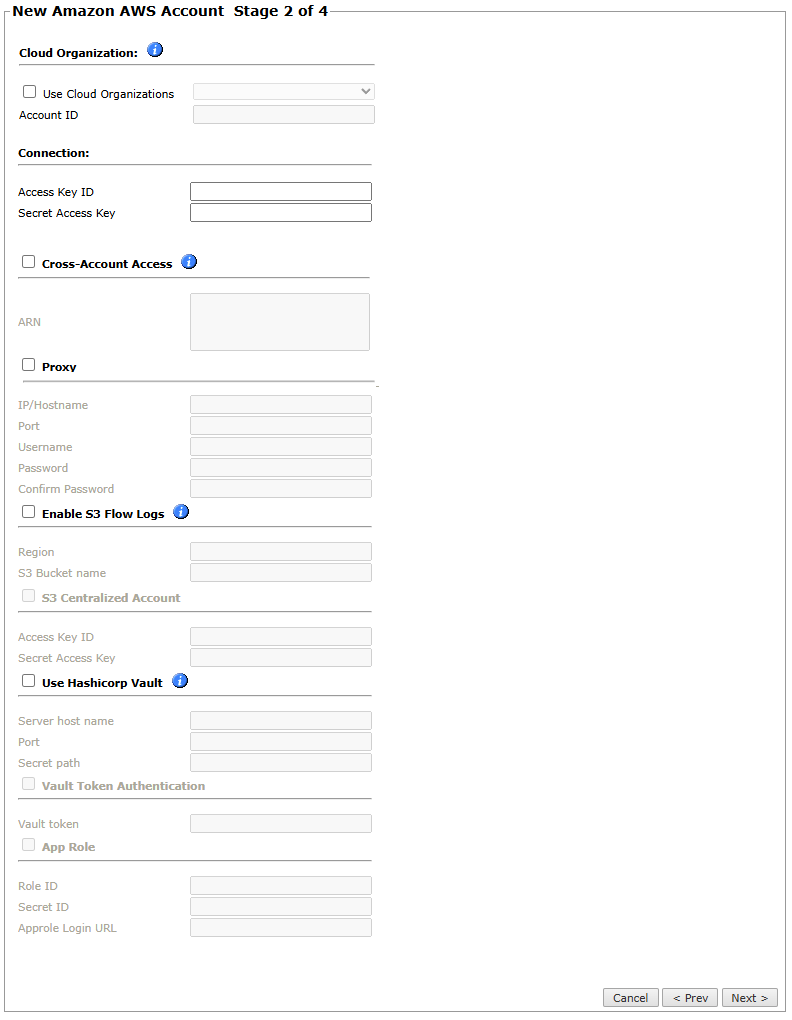
Configure the SecureTrack connection to the AWS device, according to your onboarding model:
-
Use Cloud Organization: For AWS organization access only, select to associate this device with a predefined cloud organization.
When associated with a cloud organization, other connection mechanisms and credentials are automatically disabled.
The Access Key ID and the Secret Access Key are automatically populated from those configured for the cloud organization.-
Account ID: Mandatory when Use Cloud Organization is selected. The ID of the account to associate with the device.
-
-
Connection: For single- and cross-account access, define the Access Key ID and the Secret Access Key for the account from the AWS Identity and Access Management (IAM) console.
-
ARN: For cross-account access only, define the Amazon Resource Name (ARN) identifier required to use
AssumeRolepermissions.
This allows you to request temporary security credentials to make AWS requests for account configuration information that is not available by default, and to access VPCs that are not part of your account configuration.
For more information, see Amazon AWS AssumeRole Support. -
Proxy: For single- and cross-account access, select to connect to AWS through a proxy that requires authentication, and define the details:
-
IP address or Hostname of the proxy
-
Port that you connect to on the proxy
-
Username to use for authentication
-
Password and Confirm Password to use for authentication
If SSL decryption is enabled on the proxy server and applied to the traffic from SecureTrack to AWS, you must configure a whitelist on the proxy server. The whitelist allows the traffic from SecureTrack to bypass SSL decryption and authentication. -
-
Enable S3 Flow Logs: For single- and cross-account access, to use S3 flow logs for usage analysis instead of the default CloudWatch, select the option , and define the Region and S3 Bucket name.
-
S3 Centralized Account: For cross-account access only, select and define the Access Key ID and Secret Access Key as the credentials for the centralized account access.
-
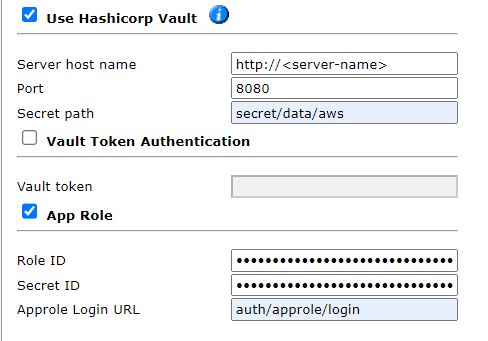
Use Hashicorp Vault: For single-account access only, select to store your AWS authentication credentials in Hashicorp Vault.
When storing AWS authentication credentials in Hashicorp Vault, use the KV secret engine version 1.-
Server host name: Name of the server used to host the Hashicorp Vault.
-
Port: TCP / UDP port that SecureTrack uses to communicate with the Hashicorp Vault.
-
Secret path: Path to the AWS authentication details within the Hashicorp Vault.
-
Select either Vault Token Authentication or App Role:
Vault Token Authentication:
Select this option to add the Vault token. This token is required for SecureTrack to authenticate AWS using Hashicorp Vault.
For example:
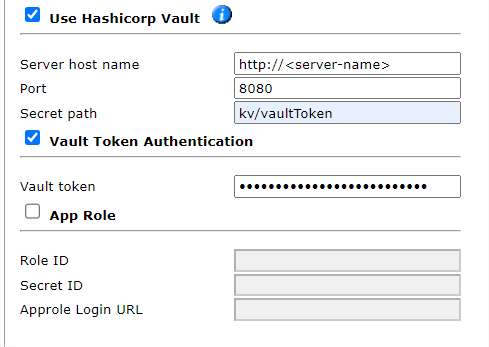
App Role:
Select this option to add the App Role fields:
-
Role ID: Vault server RoleID that SecureTrack uses to authenticate the Hashicorp Vault server.
-
Secret ID: Hashicorp Vault server SecretID that SecureTrack uses to authenticate the Hashicorp Vault server.
-
Approle Login URL: Path to AppRole login details within the Hashicorp Vault.
For example:
-
Tufin does not support using the Hashicorp Vault with a proxy or Cross-Account Access (ARN). -
-
-
Click Next.
-
Define the Monitoring Settings:
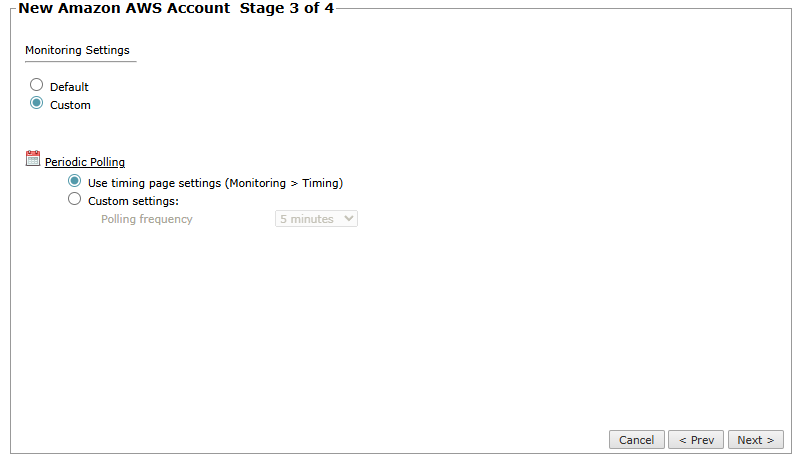
-
Custom: Define the polling frequency for SecureTrack to retrieve the configuration from each device:
-
Use timing page settings: See Setting Timing for Monitoring.
-
Custom settings: Select the required polling frequency. If you select 1 day, you can select the exact time (hour and minute) for the daily polling.
-
-
-
Click Next and then click Save.
Managing monitored devices
After adding a device, you can update its configuration settings, delete the device, or import additional settings such as VPCs, Transit Gateways, and Load Balancers. The options vary depending on your environment.
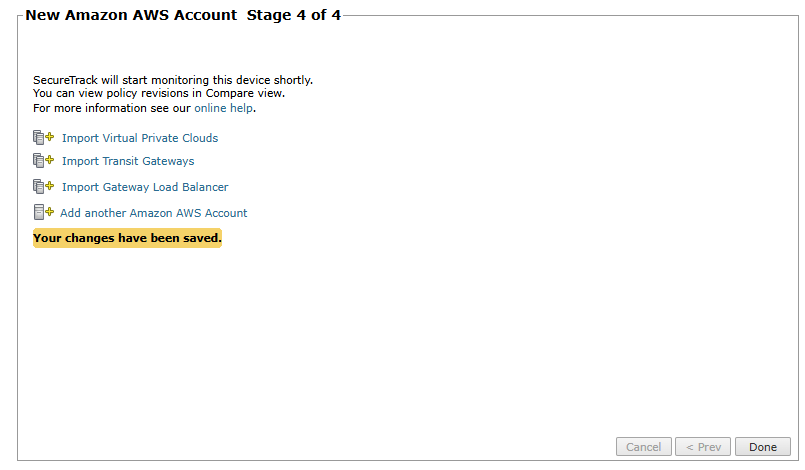
After you select the device from the list of Monitored Devices, you can:
-
Import Virtual Private Clouds
Make sure you receive the first policy revision from the device (you can see the revision in Compare view). This may take several minutes.
-
Import Transit Gateways (supported for Topology only). In multi-domain deployments, select the domain for each Transit Gateway.
When imported, Transit Gateways with associated attachments are displayed on the topology map.
-
Import Gateway Load Balancers. In multi-domain deployments, select the domain for each load balancer.
-
Migrate (ST servers): Available in distributed deployments. Select the server where the device will be monitored and click Migrate.
-
Migrate (Domains): Available in multi-domain deployments. Select the domain where the device will be monitored and click Migrate.
How do I get here?
SecureTrack > Monitoring ![]() > Manage Devices
> Manage Devices