On This Page
Rule Viewer
Overview
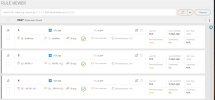
The Rule Viewer lists the policy rules across all monitored physical and virtual devices.
Rules that are currently disabled on the device are greyed out and marked with the disabled icon. Hovering over certain items displays more detail. For more information, see query fields.
Rules are ordered by vendor, device, and then policy.
What is a Rule?
A rule is a requirement pertaining to network traffic that is defined in a device. It is created outside of SecureTrack and cannot be changed in the Rule Viewer.
What Can I Do Here?
- Click Devices to limit the rules to selected devices.
If you select specific devices, a maximum of 50 devices can be displayed. Every time that you run a new query, the list of selected devices is cleared. If you have not applied a filter, click
 to scroll to the first rule in a device.
-
If the source, destination, service, or application are part of a group, click the name of the group to view details of the group, including the list of group members.
-
Click any rule card to view the rule drill-down menu.
-
Click the Violations link to view violations details. If there are multiple violations, the Violations link shows the highest severity.
-
Filter the displayed rules using TQL or click Devices to filter by device type.
-
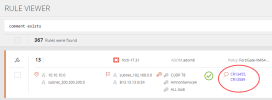
When an external ticketing system is configured with SecureTrack, click the link in the comments to view the ticket.
Select Rules for an Action
Select the rule or rules to be included in the action. The maximum number of rules that can be selected is 5,000.
Click the action button and select the relevant action. For some actions, the rule maximum is less than 5,000. If the number of rules you have selected exceeds the maximum for a specific action, it will not be available.
You can select multiple rules by selecting the first rule and pressing the shift key before selecting the last rule. When scrolling to locate the last rule, use your mouse wheel and not the scroll bar.
View Rule Documentation
Hover over the Rule Documentation icon ![]() to view addition such as rule documentation and the number of tickets. This information is entered by the user.
to view addition such as rule documentation and the number of tickets. This information is entered by the user.
Rule documentation helps you keep track of who made changes to a rule and why the changes were made. It includes the following rule information:
-
Technical Owner: SecureTrack user responsible for the rule
-
Automation attribute
-
None
-
Legacy rule
A legacy rule is a rule that is no longer needed and is typically a candidate for future decommissioning. When a rule is marked as legacy, SecureChange Designer will treat it as a shadowed rule when making recommendations, and SecureChange Verifier will ignore it when verifying access.
-
Stealth rule
A stealth rule is a 'deny' rule (cannot be 'allow') placed at the top of the policy whose purpose is prevent all access that hasn't been explicitly granted by other rules, thus protecting the entire network including the firewall itself.
For users of SecureChange, when a rule is marked as stealth, Designer recommendations will place any new rules recommended for an access request below the stealth section of the policy.
-
-
Rule description: Description of the rule
-
Certification status: Whether the rule has been certified (Certified or Decertified).
-
Certification date: Date that the rule was certified.
-
Certification expiration: Date that the certification for the rule expires
-
Number of related tickets
You can add or edit rule documentation to one or more rules in the Rule Viewer.
Edit Rule Documentation
-
Select one or more rules.
-
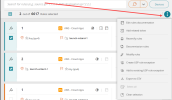
From the Actions menu, select Edit Rule Documentation
-
Add or edit the following information:
-
Rule description - free text
-
Technical Owner - TOS Classic administrators can select any user from the list. Other users can assign only themselves.
-
Automation attribute - used by SecureChange Designer
- None - no automation attribute
- Legacy rule
- Stealth rule
-
Add Ticket to Rule
A ticket is a change request or other rule related activity that is tracked in a ticketing system. Linking ticket information to a rule may be helpful for auditing as it allows you to track why each change was made, who requested the change, and who authorized it. You can manually enter this information into a related ticket in the Rule Viewer or include a URL which links the ticket in your ticketing system.
You can add details of tickets to a rule or multiple rules, this allows you to track all rule-related information in the Rule Viewer.
-
In the Rule Viewer, select the checkbox for one or more rules.
-
From the Actions menu, select Add Related Ticket, and add the following ticket information:
- Ticket ID (required)
- External URL
- Business Owner
- Expiration date
- Comment
If SecureTrack is connected to SecureChange, select SecureChange Ticket to create the ticket in SecureChange.
Once you have added a ticket to a rule, in the Rule Overview you can click the Related Tickets link on the left to view details about all related tickets.
Recertify, Decommission, or Modify Rules
You can create a ticket in SecureChange to recertify, decommission, or modify rules. A ticket can contain up to 300 rules provided that:
-
SecureChange is installed and can communicate with SecureTrack.
-
Rules are not on a ticket with a status of In Progress.
-
The user is defined as a requester on at least one workflow.
-
Inherited rules in a local policy are not supported.
-
In the Rule Viewer, select the checkbox for one or more rules.
-
In the Actions menu
 select Recertify Rules, Decommission Rules, or Modify Rules.
 If there are rules that cannot be included in the ticket, a message appears with the number of invalid rules and the option to generate a CSV file of the invalid rules.
-
Enter the following information:
-
Subject: The subject of the ticket in SecureChange
-
Action: For Decommission Tickets only, select Disable rules or Remove rules.
-
Workflow: The SecureChange workflow. The list of available workflows is based on the type of ticket you are creating.
-
- Click Open in SecureChange to create the ticket and view it in SecureChange.
Create a USP Rule Exception
You can exempt specific rules from triggering a violation in the USP by creating a USP Rule Exception. These exceptions are useful for when:
-
You have to exempt certain rule violations for a limited period of time due to an urgent requirement.
-
You want to make an exception for specific devices. For example, if you have an HA configuration, and you don't want to receive duplicate violation notifications from the standby devices.
-
In the Rule Viewer, select the checkbox for one or more rules.
-
From the Actions menu, select Create USP Rule Exception.
-
In the General section, enter the following information:
-
Exception Name: The name of the USP Rule exception
-
Ticket ID (Optional): The Ticket ID that relates to this exception.
-
Approver (Optional): The person who approved the USP rule exception.
-
Time Frame (Optional): The time frame in which the USP Rule exception is valid
-
-
In the USP section, click +Add USP to select a USP to which to apply the rule exception. If you don't select a USP, the rule exception will apply to all USPs.
-
In the Description (optional) section, enter a description of the USP rule exception.
-
Click Create.
Add a Rule to an Existing USP Rule Exception
-
In the Rule Viewer, select the checkbox for one or more rules.
-
From the Actions menu, select Add to Existing USP Rule Exception.
-
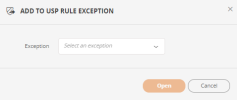
In the Exception field, select the USP Rule Exception, and click Open.
-
Review the information in the USP Rule Exception.
In the Rules section, the rules which you just added are highlighted in blue.
-
Click Save
Generate CSV Export
You can generate a CSV file which includes data about all rules currently displayed on the Rule Viewer. The file created contains a link back to TOS displaying the filter. There is however a reported Microsoft bug that sometimes causes links of this type to be blocked. One way around it is simply to copy/paste the link to your browser. Another is to follow the instructions provide by Microsoft.
-
Click Download and run or open the easy fix wizard.
-
After completing the wizard, the next time you click the link it will work.
- Apply a TQL query to display only the rules that you want to include in the export.
-
Select the checkbox for the rules that you want to include in the export (maximum of 5,000 rules), or leave all checkboxes clear to include all displayed rules in the export.
- Select Actions > Export to CSV.
Save a Query
You can save a query to use again later. For example you can save the filter policy.name = 'ST_DG1.1' and disabled = true to get all the disabled rules for a specific policy, so that you do not need to retype the filter next time that you need it.
Administrators can create public queries which are available to all users. Non-admin users can create private queries which only they have access to. Users with Super Admin access can view, modify, or delete any query created by any user, other users can only modify or delete queries that they created.
If MSSP mode is enabled, if the domain context is All Domains, queries that you save will be available in all the domains that you have access to. You can only edit these queries when the domain context is All Domains.
-
Apply a TQL query to display only the rules that you want to include in the saved query.
-
Run the query and confirm that it returns the required results without generating an error.
-
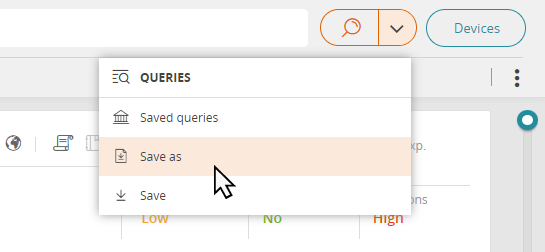
Click
 > Save as.
-
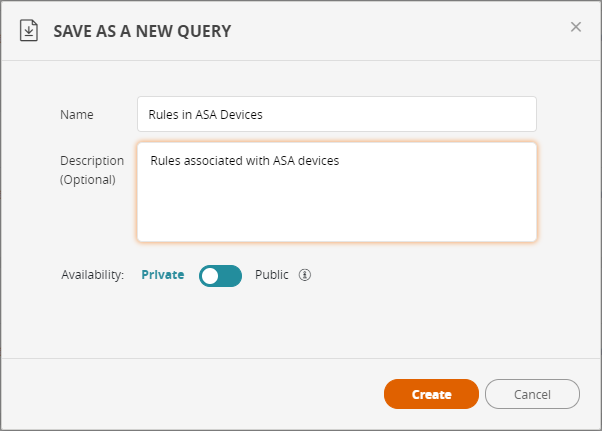
Enter a name and description for the query.
-
If you have Admin Privilege, select whether the query should be Private or Public. All users have access to public queries.
-
Click Create.
Modify a Query
-
Click
 > Saved queries.
 -
In the list of Saved Queries, click the name of a query to apply the query, or click
 next to a query that you created to edit or delete the query.
How Do I Get Here?
SecureTrack > Browser ![]() > Rule Viewer.
> Rule Viewer.
Was this helpful?
Thank you!
We’d love your feedback
We really appreciate your feedback
Send this page to a colleague
