On this page
Link Redundancy on Tufin Appliances
This procedure is supported for TufinOS 4.30 and above.
For appliances with two network connections, NIC bonding can be used to combine them into one virtual connection. This means that if one connection fails, the other can take over so the network keeps working.
However, this backup system will only works if one connection fails. If multiple connections fail at the same time, the link redundancy may not be successful.
Prerequisites
-
Log in as a root user with the
rootuser environment variables. Regular users can usesudo su -to become root users. If the sudo command is not configured, use su -. -
This procedure cannot be performed in environments where TOS is already installed. If you are currently running TOS, you must uninstall it by following the instructions in Step 1 of your desired procedure.
Configure network bond interface
In this procedure, you will use the nmtui tool to add a network bond interface.
-
If you already have TOS installed, uninstall it safely by performing the following:
- Create a full backup
- Export your backup and place it in an offline location
- Uninstall
At the end of the procedure, you will be prompted to reinstall TOS.
-
Determine the first two network interfaces for network bond. Connect via SSH to your machine and run:
/opt/tufinos/scripts/network_interface_by_pci_order.sh | grep "NET_IFS" | head -n2
/opt/tufinos/scripts/network_interface_by_pci_order.sh | grep "NET_IFS" | head -n1
/opt/tufinos/scripts/network_interface_by_pci_order.sh | grep "NET_IFS" | head -n2The names of the existing interfaces are displayed. Note the names of the interfaces as you will need them for the procedure.
-
Disconnect from the SSH connection and continue with the procedure remotely or a monitor connected to TTY.
Do not attempt to perform the rest of the procedure with SSH. Once the configuration is applied, you will lose connectivity to the machine.
-
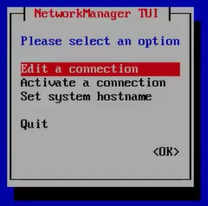
Start
nmtui.The NetworkManager TUI screen appears.
-
Select Edit a connection, and press Ok.
-
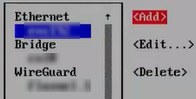
Press Add.
-
From the list of connection types, select Bond and press Enter.
The Edit Connection screen appears.
-
Enter:
Profile name: <meaningful profile name, for example:
bond0>Device: <port's device name>
-
Add ports to the bond to be created:
-
From the list to the left of the Slaves box, select Add.
-
From the New Connection dialog box, select Ethernet as the connection type.
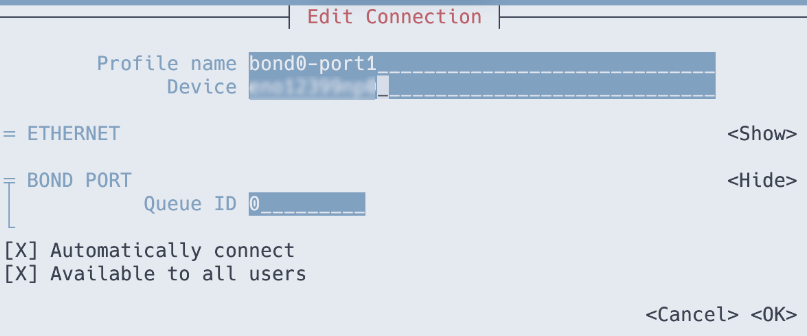
The Edit Connection screen appears.
-
Enter:
Profile name: <meaningful profile name, for example: bond0-port1>
Device: <the name of your first network interface that you wrote down in the Prerequisites>
-
Press OK to return to the window with the bond settings.
-
Repeat steps a-d to add the second port, with the following details:
Profile name: <meaningful profile name, for example:
bond0-port2>Device:<the name of your second network interface that you wrote down at the beginning of the procedure>
-
-
Set the bond properties:
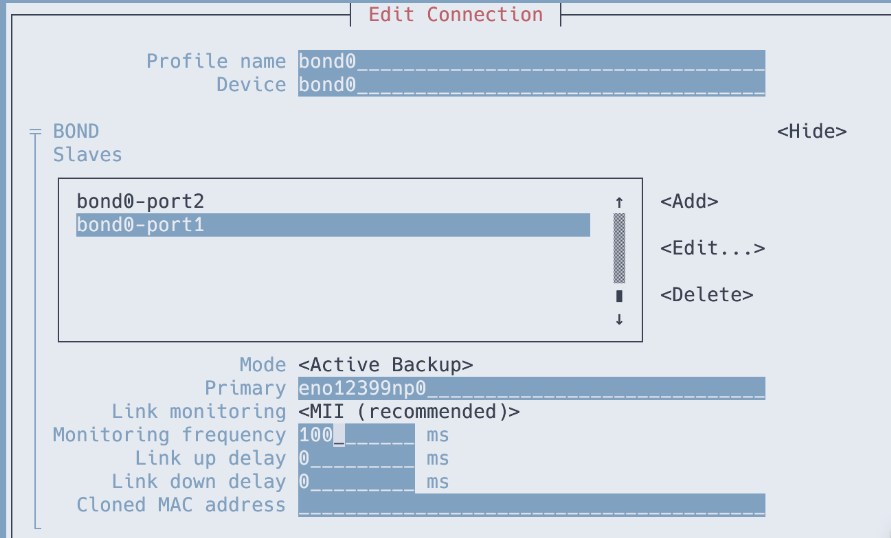
Mode: Active Backup
Primary: <name of first network interface>
Link Monitoring: MII (recommended)
Monitoring frequency: 100 ms
Link up delay: 0 ms
Link down delay: 0 ms
-
Configure the IP address settings in the IPv4 CONFIGURATION.
-
Select Manual and Show.

The Manual configuration options appear.
-
Configure according to your network requirements.
-
-
Press OK to create.
The new connection is activated.
-
Press Back to return to the main menu.
-
Deactivate the first network connection:
-
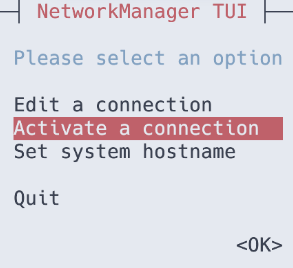
Select Activate a Connection.
-
Select the first network interface that supplied the machine connectivity, press the right arrow button, and press Deactivate.
-
-
Make sure the bond0 interface is activated. It should have the (*) character before the name.
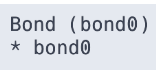
Activate the bond0 interface if it is not activated.
-
Press Back to return to the main menu.
-
Select Quit to close the nmtui application.
-
If you uninstalled TOS at the beginning of this procedure, reinstall it now.
Verify link redundancy
-
Temporarily remove the network cable from one of the network devices and check if the other device in the bond handles the traffic.
Note that software utilities are not the proper way to test link failure events. Tools that deactivate connections, such as nmcli, show only the bonding driver’s ability to handle port configuration changes and not actual link failure events.
-
Display the status of the bond:
Output example
Ethernet Channel Bonding Driver: v3.7.1 (April 27, 2011)
Bonding Mode: fault-tolerance (active-backup)
Primary Slave: eno12399np0 (primary_reselect always)
Currently Active Slave: eno12399np0
MII Status: up
MII Polling Interval (ms): 100
Up Delay (ms): 0
Down Delay (ms): 0
Peer Notification Delay (ms): 0

Slave Interface: eno12409np1
MII Status: down
Speed: Unknown
Duplex: Unknown
Link Failure Count: 0
Permanent HW addr: 04:32:01:46:eb:e1
Slave queue ID: 0

Slave Interface: eno12399np0
MII Status: up
Speed: 1000 Mbps
Duplex: full
Link Failure Count: 0
Permanent HW addr: 04:32:01:46:eb:e0
Slave queue ID: 0
Delete network bond interface
In this procedure, you will use the nmtui tool to remove a network bond interface.
-
If you already have TOS installed, uninstall it safely by performing the following:
- Create a full backup
- Export your backup and place it in an offline location
- Uninstall
At the end of the procedure, you will be prompted to reinstall TOS.
-
Determine the first network interface by running the following script.
-
Disconnect from the SSH connection and continue with the procedure remotely or a monitor connected to TTY.
Do not attempt to perform the rest of the procedure with SSH. Once the configuration is applied, you will lose connectivity to the machine.
-
Start
nmtui.The NetworkManager TUI screen appears.
-
Select Edit a connection, and press Ok.
-
Select the interface you wish to delete, press the right arrow button, select Delete, and press Enter.
-
Select the first network interface name that you located in Step 1. Press the right arrow button, select Edit and press Enter.
-
Configure the IP address settings in the IPv4 CONFIGURATION according to your requirements.
-
Press OK.
-
Press Back to return to the main menu.
-
Select Activate a Connection.
-
Select the first network interface and press Activate.

-
Press Back to return to the main menu.
-
Select Quit, and press Enter to close the nmtui.
-
If you uninstalled TOS at the beginning of this procedure, reinstall it now.
Was this helpful?
Thank you!
We’d love your feedback
We really appreciate your feedback
Send this page to a colleague