On this page
Verifying Access Requests
Overview
When handling a task containing an Access Request field, you can use the Verifier Tool. Use this tool after configuring policies, to test that your changes successfully implement the request. For access requests with application identities whose targets are Palo Alto devices, the verifier considers the application identity. For all other targets, the verifier considers the service that the application identity uses. When a request includes the Internet object, the Designer uses the internet object for the target device to represent the all IPv4 addresses in the Internet in TOS features. (Configurable in SecureTrack for Check Point and Forcepoint; ANY for other devices)
The Verifier Tool is only available if it was enabled for the step in workflow configuration.
The possible results are:
- A policy which allows the requested traffic exists (Green
 )
) - The policy does not allow all the requested traffic (Red
 )
) - The system cannot run Verifier (Yellow
 )
)
When both options for the Verifier tool (Automatically run Verifier after this step and Do not proceed to next step if not verified) are enabled for the Access Request in a step, the Access Request is also automatically verified when task handling is finished, and the ticket is not moved to the next step until the verification process is finished. This may take up to 30 minutes, because SecureChange may wait for possible changed policies to be received by SecureTrack. In addition, workflow configuration may have specified that the ticket not be moved to the next step unless the request is successfully verified to have been implemented.
Verification is only supported where the target ACL and the source and destination of the traffic are the same version of IP addressing.
Verification for IPv6 traffic is only supported for targets that are Cisco IOS and ASA devices.
Manually checking verification
-
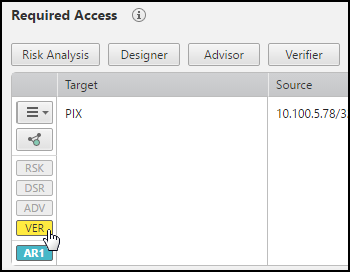
In the Access Request field, click Verifier.
If there is no Verifier button, check if the Verifier Tool was enabled in this step of the workflow configuration.

The VER button appears in one of these colors:
-
Green: A policy already exists (
). -
Red: A policy does not exist (
). -
Yellow: The system cannot run Verifier (
).
-
-
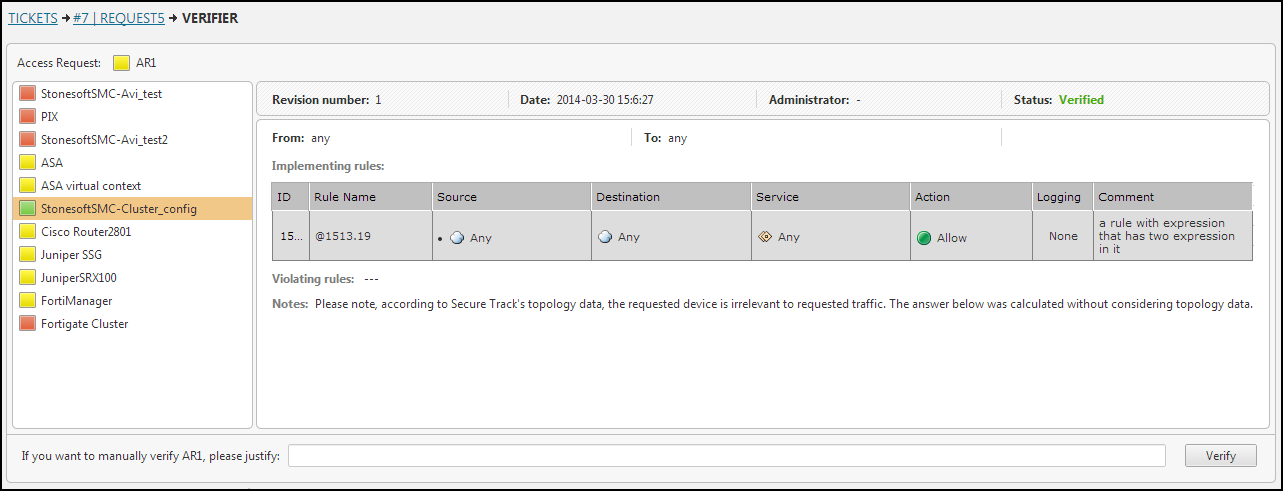
Click the Verifier indicator to view details:
-
In the Verifier Details window, click each device. You can see the relevant policy details.
-
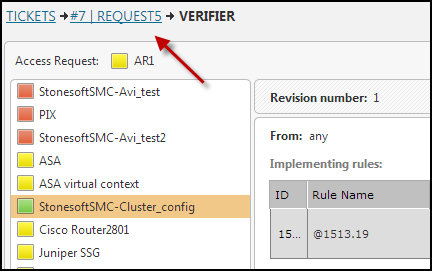
To return to the request, click the request name in the bread crumbs.
-
In cases where verification failed but you are sure that the change was made, you can manually verify the change.
-
Enter an explanation and click Verify.

-
Click the request name in the bread crumbs to return to the Request window. The VER button alters slightly (
 ) to indicate the risk that was manually verified.
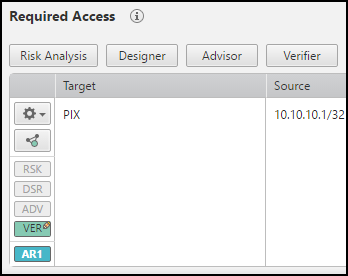
-
How do I get here?
SecureChange > Tickets
Was this helpful?
Thank you!
We’d love your feedback
We really appreciate your feedback
Send this page to a colleague