On this page
Change Request Advanced Options
Overview
When building a change request, Advanced Options helps you add relevant objects from your policies to the request. The tool includes a search function, so you can also locate relevant objects among your device's polices.
Target
Select Suggested to run topology analysis for a list of suggested devices found on the path from source to destination. Select Manual to manually add targets.
Suggested
Clicking on Suggested runs a path analysis query to retrieve all devices found on the path. For accurate results, make sure that the topology map is synchronized. See Refreshing the Map for more details.
The suggested target option is only available for requests that use a workflow and access request with topology enabled. For more information about configuring workflows to use topology, see Configuring a Workflow.
Suggest targets:
-
Confirm that Topology mode is active.
- Define a Source and Destination. Use your SecureTrack Map for reference.
To use the auto suggest target tool, the source or destination cannot include: ANY or Class A addresses. In addition, if the source contains IPv4 addesses then the destination cannot include IPv6 addresses (and vice versa).
- From the change request draft, click the Target settings icon.
- Click Suggested. A list of all suggested Targets appear.
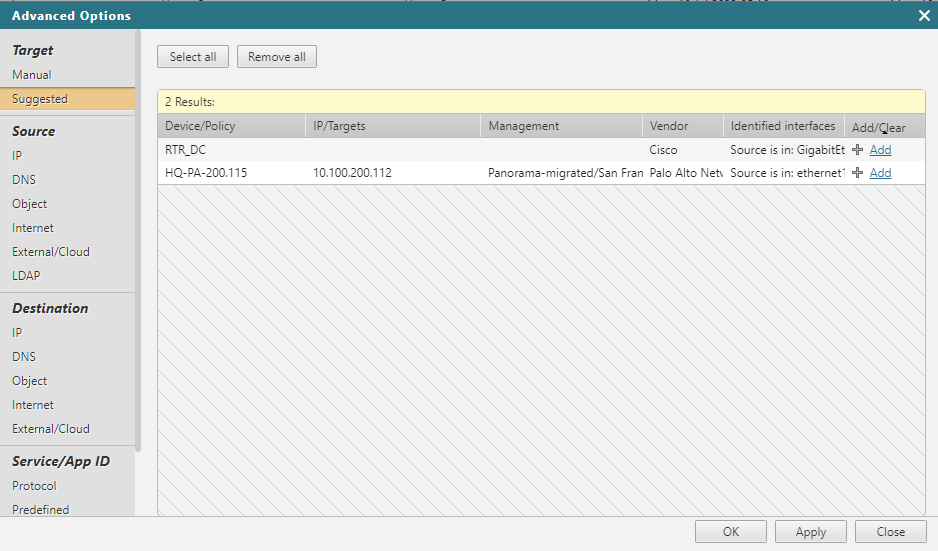
- Click +Add for the targets you want to appear in the request.
- Click OK.
The selected Targets have been added to your change request.
Manual
- Select the Vendor of the firewall you want to target.

- Click Search.
A list of firewalls from that vendor appear.

- Click +Add for each firewall you want to add as a target.
- Click OK.
Source, destination, and Service/App ID
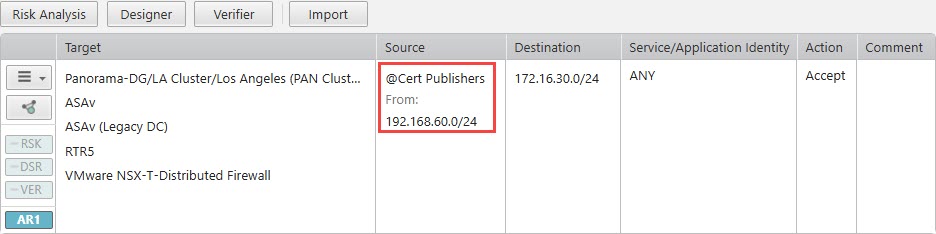
Type the addresses or objects you would like to add in the free text field or use the tool's fields to locate and add objects.
You can use also use Advanced Option's tools to help you locate and add relevant objects to the access request.
Example

Add objects
-
IP - Enter an IP address and netmask and click Add. You can also enter a NAT address and netmask for the entry.
- DNS - Enter a DNS name and click Add. You can click Lookup to see the resolved IP address before you add the DNS name.
- Object - Search for host, network, group, FQDN (when supported), and range objects by name or device, and click Add to select an object.
- Internet - Click Internet and click Add. The Internet object includes all public IP addresses except for addresses that are defined in other SecureTrack zones. If you do not have SecureTrack zones defined then the Internet zone is treated as ANY.
- URL Category (Supported for Palo Alto devices, Destination only) - Enter the URL category name and click the search icon. If you click the search icon without entering a name, all available results appear. Click +Add to select a category.
-
External: Search to see a list of all network elements that are supported by an external provider and click Add to select an object.
In the Source or Destination field, external network object providers are identified with a # before the name of the device. Hover over the name of the device to view additional information including IP representation.
-
LDAP (Source only) See Using User Identity in TOS.
Click LDAP, find an LDAP group and click Add. If you do not see LDAP groups, check with your SecureChange administrator that SecureChange is not in Multi-Domain interconnected mode, and check with your SecureTrack administrator to make sure LDAP server configuration in SecureTrack is correct.
For supported devices, SecureChange includes the LDAP groups in Designer and Verifier results for User Identity. SecureChange provides risk results for LDAP groups that have addresses in the Users Networks zone in the security zone matrix requirements of SecureTrack Unified Security Policy.
If the Source field contains both an IP address and a user identity element (such as an LDAP group):
-
Devices that support user identity elements natively in firewall rules (Panorama, Fortinet, Check Point):
-
Path Analysis uses only the IP address.
-
Designer suggests rules that include both the IP address and user identity elements.
-
Verifier finds rules that match both the IP address and user identity elements.
-
Risk Analysis considers only the IP address.
-
-
Devices that do not support user identity elements natively in firewall rules: For these devices, Path Analysis, Designer, Verifier, Risk Analysis, and the Topology Map substitute the user identity elements with the IP subnets defined in the Users Networks security zone in SecureTrack.
Access Requests for Check Point targets cannot include user identity elements and other object types in the same Source field. Create a separate Access Request for each source type in the ticket. -
-
Protocol - Select the protocol (TCP, UDP or ICMP), enter the port number, and click Add.
-
Predefined - Select from the list of predefined services and application identities. You can also search for predefined services and application identities by name. Click Add.
-
Object - Search for service objects by protocol, name or device, and click Add to select an object. Use the Search options to limit the number of items displayed; if the search criteria returns more than 100 results, only the first 100 results are displayed.
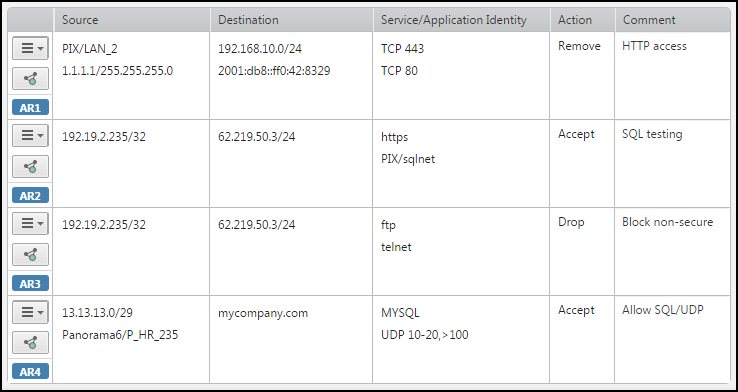
Paste from Excel
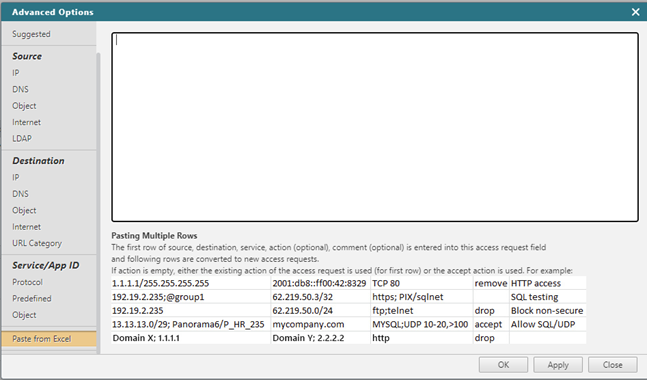
Copy a row of cells from a Microsoft Excel spreadsheet or any set of tab-delimited text, and paste into the text editor field.
When you click OK or Apply, the traffic details are added to the access request. Each additional row of cells is added to the ticket as additional access request.
The text must have 3 columns in the order of Source, Destination, Service, Action (optional), and Comment (optional). You can include multiple values in a single cell delimited with a semi-colon (;).
For example:

In this example, if the access request already has ASA/LAN_2 in the source, ASA/MCI_Zone in the destination, and TCP 443 in the service, then the result of importing the cells is:
How do I get here?
SecureChange > My Requests > New Request > Settings > Advanced Options
See Access Request Options for details.
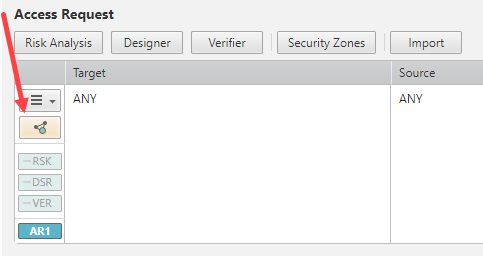
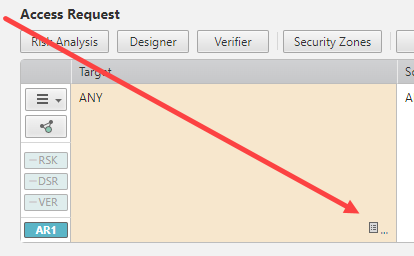
You can also access Advanced Options by hovering over the field of the Access Request and selecting ![]() .
.
Was this helpful?
Thank you!
We’d love your feedback
We really appreciate your feedback
Send this page to a colleague