On This Page
Service-Level Agreement (SLA) Tracking
|
|
This topic is intended for SecureChange workflow owners, who are responsible for creating and maintaining workflows. |
Overview
You can configure any workflow to track tickets' progress according to configurable deadlines and interim tracking points.
In addition to a total handling time for the workflow's tickets, you configure tracking points for each of three service statuses: Warning, Alert, and Escalation. You also configure recipients of automatic status-change notifications.
Multiple tracking points can be configured for each status. For example, you could configure the following: If step 2 is not completed after 3 days or step 4 is not completed after 5 days, change status to Warning; If step 2 is not completed after 5 days or step 4 is not completed after 7 days, change status to Alert.
The SLA is measured from the day that the ticket is created. From R24-2 PHF1.0.0, SecureChange users with the Pause ticket SLA permission can pause the progress of the SLA calculation. The Pause Ticket SLA button is displayed only when the Calendar option in Workflow Properties is set to System Default.
For reports and in Tickets, tickets can be filtered and/or arranged by the above service statuses (for open tickets), and by final outcome (Met or Overdue). Dashboard widgets can display service statuses and outcomes across the system.
Configure Service-Level Tracking
-
In the Workflows tab, select the workflow to configure.
-
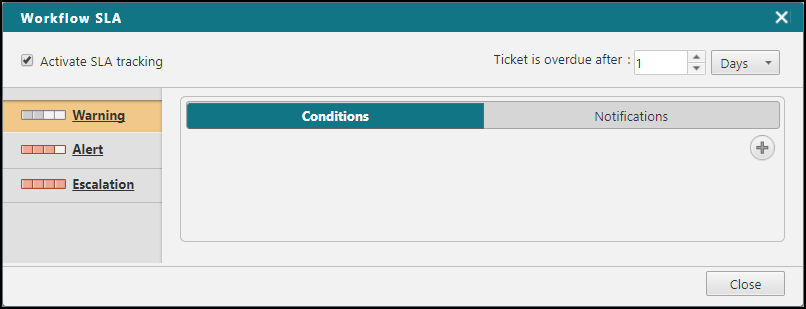
Click Workflow SLA:
-
Select Activate SLA tracking.
From R24-2 PHF1.0.0, you can also check:
-
Reset SLA on ticket resubmission: When a ticket is resubmitted, the business duration is reset.
- Pause SLA on resolved status: When a ticket is resolved and awaiting approval, the SLA counter is paused.
When a ticket with a paused SLA changes its current step, the SLA automatically resumes. -
-
Set a number of days or hours for Ticket is over due after:.
-
To configure Tracking Points, for each service status (Warning, Alert, and Escalation), set Conditions and Notifications.
-
Save the workflow.


