On This Page
Upgrading BIOS and BMC for Gen4 Appliances
Overview
This topic describes how to upgrade the BIOS and BMC firmware (IPMI) on Gen4 Tufin appliances (T-800 and T-1200) using the Supermicro Update Manager (SUM) tool and the RMM interface. The procedure applies to all deployment types, including single-node, Remote Collector (RC), and high availability (HA) environments.
Prerequisites
Before you begin, confirm the following:
-
TufinOS version 4.50 or later is installed. If your system is running an earlier version, see Updating TufinOS.
-
The appliance’s RMM interface is accessible. If RMM is not configured, follow the RMM setup guide.
-
You have root access to the appliance.
Preparing the appliance
Use this section to prepare your Gen4 appliance for the upgrade. These steps apply to single-node, RC, and HA deployments.
-
Determine the deployment type:
-
Single node or RC cluster: Requires downtime.
-
HA cluster or worker node: No downtime.
-
-
Run the following command to confirm that the appliance is Gen4 (T-800 or T-1200):
-
Log in to the RMM interface at https://<RMM IP>.
-
Go to the System page and verify that the BIOS and BMC versions are lower than the target versions:
- BIOS Version: 4.3
- Firmware Revision: 01.74.14
If the system is already running these versions, the upgrade is not required.
-
Prepare the node for maintenance. For HA or RC clusters, follow the Cluster Node Maintenance procedure.
-
If the system is a single-node or RC deployment, disable k3s:
Preparing upgrade files and tools
Follow these steps to upgrade the BIOS and the BMC firmware.
-
Download the required files from the Download center:
- BIOS_X11DPU-091C_20240305_4.3_STD.zip
- BMC_X11AST2500-4101MS_20231130_01.74.14_STDsp.zip
- sum_x.xx.x_Linux_x86_64_xxx.tar.gz
-
Extract the BIOS and the BMC/IPMI .bin files locally.
-
Transfer and extract the SUM tool to the appliance:
-
Copy the archive:
-
Connect to the appliance using SSH and switch to the root user:
-
Extract the archive:
-
Make SUM executable:
-
Backing up BIOS and BMC configuration
Back up the current BIOS and BMC configurations using the SUM tool.
-
Back up the BIOS configuration:
-
Back up the BMC configuration:
-
(Optional) Back up TOS Aurora using the CLI. This is strongly recommended for single-node or non-HA deployments.
Upgrading BIOS using RMM
Use the RMM interface to upgrade the BIOS firmware.
Do not interrupt the upgrade. This can corrupt the firmware and require an RMA (return merchandise authorization).
-
Log in to the RMM interface at https://<RMM IP>.
-
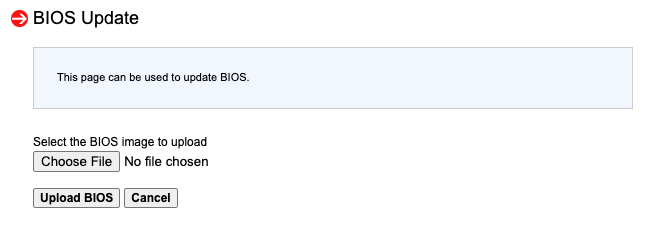
Go to Maintenance > BIOS Update.
-
Click Choose File, select the BIOS .bin file, and click Upload BIOS. Wait for the upload to complete.
-
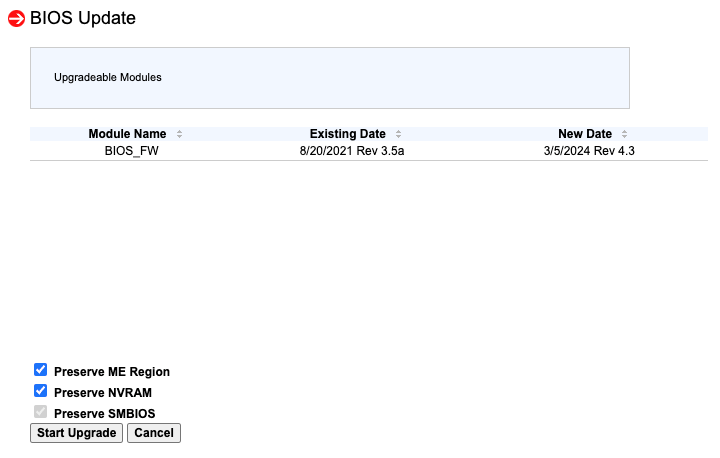
Select the following options:
- Preserve ME Region
- Preserve NVRAM
- Preserve SMBIOS
-
Click Start Upgrade and wait for completion. The system may reboot automatically.
Upgrading BMC firmware using RMM
Use the same RMM interface to install the BMC firmware.
-
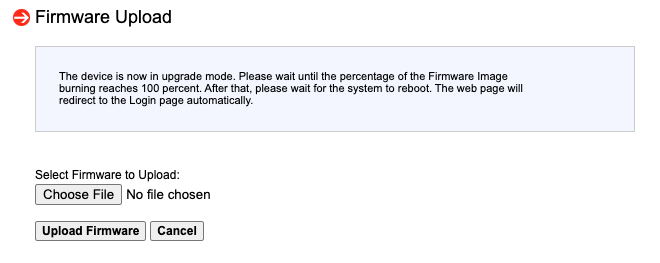
Go to Maintenance > Firmware Update and click Enter Update Mode.
-
Click Choose File, select the BMC .bin file, and click Upload Firmware. Wait for the upload to complete.
-
Select the following options:
- Preserve Configuration: Keeps current BMC settings.
- Preserve SDR: Retains current sensor definitions.
- Preserve SSL certificate: Keeps the current certificate.
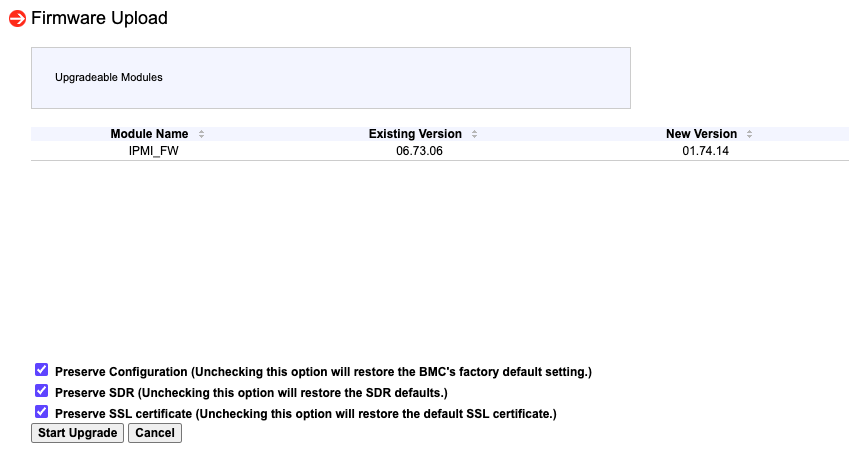 If you clear any of these options, factory defaults will be applied.
 -
Click Start Upgrade. The system should reboot automatically.
If the appliance does not reboot, go to Remote Control > Power Control in RMM and select Power Cycle Server.
Verifying and restoring after upgrade
After the upgrade, restore your configuration, reboot the appliance, and restart services.
-
Log in to the appliance.
-
Go to the extracted SUM folder.
-
Run the following to save the new post-upgrade configurations:
-
Restore the previous BIOS and firmware configuration:
./sum -c ChangeBiosCfg --file bios-config-before-upgrade.txt
./sum -c SetBmcCfg --file bmc-config-before-upgrade.txt
--skip_unknown and --skip_duplication_check handle any deprecated or duplicate settings. -
Power off the appliance:
-
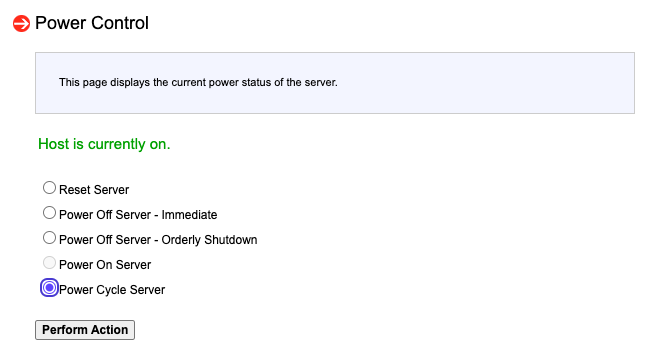
In the RMM interface, go to Remote Control > Power Control and select Power Cycle Server.
-
Click Perform Action and wait for the server to reboot.
-
Verify that the appliance boots successfully.
-
Confirm in the RMM's System window that the BIOS and the BMC versions were upgraded successfully.
-
If you disabled k3s earlier (for single node or RC deployments) , re-enable and restart services:
-
Enable k3s to start at boot:
-
Start k3s service now:
-
Verify that k3s is active:
-
Start TOS:
-
Troubleshooting
Use these tips to resolve common upgrade issues.
-
If the BIOS or BMC file upload fails, retry the process in the RMM interface.
-
If the upgrade is blocked, confirm that the appliance model and TufinOS version meet the supported requirements.
-
If the BIOS or BMC version does not update, verify that you used the correct .bin files and selected the appropriate preserve options.
-
If the appliance becomes unresponsive or RMM is unavailable, wait and retry. If needed, reboot using Power Control in RMM.
-
Contact Tufin Support if the issue persists.
