On This Page
Adding Microsoft Azure Cloud Platform
Overview
TOS Classic monitors the Microsoft Azure Resource Manager (RM) platform for policy revision changes. To help you organize the information for your devices, you can use the device information worksheet. To see which TOS features are supported for your device, review the feature support table.
Prerequisites
To complete the Microsoft Azure configuration procedures, you must have the following connection information for Microsoft Azure Resource Manager:
|
ID Information |
Description |
|---|---|
|
Subscription ID |
The ID for an active Azure subscription - see Find your Azure subscription (Microsoft documentation) |
|
Tenant ID |
A Tenant represents a single organization, and is the dedicated instance of Azure Active Directory (AD) you receive when you sign up for Azure AD services. Each Tenant is completely isolated, and all your data and identity information is kept distinct and separate from other Tenants - see Get Tenant ID. |
|
Application ID |
An Application ID (also referred to as a Client ID) is the unique ID provided by Azure Active Directory (AD) for any registered application. You must register an application in your Tenant to authenticate the application to access to your network or data. See |
|
Application Secret |
An Application Secret (also known as a Client Secret, Shared Secret, or Keys) is credentials used by an application to authenticate itself to a Tenant when signing in to Azure AD - see Get application ID and authentication key. These keys do not refer to key vaults. |
Additional information from Microsoft documentation:
Adding a Microsoft Azure Device
-
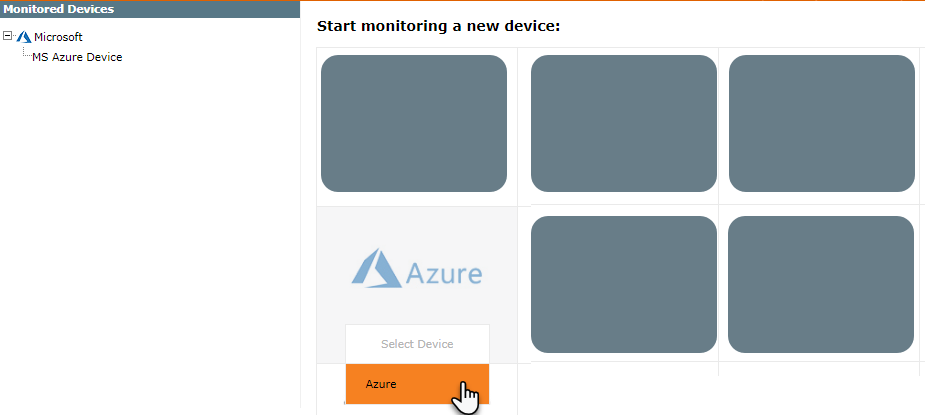
In TOS Classic, go to
-
Select the appropriate device type:
-
Configure the device settings:
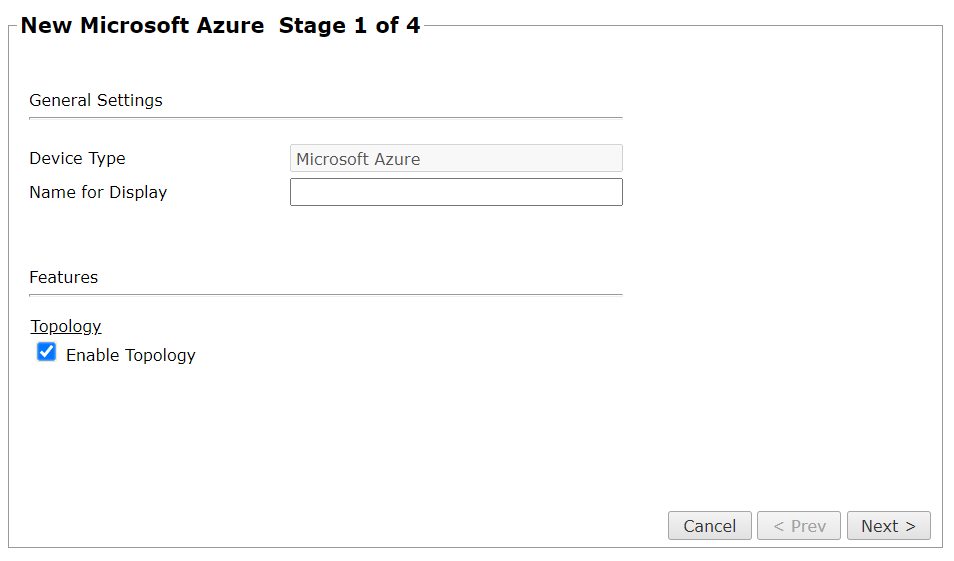
- Name for Display
-
Domain: Available only if you have configured your system for managing multi-domains and All Domains is currently selected. Select the domain to which to add the device. The Domain can only be entered when adding a device; to change the Domain, you must migrate the device.
- Enable Topology: Collects routing information for building the network Interactive Map.
- Click Next.
-
Configure the TOS Classic connection to the Microsoft Azure device, according to the parameters required by the device:
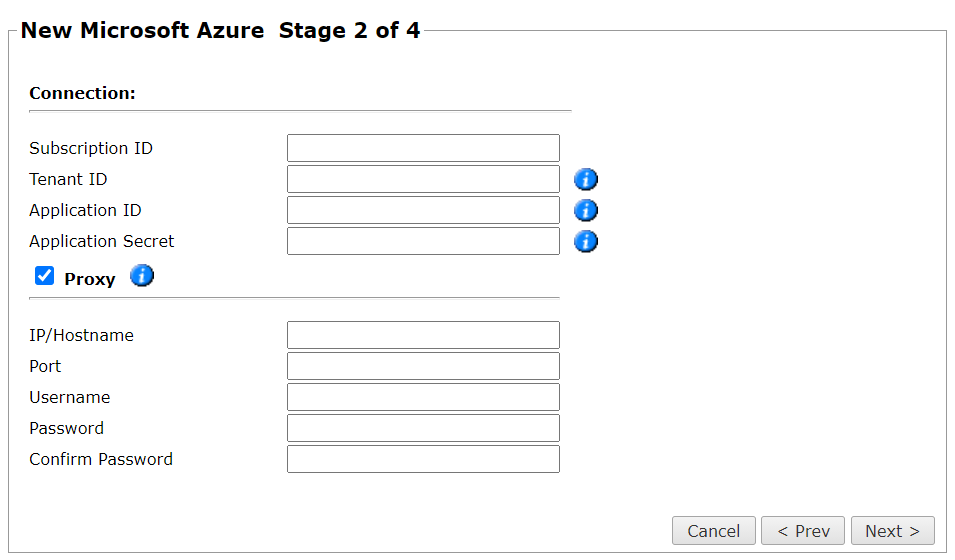
- If you connect to the device with a proxy server, select Proxy and enter the Hostname, Port, Username, and Password.
- Click Next.
-
In Monitoring Settings, do one of the following:
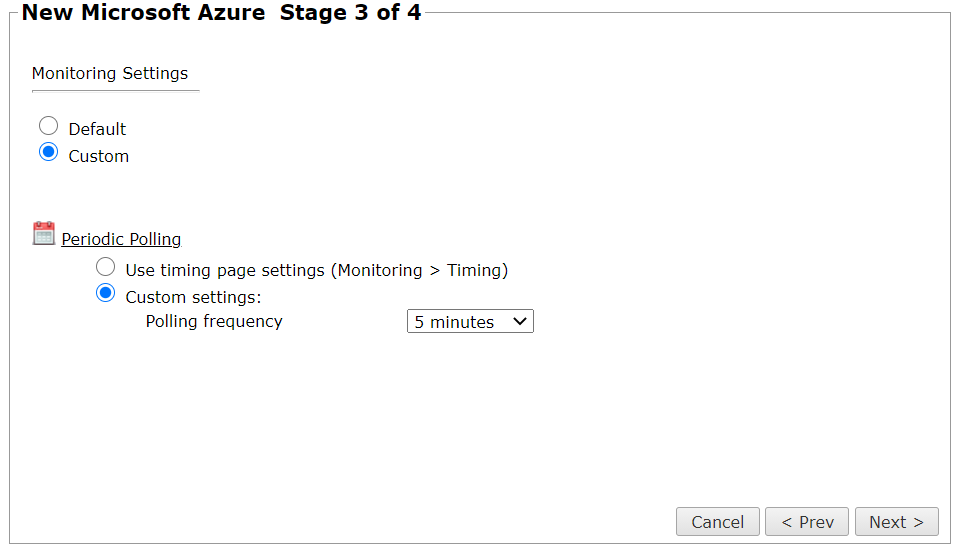
- To use real-time monitoring and timing settings from the Timing page, select Default.
Otherwise, select Custom and configure the monitoring mode and settings.
- In Periodic Polling, select Custom settings and configure the Polling frequency: How often TOS Classic fetches the configuration from each device.
If you select 1 day, you can then select the exact time (hour and minute) for the daily polling.
- Click Next.
-
Save the configuration.
The Microsoft Azure device now appears in the Monitored Devices tree.
-
To manually add Virtual Networks to your device, wait for a revision to be received from the device (you can see the revision in Compare view). This may take several minutes. Then, add the Virtual Networks:
-
In the Monitored Devices tree, select the device. Only Virtual Networks with a vNic are imported.
-
Click Import Virtual Networks (only enabled for Manual Import):

-
Select all the Virtual Networks to be added.
If the option to collect rule and object usage statistics for virtual contexts is available, it is enabled.
If you do not want to collect these statistics, clear the options before you import the virtual contexts.
-
- Click Save.
How Do I Get Here?
In TOS Classic, go to
