On This Page
Enabling and Disabling SecureChange
Enable SecureChange
Enable SecureChange on TOS deployments that are set up for SecureTrack only.
- Log in to SecureTrack as an administrator.
-
Run the command:
-
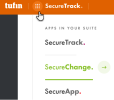
Go into SecureChange by one the following means:
-
Configure the DNS.
-
Go to
 Settings > Miscellaneous.
-
Delete the default value that appears in the field Server DNS name. Enter a value for Server DNS name - the DNS server to use for links in email notifications. This can be an IP address in the format 11.22.33.44 or a FQDN in the format https://mydomain.com. The SecureChange DNS name is published by SecureChange so it can be accessed from external sources. For example, it is embedded in notification mails sent by SecureChange, which include a link to a ticket, such as an email notifying a handler assigned with a task, or informing a requester that the ticket has been successfully resolved.
-
-
Additional setup that can be done now or later:
- Internal SSO Authentication. Internal SSO is enabled by default when TOS is installed, giving user access to all TOS components using the same credentials - SecureTrack, SecureChange, SecureApp, and extensions. When disabled, there is no connection between a SecureTrack user and SecureChange user with the same name.
- Mail server connection
- LDAP directory connection to use LDAP user accounts
- Local users and user roles
- Subsequent password changes can be made from the command line , see SecureChange Command Line Reference.
-
Change access to SecureTrack from SecureChange
-
Go to
 Settings > SecureTrack:
 -
Change the default SecureTrack administrator. For SecureChange to access SecureTrack data, a SecureTrack administrator must be specified. By default this is the predefined user 'Admin' and everything will work fine if you leave it as it is. However, if you want a different user, create a new administrator and enter the user name. If you have already configured multi-domain management, this user can be either a super administrator or multi-domain administrator, depending on whether you want to restrict the administrator to selected domains.
-
Remove link to SecureTrack . By default you can go from SecureChange to SecureTrack by selecting the SecureTrack link in the app launcher. If you want to remove this option, unmark the checkbox.
-
Change connection check interval. The default value for the frequency of SecureChange testing connectivity to SecureTrack can be changed if desired.
-
Click Test connection to verify that SecureChange has a connection to SecureTrack.
-
Click Refresh license status. This will ensure that SecureTrack and SecureChange share the highest level of connectivity.
-
Click Save.
-
Disable SecureChange
Disable SecureChange using CLI commands:
Was this helpful?
Thank you!
We’d love your feedback
We really appreciate your feedback
Send this page to a colleague


