Open or create an access request and click Designer.
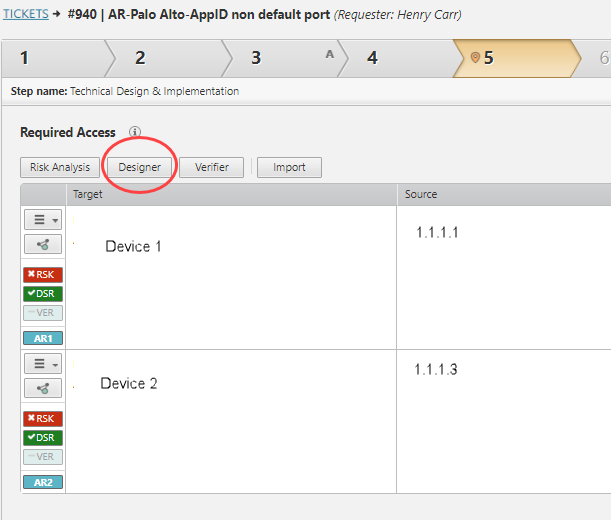
If there is no Designer button, check if Designer was enabled in this step of the workflow configuration.
If your access request contains an AWS instance, select Security Groups for the VPC.
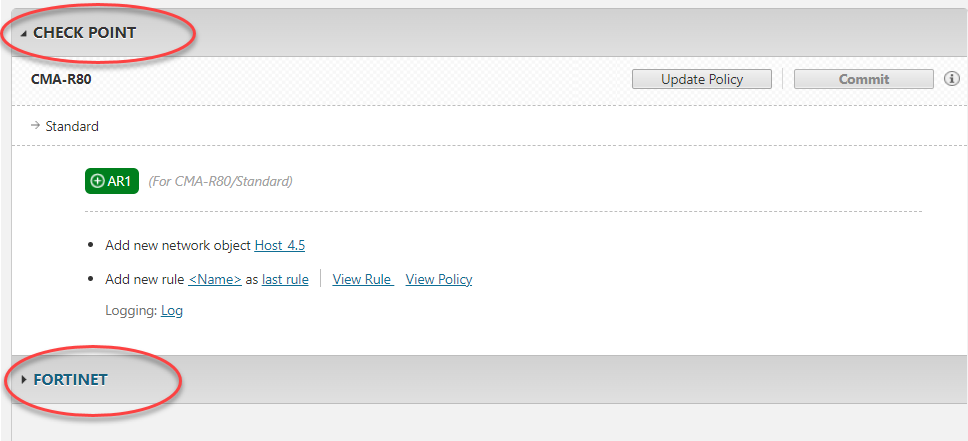
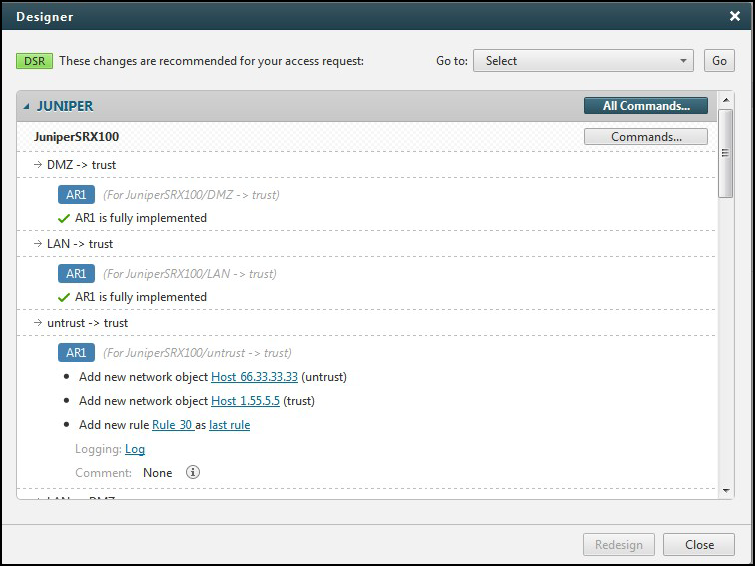
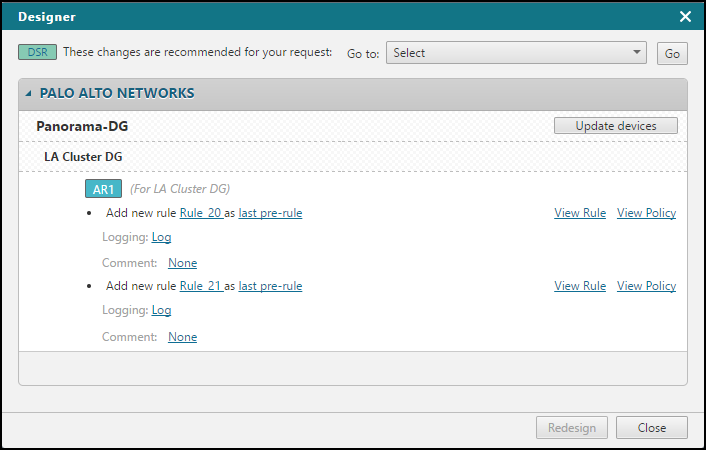
Review the Designer recommendations, organized by vendor > device > policy > access request.
If a later access request requires the same changes as an earlier one, Designer notes that no duplicate changes will be implemented.
Designer assigns names to new servers, services, or rules using these guidelines:
-
Creates names in the format host_<ip> or subnet_<ip>
-
If the request came from SecureApp, Designer uses the SecureApp name
-
If an "i" icon appears next to the recommendation, then Designer has modified the name assigned in SecureApp to meet the vendor's requirements. For example if you created a new connection with the name “Connection 1” the Designer changes it to “Connection1” if spaces are not allowed.
Click
 to view the original name.
In the recommendations, you can edit the following values (unless a new revision was received from the device):
-
Object names
-
Rule names
-
Rule location (before/after a specific rule, or as the last rule)
-
Logging levels
For supported vendors, you can also edit comments or rule names, see SecureChange Features by Vendor.
For NSX devices, when adding new rules, if the access request has a Security Group as a Source or Destination, Designer provides more specific suggestions based on the relevant security groups instead of using DFW. Click the Applied to field to select the relevant security groups.
For Decommission Access Requests, if related rules exist, click Manage Related Rules to review them and adjust the Ignore setting if needed, then Redesign.
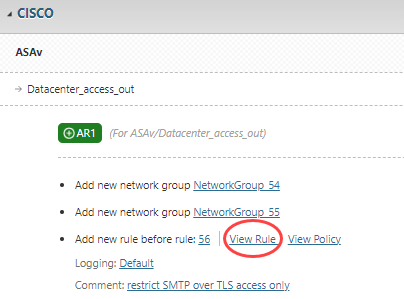
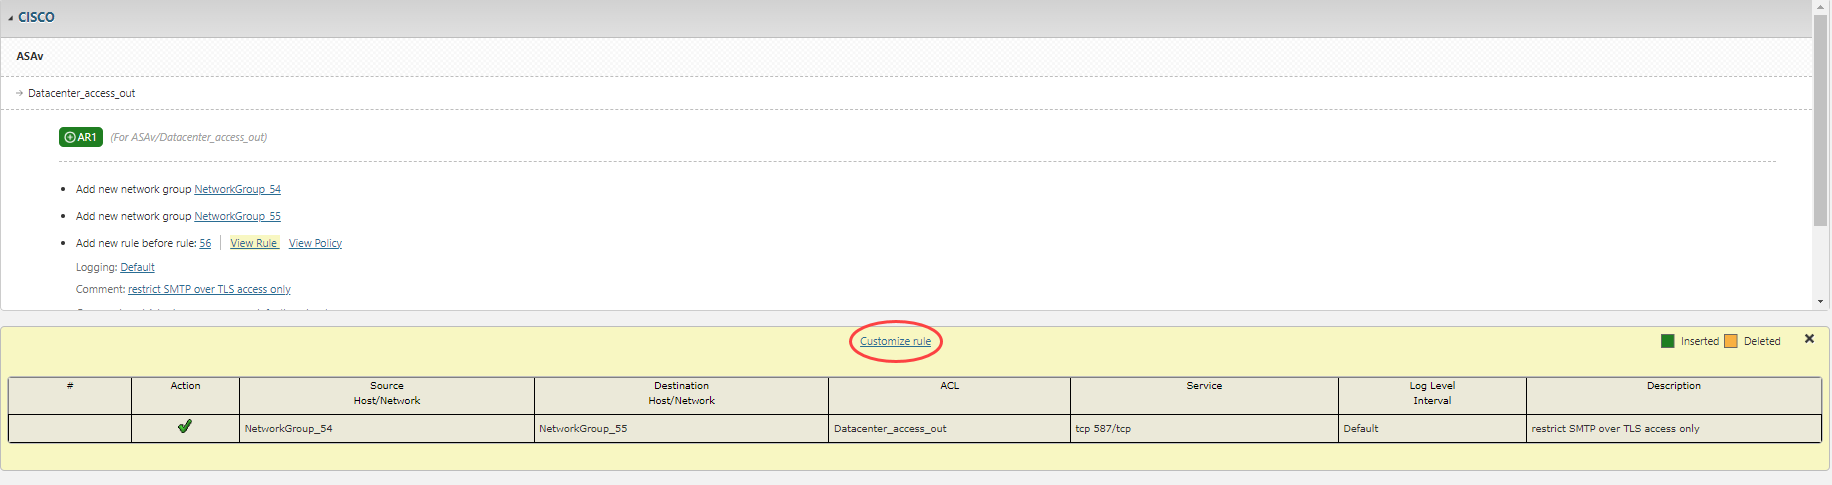
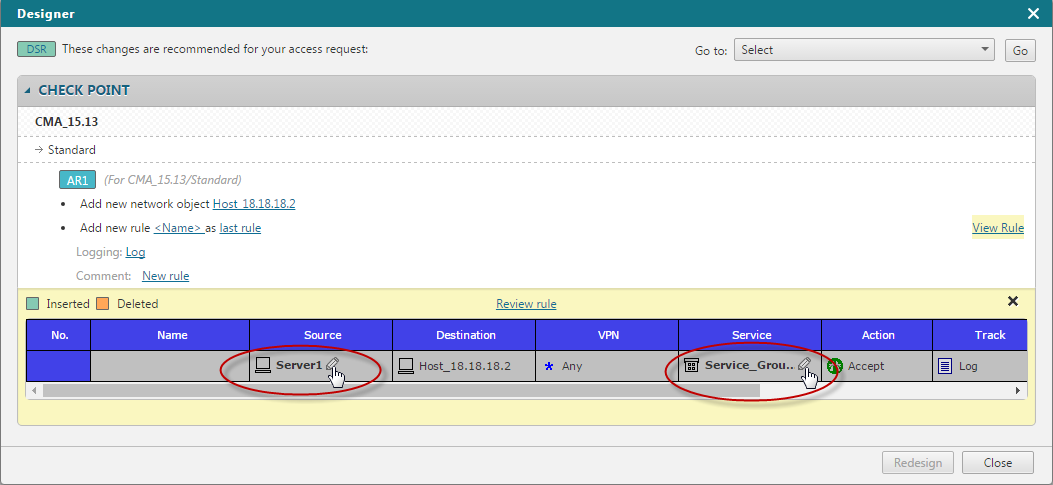
Click View rule to preview the firewall rule. Use Customize rule to choose alternate objects if multiple match the access request.
Example: if the access request specifies IP 1.1.1.1 and multiple objects with that IP exist, you can select the specific object to use in the Designer results.
-
Click View rule.
-
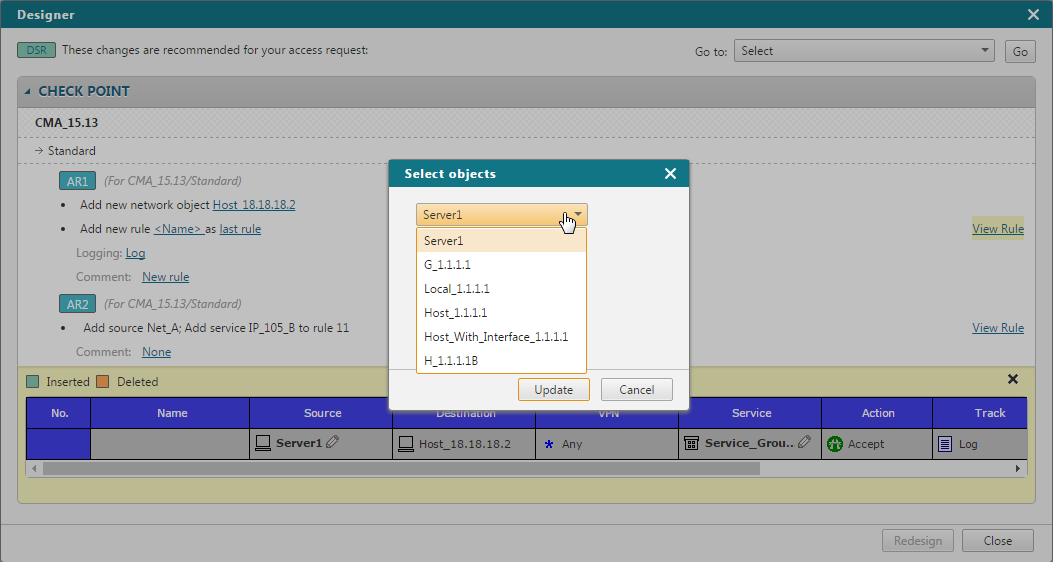
Click Customize rule.
-
Click to change the editable object.
-
Select a different object to use in the rule.
-
Click Update.
Click  to save the change or
  to cancel the change that you entered.
If you have permissions, to implement the changes:
-
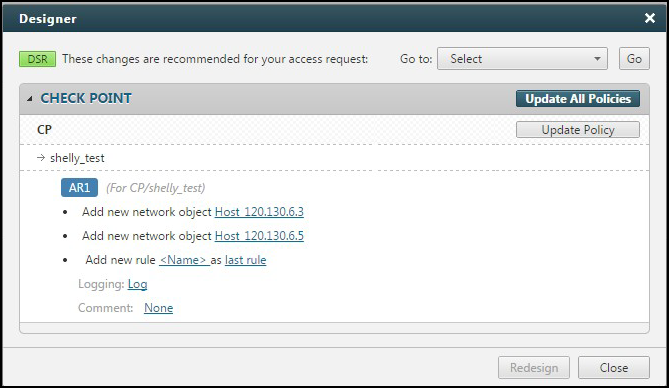
Check Point:
-
Click Update Policy or to update all policies at one time click Update All Policies. The updated policies are saved in CMA/SmartCenter.
To have the Update Policy option, enabling the Designer to apply changes directly to Check Point policies, you need to configure SecureTrack to use an OPSEC object that has Read/Write permissions.
-
Use Check Point SmartDashboard to install the policies.
-
-
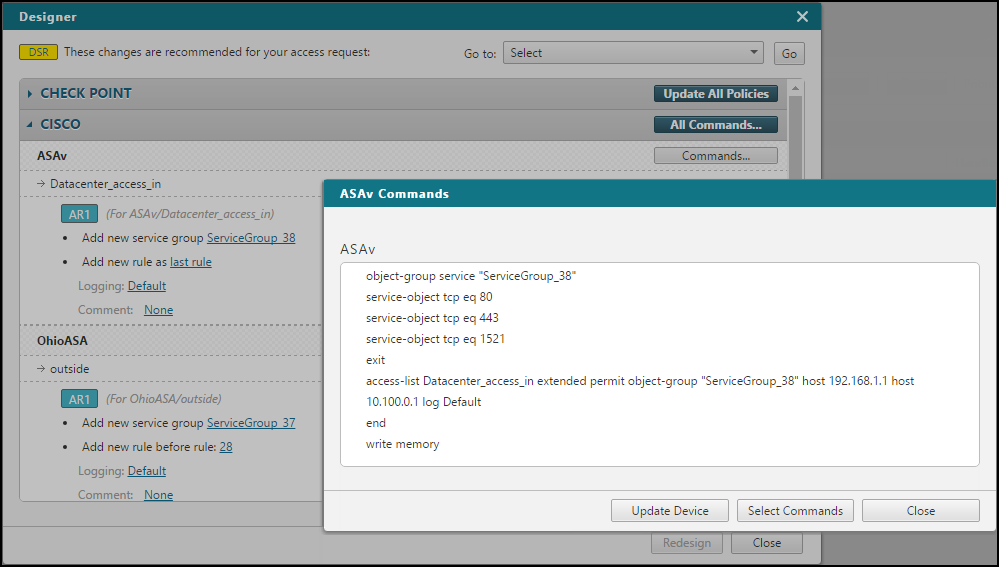
Cisco ASA, Cisco IOS, and Juniper SRX:
-
Click Commands > Update Device.
To have the Update Device option, enabling the Designer to apply changes directly to Cisco devices, you need to configure SecureTrack to monitor the devices via SSHv2.
-
-
Juniper NetScreen:
-
Click Commands > Copy Commands.
-
Paste the commands on to the device's CLI.
-
-
Palo Alto/Panorama:
-
Click Update devices.
-
Click Close to return to the ticket.
If you click Close and save the progress on the task, the designer results are saved.
You can click  next to the access request to see the results, and other handlers can click in this step to see the results.
Once you have implemented the changes recommended by Designer, you can run Verifier to confirm that the changes were implemented, see Verifying Access Requests.