On This Page
Rule Analytics Report
Overview
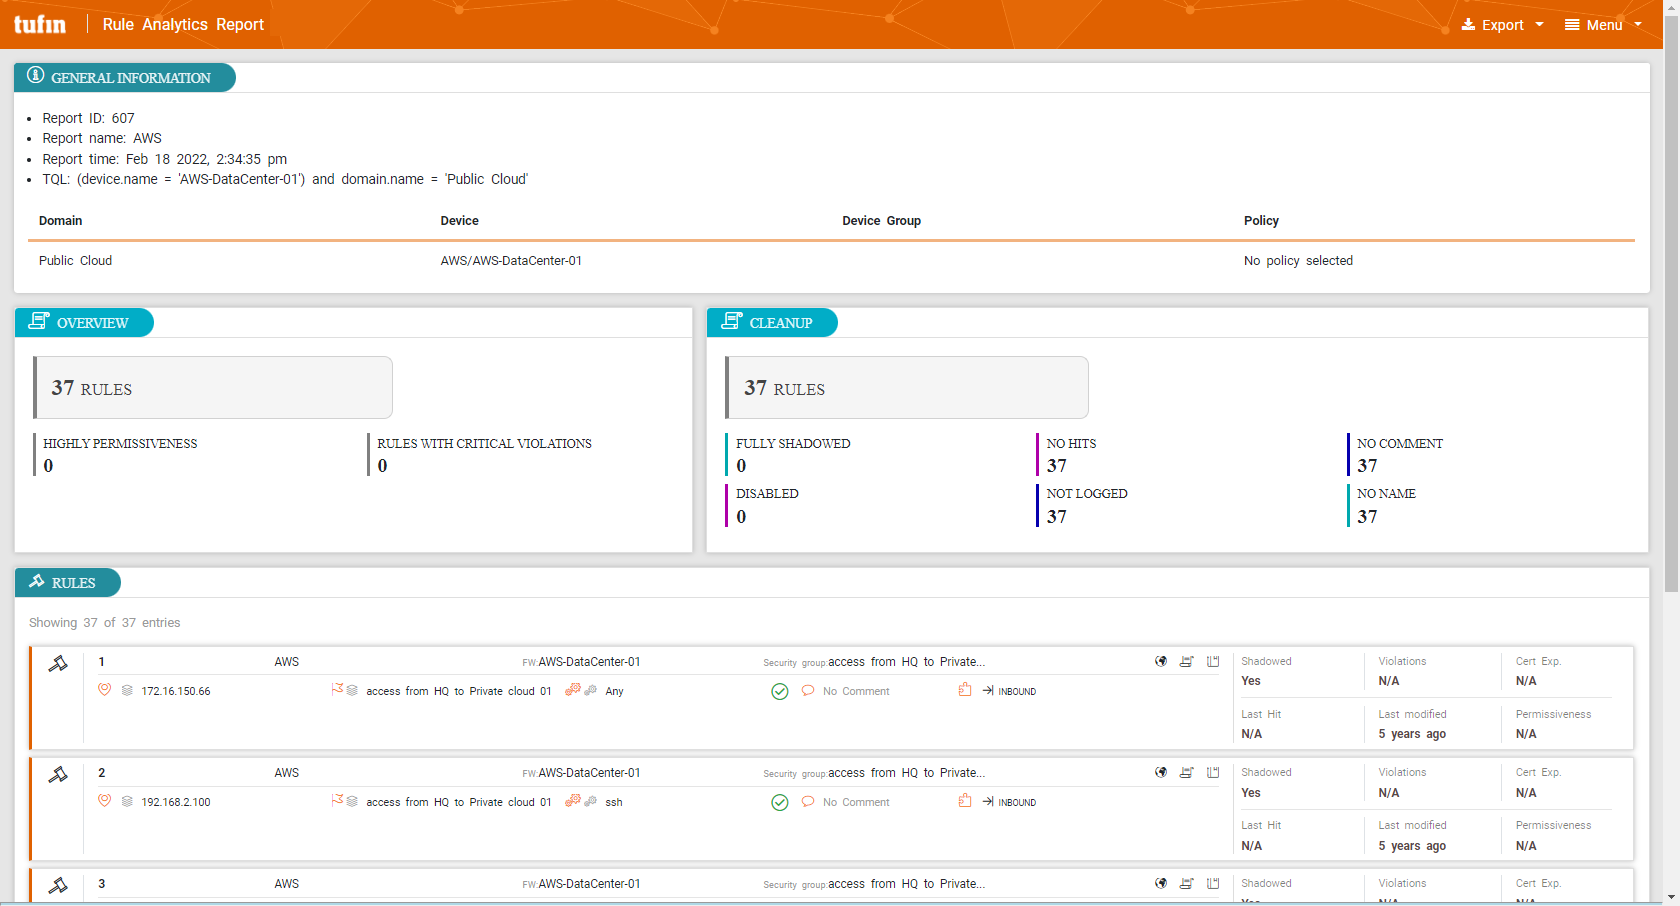
The Rule Analytics report displays rules and rule KPIs based on the search and the selected device. The search feature uses the SecureTrack Rule Viewer TQL that you paste into the report.
What Can I See Here?
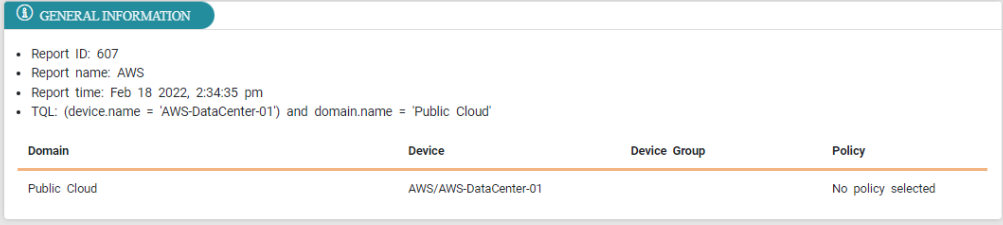
General Information
The General Information section includes details such as the report ID, name, time, and the TQL string.
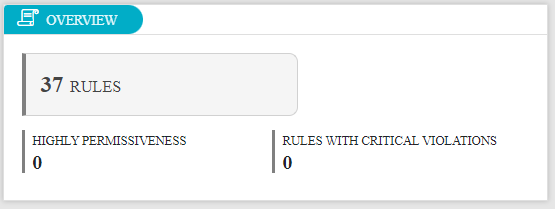
Overview
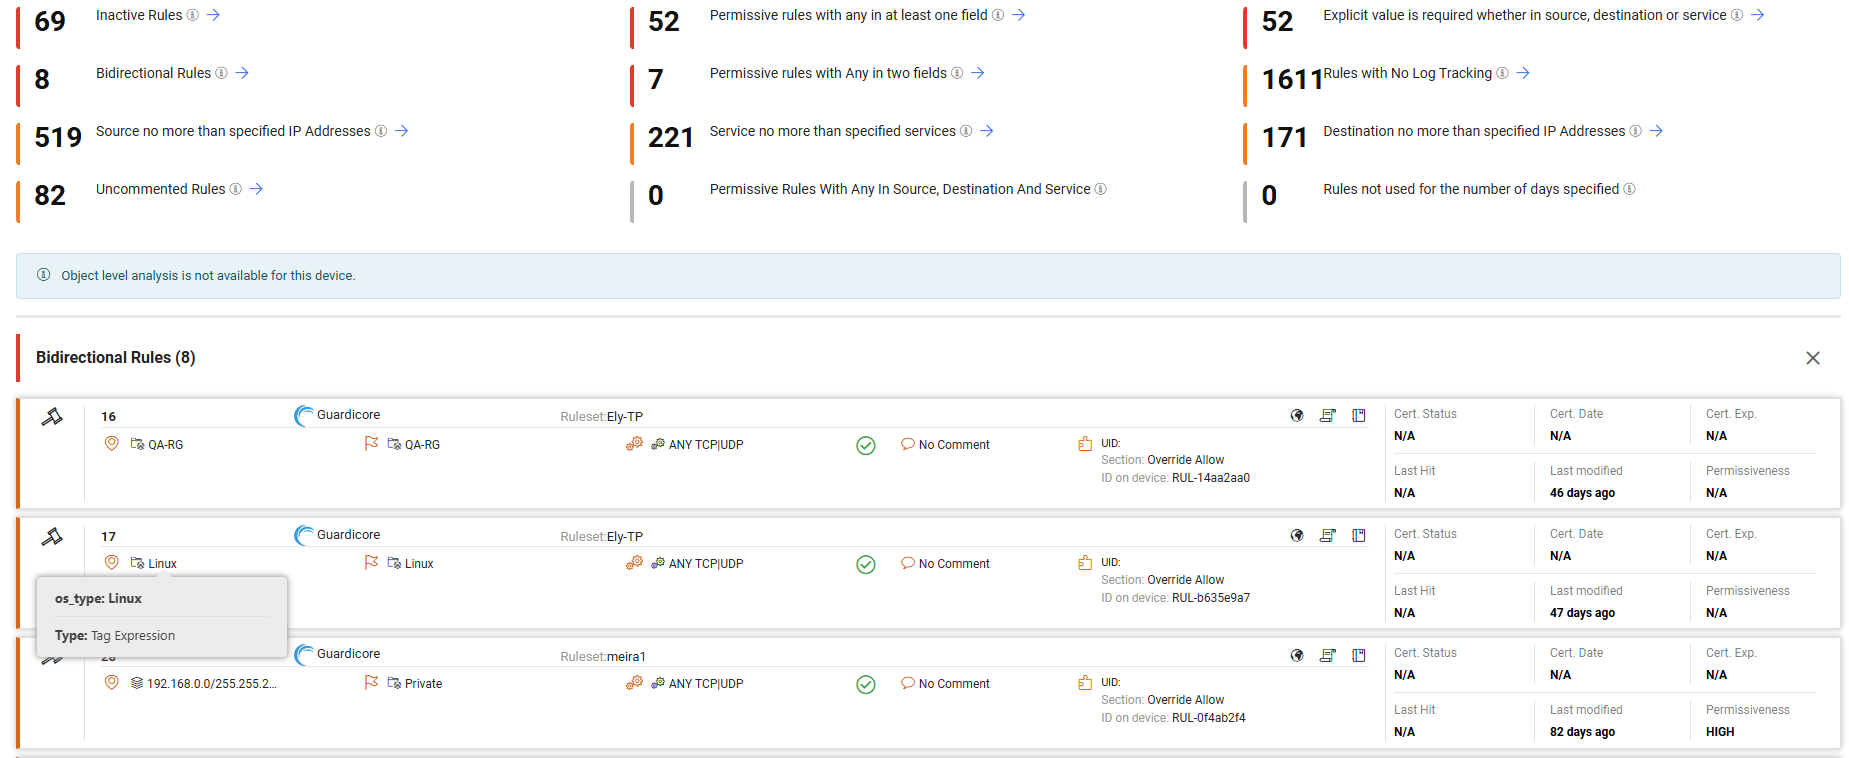
This section shows the total number of rules with permissiveness and critical violations metrics.
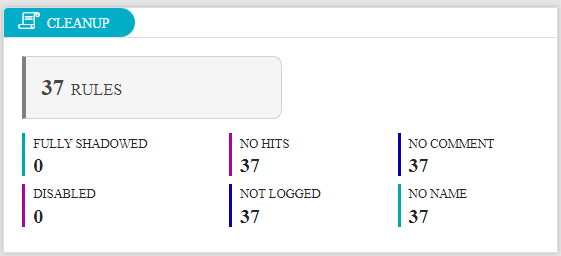
Cleanup
This section shows the total number of rules with metrics such as Fully Shadowed, No Comment, and No Hits.
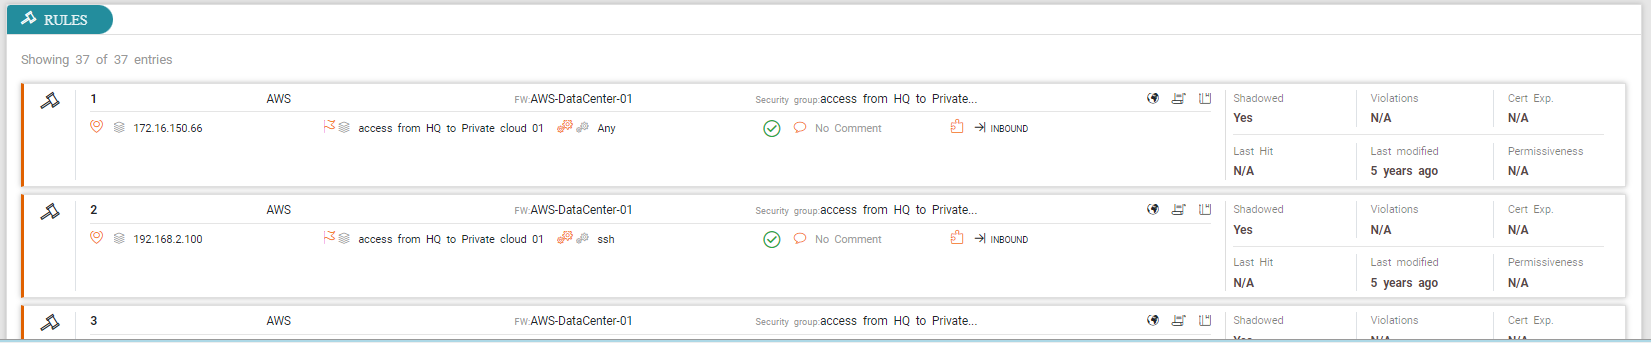
Rules
The rule cards show all information for rules resulting from the TQL search.
Rules for Guardicore devices
For Guardicore devices, the rule card shows the tags and tag groups configured for the device. Hovering over the tag shows both the tag key and tag value.
Create a Rule Analytics Report
Prerequisites
-
Outgoing SMTP server and remote repository configured by admin
Procedure
-
From the Create (
 ) menu, click Rule Analytics.
The Setup page for the report appears.
-
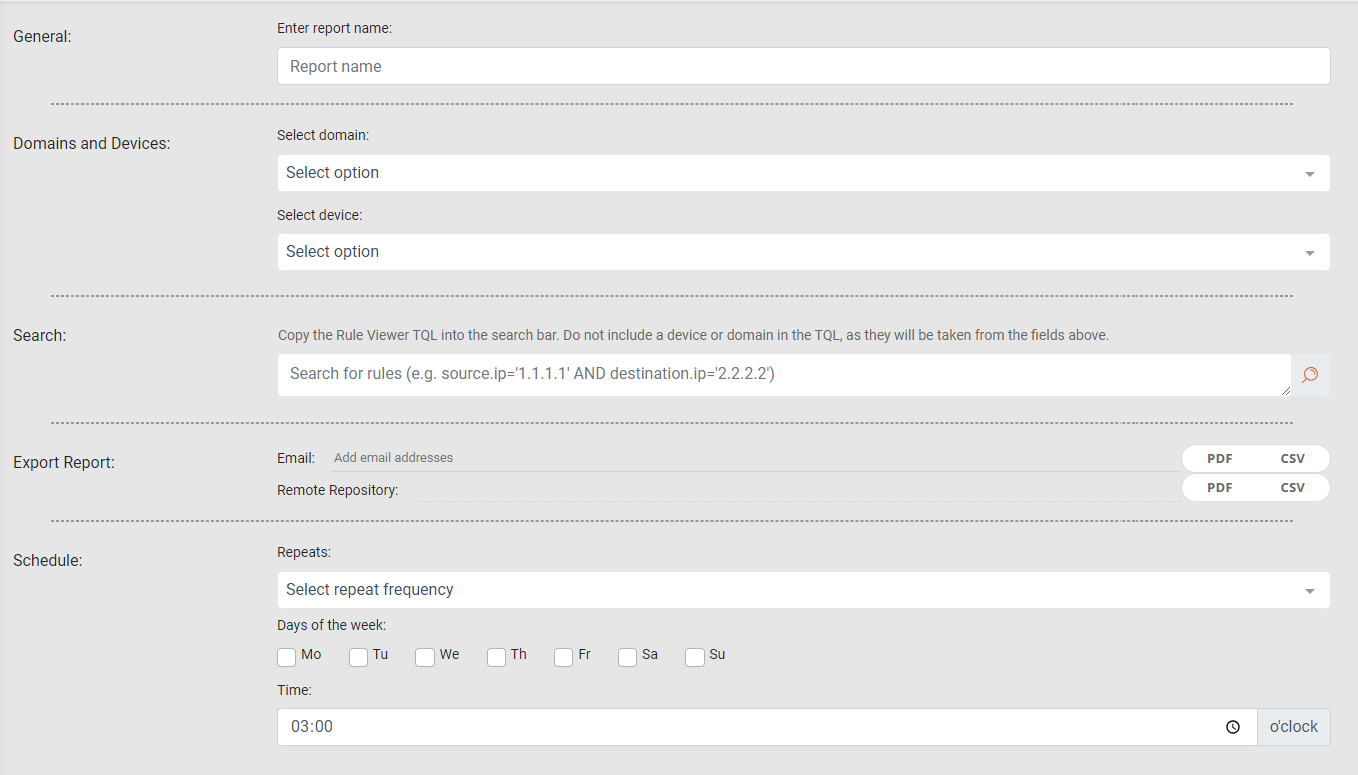
Complete the report fields:
-
General: Report name.
-
Domains and Devices: Select a domain and one or more devices or device groups.
-
Search: Copy the Rule Viewer TQL into the search bar. Do not include a device or domain in the TQL, as they will be taken from Domains and Devices fields.
-
PDF Settings: By default only the first level rules in groups are included in the PDF output. Select Include nested groups and include all members to ensure the PDF includes nested group members. Once enabled, the PDF report will include two layers of group members: parent group members and child group members. Only 100 objects, or group members, per group will display in the PDF report.
-
Export To Email: Specify the recipients for notification emails. Press Tab or Enter to separate multiple email addresses. Specify the report format - PDF or CSV.
-
Export to Remote Repository: STRE can export reports using SFTP. Specify the report format - PDF or CSV.
If the report finished successfully, you can verify that the new files appear in the Reports Folder path, in the remote repository, configured by your administrator (see Send Reports Using SFTP).
- Schedule: Configure the following:
- Repeats: The frequency at which the report runs: Daily, Weekly, or Monthly.
- Days of the week: Available for Weekly and Monthly frequencies.
For Weekly, runs the report on each selected day at the specified time. For example, if you select Monday, the report runs every Monday.
For Monthly, this is one of two scheduling options. Runs report on the first occurrence of the selected day of the week in the month at the specified time. For example, if you select Monday, the report runs on the first Monday of the month.
- Calendar Month: Available only for Monthly frequencies. This is the second monthly scheduling option. Runs report on the 1st or 15th of the calendar month. Reports based on calendar months run automatically at midnight.
- Time: The time at which the report should run.
-
-
Click one of the following:
 : Saves the report. The Saved menu lists all saved and scheduled reports.
 : Runs the report. After a report runs, you can view the results in the Repo menu.
Export Reports from Local Repository
After creating a report, export it to any supported format from the Repo menu.
-
CSV: Use to create your own reports based on the specific data from the report configuration.
-
PDF: Use to export as a ZIP file.
-
If the report exceeds 250 rules, the ZIP file includes multiple PDFs, each including up to 250 rules. The name includes the sequence in the format <num> of <total_reports> to indicate the order. For example, 1 of 3.
-
A single report comprising multiple PDFs can include a total of 6000 rules. To increase the limit, contact Tufin Support.
-
